ASSEMBLY
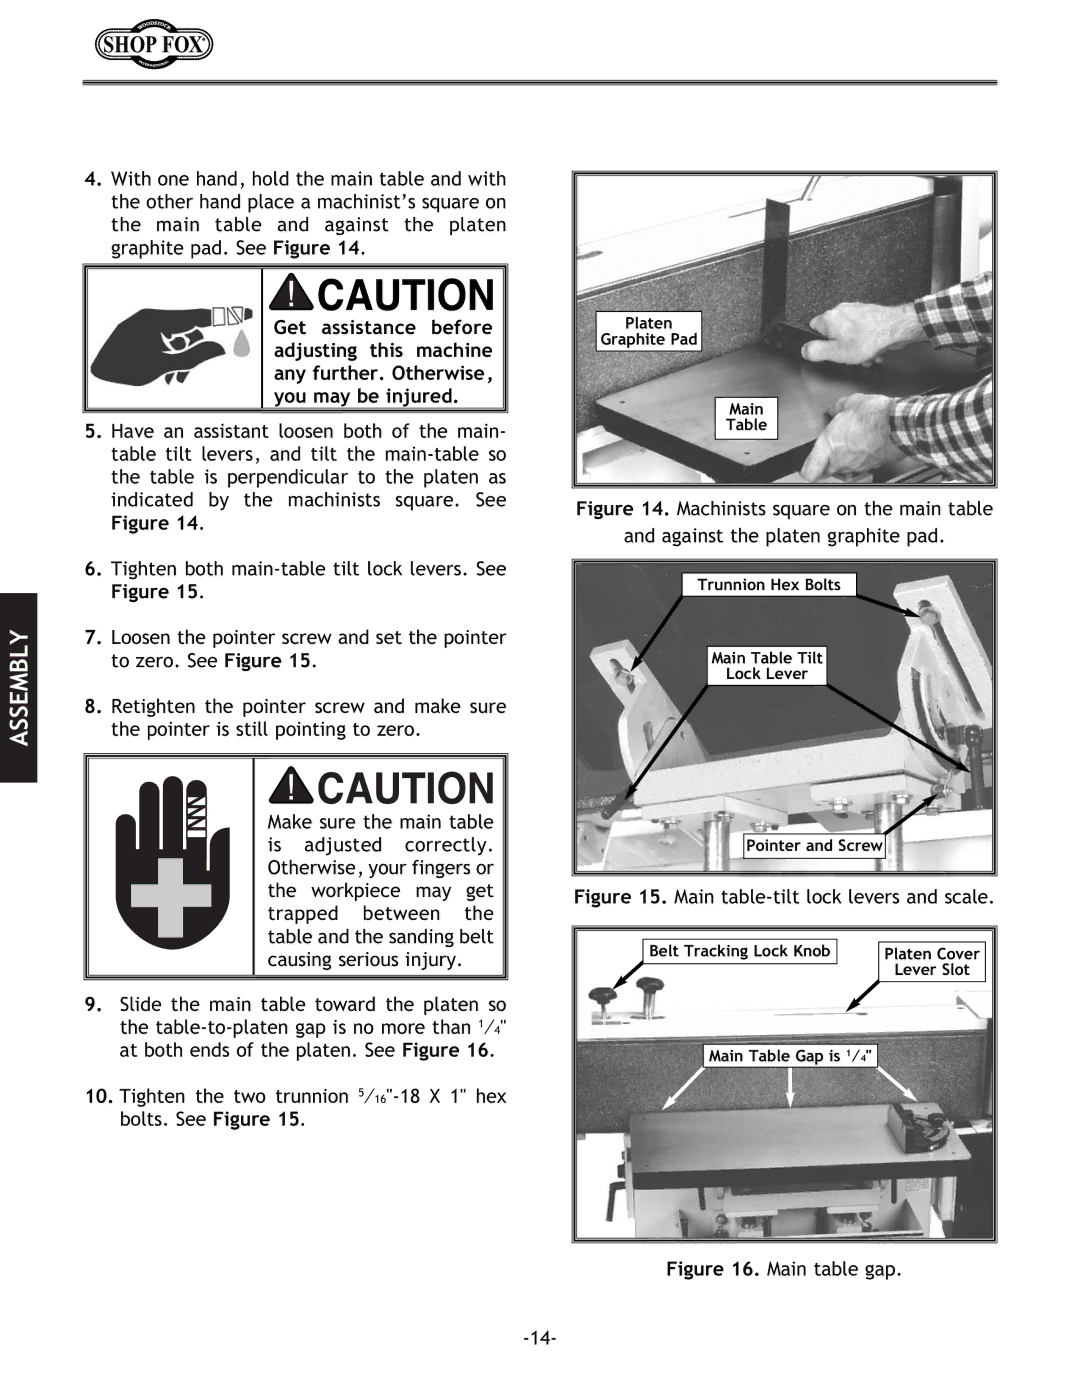
4.With one hand, hold the main table and with the other hand place a machinist’s square on the main table and against the platen graphite pad. See Figure 14.
Get assistance before adjusting this machine any further. Otherwise, you may be injured.
5.Have an assistant loosen both of the main- table tilt levers, and tilt the
Figure 14.
6.Tighten both
Figure 15.
7.Loosen the pointer screw and set the pointer to zero. See Figure 15.
8.Retighten the pointer screw and make sure the pointer is still pointing to zero.
Make sure the main table is adjusted correctly. Otherwise, your fingers or the workpiece may get trapped between the table and the sanding belt causing serious injury.
9.Slide the main table toward the platen so the
10.Tighten the two trunnion
Platen
Graphite Pad
Main
Table
Figure 14. Machinists square on the main table
and against the platen graphite pad.
Trunnion Hex Bolts |
Main Table Tilt |
Lock Lever |
Pointer and Screw |
Figure 15. Main table-tilt lock levers and scale.
Belt Tracking Lock Knob |
|
|
| Platen Cover | |
|
| Lever Slot |
Main Table Gap is 1⁄4"