W1754 20" Planer With Mobile Base
Setting/Replacing Knives
Setting the knives correctly is crucial to the proper opera- tion of the planer and is very important in keeping the knives sharp. If one knife protrudes higher than the oth- ers, it will do the majority of the work, and thus, dull much faster than the others.
The included knife gauge is designed to set the knives approximately 0.070" higher than the cutterhead. Planer Pal® (Model W1216) can also be used to set the knives.
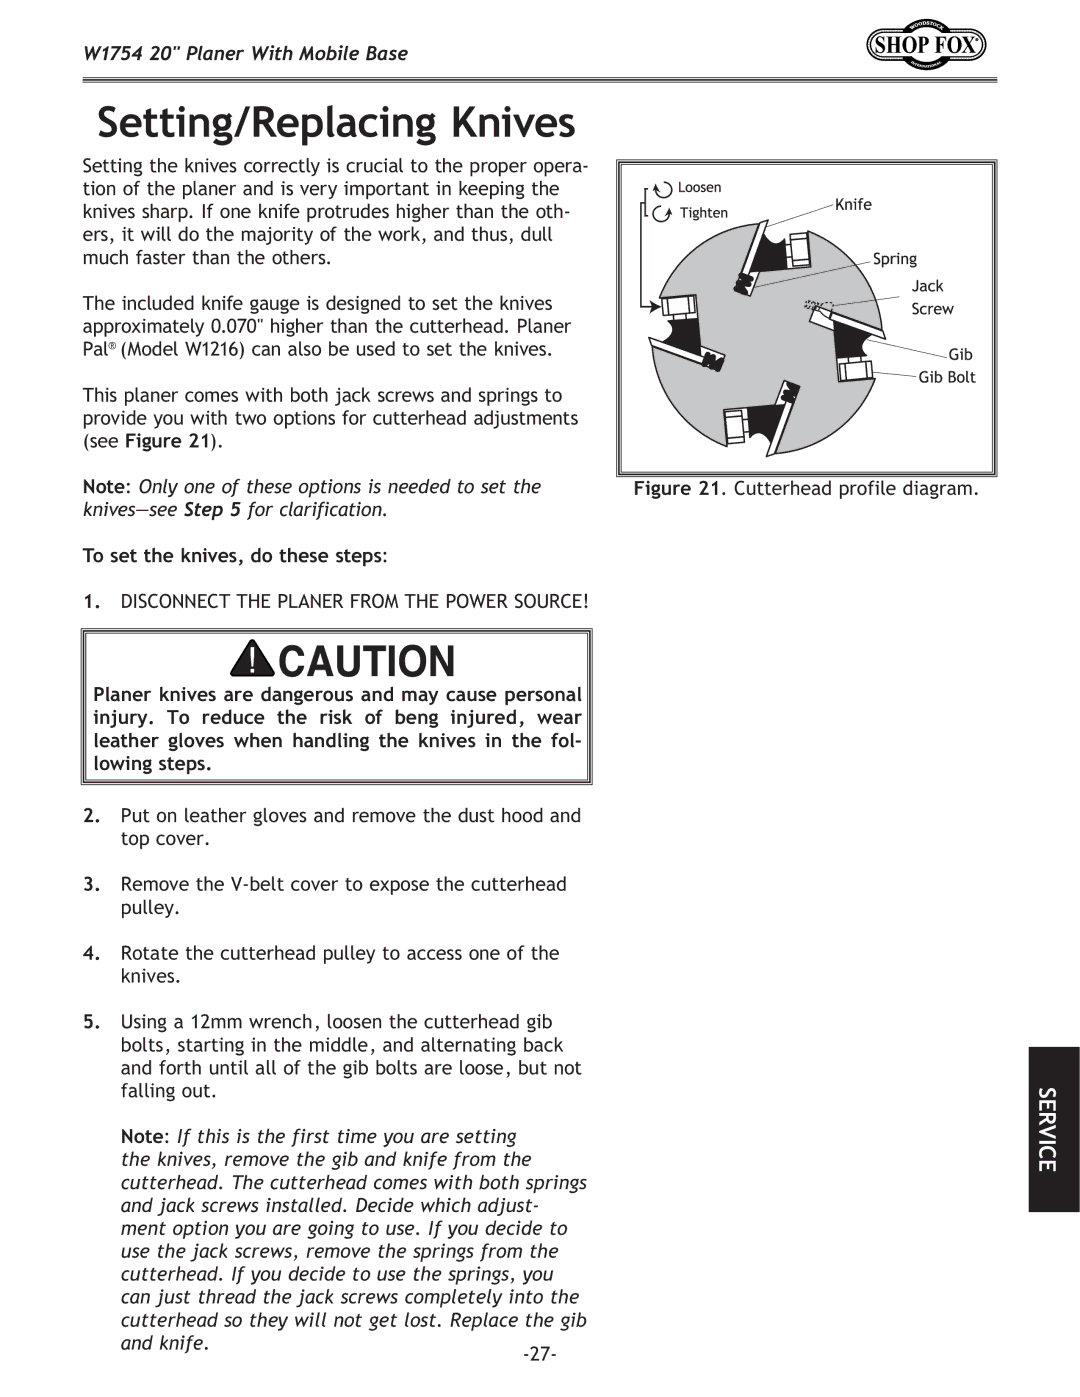
This planer comes with both jack screws and springs to provide you with two options for cutterhead adjustments (see Figure 21).
Note: Only one of these options is needed to set the
To set the knives, do these steps:
1.DISCONNECT THE PLANER FROM THE POWER SOURCE!
Planer knives are dangerous and may cause personal injury. To reduce the risk of beng injured, wear leather gloves when handling the knives in the fol- lowing steps.
2.Put on leather gloves and remove the dust hood and top cover.
3.Remove the
4.Rotate the cutterhead pulley to access one of the knives.
5.Using a 12mm wrench, loosen the cutterhead gib bolts, starting in the middle, and alternating back and forth until all of the gib bolts are loose, but not falling out.
Note: If this is the first time you are setting the knives, remove the gib and knife from the cutterhead. The cutterhead comes with both springs and jack screws installed. Decide which adjust- ment option you are going to use. If you decide to use the jack screws, remove the springs from the cutterhead. If you decide to use the springs, you can just thread the jack screws completely into the
cutterhead so they will not get lost. Replace the gib and knife.