Manuals
/
Yamaha
/
Home Audio
/
Stereo System
Yamaha
DVX-S100
owner manual
Models:
DVX-S100
1
1
82
82
Download
82 pages
1.22 Kb
1
2
3
4
5
6
7
8
Troubleshooting
Specs
Install
Code list
Signal type/data
Setting the sleep timer
Before connecting components
Dimension
Problem Cause
Presetting stations
Page 1
Image 1
U
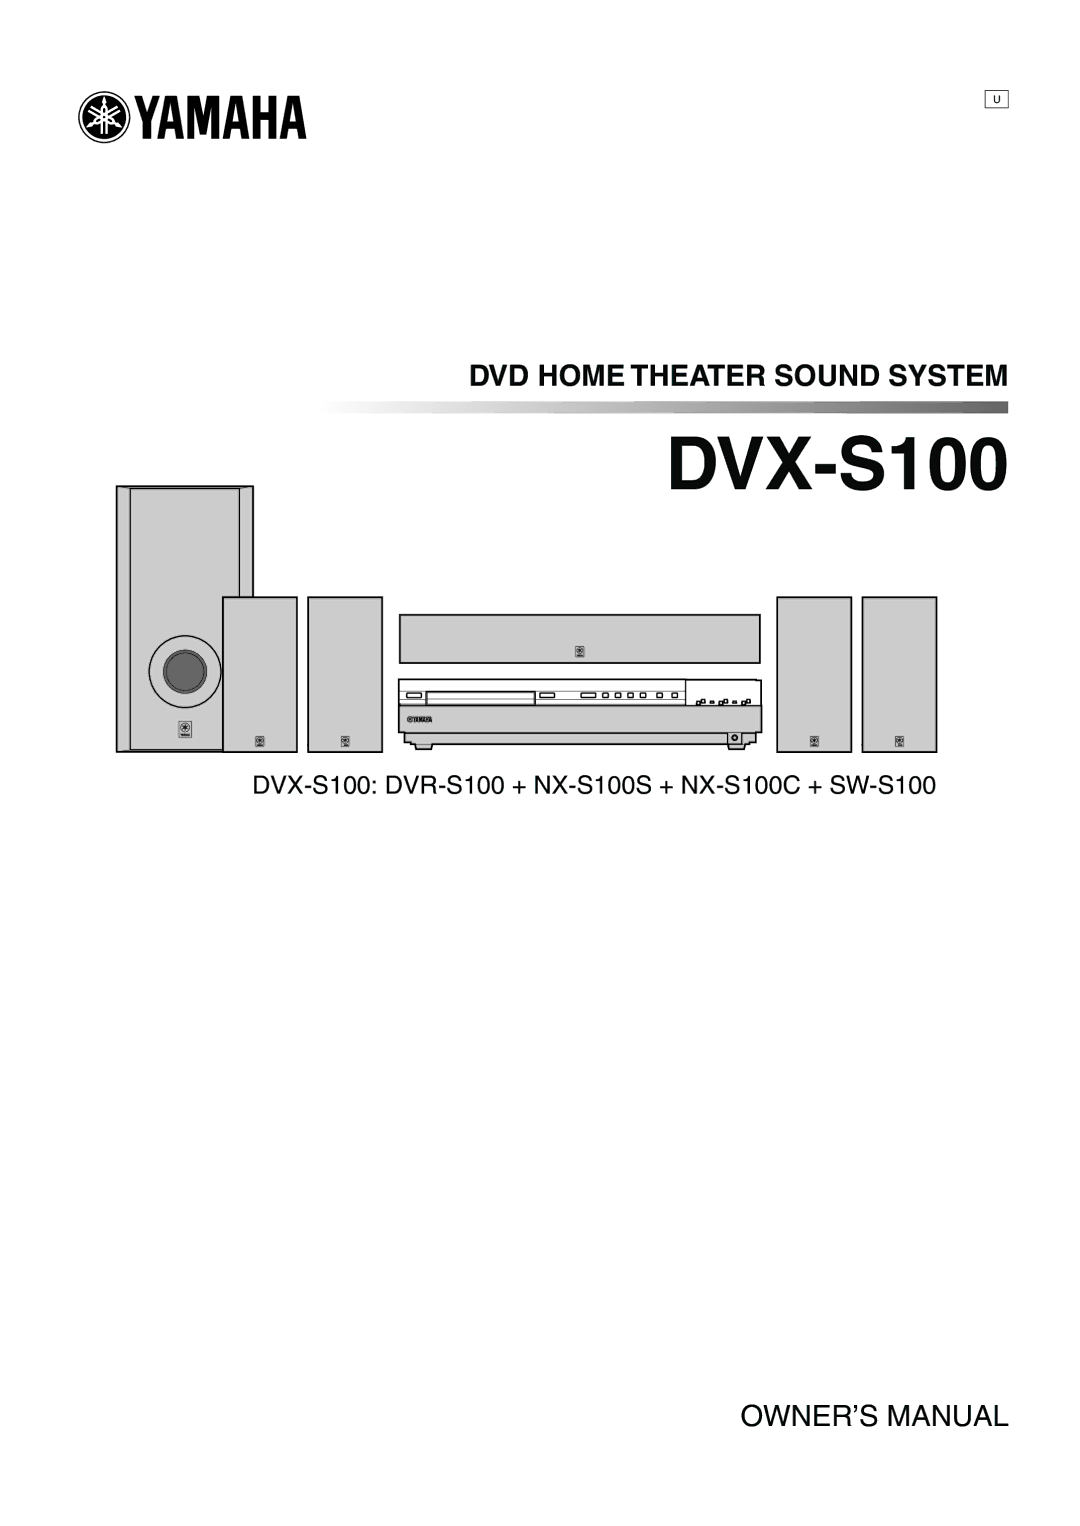
DVD HOME THEATER SOUND SYSTEM
DVX-S100
DVX-S100:
DVR-S100
+
NX-S100S
+
NX-S100C
+
SW-S100
OWNER’S MANUAL
Page 1
Page 2
Page 1
Image 1
Page 1
Page 2
Contents
DVX-S100
Explanation of Graphical Symbols
Important Safety Instructions
Example of Antenna Grounding
FCC Information for US customers only
For Canadian Customers
We Want You Listening For a Lifetime
Contents
About this manual
Features
Installing Batteries in the Remote Control
Checking the Accessories
DVR-S100
NX-SW100 NX-S100S x4, NX-S100C, SW-S100
Front panel
Controls and Functions
STANDBY/ON
Input H/G
Introduction
Code SET
Remote control AMP mode
Level
Test
Handling the remote control
Using the remote control
Approximately 6 m 20 feet
Front panel display left
Front panel display right
Adjusting speaker output levels P.20
Before connecting components
After connecting components
Preparation Steps
Speaker placement
Speaker Setup
Preparation
Placing the center speaker
Installing the speakers
Mounting the front and rear speakers
Placing the front and rear speakers
Hang the holes on the protruding screws
Components
Connections
Types of video jacks
Types of audio jacks
For Audio component
Connection example
For Video Component
For A/V component
Connecting indoor FM antenna
Connecting the antennas
Connecting the AM loop antenna
Set up the AM loop antenna, then connect it
RED White
Connecting the speakers
Green
Gray Blue
Exchanging the speaker cables
Using commercially available speakers and speaker cables
Connecting the AC power cord
Connecting to an external Amplifier
Turning on the power
Memory back-up
Using the test tone
Adjusting Speaker Output Levels
Left Right Center Subwoofer SUR
AMP
Basic operations
Basic Playback
Enhancing the bass tones
To mute the sound
Setting the sleep timer
When you have finished using this unit
Input modes and indications
Using
Feature of DSP programs
Selecting a sound field program
Basic Functions
CINEMA-DSP for cinema sources
Program Features
TV Sports
Mono Movie
Table of Program Names for Each Input Format
Using Basic Functions
Means the Matrix 6.1 decoder is on
Playing Dolby Digital Surround EX or DTS ES software
Selecting PRO Logic
Virtual Cinema DSP
While playing a 2-channel source Press AMP Press q/DTS
Normal Stereo Reproduction
Displaying the information about input signal
Timer playback/recording
Special considerations when recording DTS software
Recording
Types of disc that this unit can Play
Disc Information
Playing a Disc
This manual, the type of discs are indicated as below
Structure of the disc example
MP3 playback
Starting play from a selected chapter
Repeat play
Setup
Remote Control DVD Mode
Play Mode
Subtitle
Basic operation
Playing a Disc
To stop playback
After operation
To select a specific track
Skip
Search
Pause
Operating menu bar
ON-SCREEN Menu
To turn the screen off
To change the menu bar position
Icons for disc menu
Signal type/data
Language
Icons for player menu
Play mode menu
Display menu
Audio menu
Transfer Mode
Digital picture mode
To change the user mode
Shuttle screen
Using a disc’s menu
Using Multiple Functions
Enhancing video quality U.S.A Canada models only
Video CD’s playback control VCD
Save the adjusted position
Adjusting the screen position when using progressive output
To play a track on a specific group
A. and Canada models
To play a bonus group
Enhancing audio quality Disc
To change pages
Press a to stop play Press Group while pressing Shift
Subtitles
Audio tracks
Angles
To turn the icon off
Programmed play
Press a to stop play Press Play Mode while pressing Shift
Case of DVD-Audio
Press a to stop play
To exit programming mode
To cancel the programmed tracks
To change or add to the program during programmed play
To move up and down the pages on the program screen
Random play DVD-Audio
To cancel random mode
To play from the marked point
To clear a bookmark
Random-sequence repeat
Program repeat
DVD-Video
DVD-Audio/Video-CD/CD
Press A-B while pressing Shift
To cancel A-B repeat
Repeat A-BDVD-A DVD-V VCD CD
Operating the setup menu
Setup Menu
To get out from the setup menu mode
To go back to the previous screen
Menu groups Items Options
Summary of settings
DVD-A DVD-V
DVD-A DVD-V VCD
Mpeg
Language code list
Language selection and language code list
Others DVD-Video Mode
Demo
If you have forgotten your password
To change settings Level 7 to
Setting method Level
Ratings DVD-V
Output mode
Speaker settings DVD-A DVD-V
Difference Setting
To exit the speaker setting mode
Difference Setting
Speaker balance
Automatic and manual tuning
Tuning
Automatic tuning
Manual tuning
Automatically presetting stations for FM stations
Presetting stations
Manually presetting stations
Tuning
Press PRESET/BAND again
Tuning in to a preset station
Repeat steps 1 to 5 to store other stations
Seconds
Remote Control Features
Setting the manufacturer code
You can release Code SET after entering the code
MD/CD-R
CD/MD recorder
Table of control buttons
0, ≥10
CH +
Adjustments
Adjusting the items on the SET
SET Menu
List of SET Menu items
1A Center center speaker mode
Settings
1B Front front speaker mode
1C Rear LR rear speaker mode
1E F. Level front level mode
1D Bass LFE/bass out mode
Swfr
Both
Range dynamic range
SP DLY Time speaker delay
R Balance balance Front left and right speakers
Control
SP/PRE OUT output source Settings
Input Mode initial input
Optical Input jack
Coaxial Input jack
Press j / i to adjust the speaker output level
Adjusting the Level of the Effect Speakers
For 5ch Stereo
Level
Following table shows factory-set delay time
Adjusting the delay time
Changing parameter settings
Adjusting the parameter settings for PRO Logic II Music
Dimension
PRO Logic II Music parameter descriptions
Problem Cause Remedy Refer
Troubleshooting
General
Appendix
No sound from
Volume level
Center speaker
Rear speakers
Disc playback
Problem Cause
On the unit’s display This unit does not
Remedy Refer
Tuner
Remote control
Cinema DSP
Glossary
Interlace and progressive output
Silent Cinema
Video signal
Specifications
VCR
List of MANUFACTURER’S Codes
Kenwood Pioneer Sharp
CDR
V883340-1
Top
Page
Image
Contents