INSTALLATION INSTRUCTIONS
PR8009
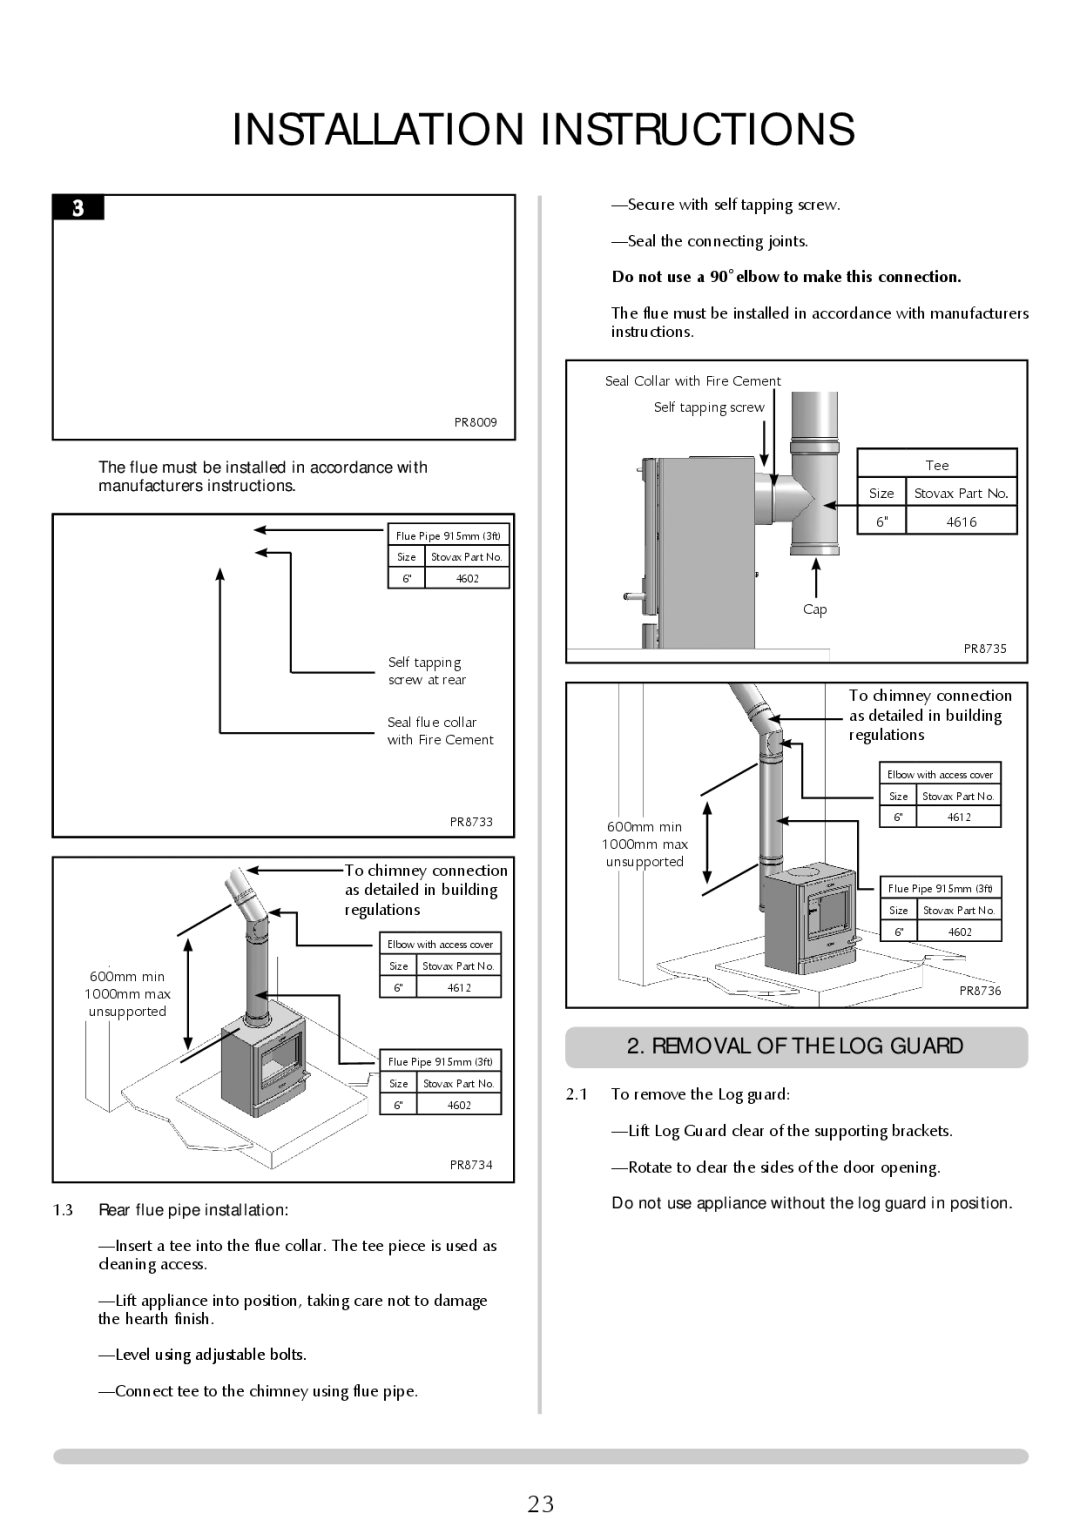
The flue must be installed in accordance with manufacturers instructions.
Flue Pipe 915mm (3ft)
Size | Stovax Part No. |
6" | 4602 |
Self tapping screw at rear
Seal flue collar with Fire Cement
—Secure with self tapping screw.
—Seal the connecting joints.
Do not use a 90˚elbow to make this connection.
The flue must be installed in accordance with manufacturers instructions.
Seal Collar with Fire Cement
Self tapping screw
|
| Tee |
| Size | Stovax Part No. |
| 6" | 4616 |
|
|
|
Cap
PR8735
To chimney connection  as detailed in building regulations
PR8733
600mm min
Elbow with access cover
Size Stovax Part No.
6" 4612
600mm min
1000mm max unsupported
![]() To chimney connection as detailed in building regulations
To chimney connection as detailed in building regulations
Elbow with access cover
Size Stovax Part No.
6" 4612
Flue Pipe 915mm (3ft)
Size Stovax Part No.
6" 4602
1000mm max unsupported
Flue Pipe 915mm (3ft)
Size | Stovax Part No. |
6" | 4602 |
|
|
PR8736
2. REMOVAL OF THE LOG GUARD |
2.1 To remove the Log guard: |
PR8734
1.3Rear flue pipe installation:
Do not use appliance without the log guard in position. |
23