PICTURE Menu
PICTURE Menu (continued)
Item
Description
Using the buttons ▲/▼ switches the mode of color temperature.
HIGH DEFAULT � HIGH CUSTOM � MID DEFAULT � MID CUSTOM
LOW DEFAULT � LOW CUSTOM �
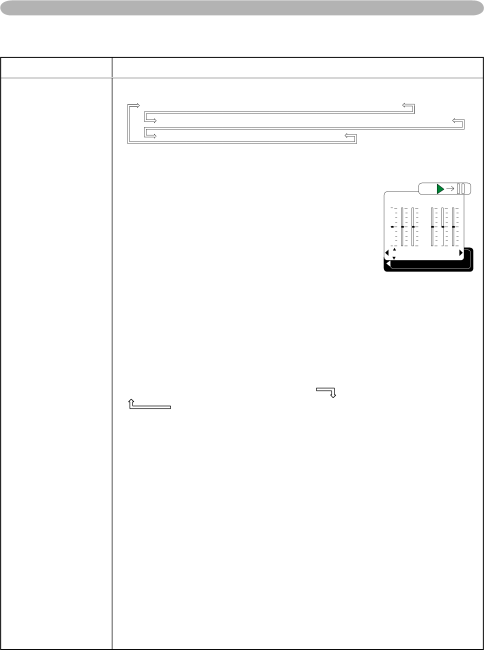
| To adjust CUSTOM |
|
|
|
|
|
|
|
|
|
|
|
| |
| Selecting the CUSTOM and then pressing the |
|
|
|
|
| ENTER : |
|
| |||||
| button ► or the ENTER button displays a dialog |
|
|
|
|
|
|
| ||||||
|
| OFFSET |
| GAIN |
|
| ||||||||
| to aid you in adjusting the OFFSET and/or GAIN | R G B | R G B | |||||||||||
|
|
|
|
|
|
|
|
|
|
|
| |||
| of the CUSTOM mode. |
|
|
|
|
|
|
|
|
|
|
| ||
| OFFSET adjustments change the color intensity |
|
|
|
|
|
|
|
|
|
|
| ||
COLOR TEMP | on the whole tones of the test pattern. | +0 | +0 +0 | +0 +0 +0 |
|
| ||||||||
| ||||||||||||||
GAIN adjustments mainly affect color intensity |
| COLOR TEMP | ||||||||||||
|
|
|
|
|
|
|
|
|
|
|
| |||
| on the brighter tones of the test pattern. |
|
|
|
|
|
|
|
|
|
|
| ||
| Choose an item using the buttons ◄/►, and adjust the level using | |||||||||||||
| the buttons ▲/▼. |
|
|
|
|
|
|
|
|
|
|
| ||
| You can display a test pattern for checking the effect of your | |||||||||||||
| adjustment by pressing the ENTER button. |
|
|
|
|
|
|
|
|
|
|
| ||
| Each time you press the ENTER button, the pattern changes as | |||||||||||||
| below. |
|
|
|
|
|
|
|
|
|
|
| ||
| No pattern ð Gray scale of 9 steps |
|
|
|
|
|
|
|
|
|
|
| ||
| Ramp Gray scale of 15 steps |
|
|
|
|
|
|
|
|
|
|
| ||
| • When this function is performed, a certain extra such as a line | |||||||||||||
| may appear. |
|
|
|
|
|
|
|
|
|
|
| ||
| Using the buttons ▲/▼ adjusts the strength of whole color. | |||||||||||||
COLOR | Strong ó Weak |
|
|
|
|
|
|
|
|
|
|
| ||
• This item can be selected only for a video signal, | ||||||||||||||
| ||||||||||||||
| component video signal. |
|
|
|
|
|
|
|
|
|
|
| ||
| Using the buttons ▲/▼ adjusts the tint. |
|
|
|
|
|
|
|
|
|
|
| ||
TINT | Greenish ó Redish |
|
|
|
|
|
|
|
|
|
|
| ||
• This item can be selected only for a video signal, | ||||||||||||||
| ||||||||||||||
| component video signal. |
|
|
|
|
|
|
|
|
|
|
| ||
| Using the buttons ▲/▼ adjusts the sharpness. |
|
|
|
|
|
|
|
|
|
|
| ||
SHARPNESS | Strong ó Weak |
|
|
|
|
|
|
|
|
|
|
| ||
• There may be some noise and/or the screen may flicker for a | ||||||||||||||
| ||||||||||||||
| moment when an adjustment is made. This is not a malfunction. | |||||||||||||
28