BenQ MP720 user manual Using the menus

Page 38

Using the menus

The projector is equipped with on-screen display (OSD) menus for making various adjustments and settings.

There are 17 different menu languages. (Refer to page "4. Advance menu" on page 37 for more details.)

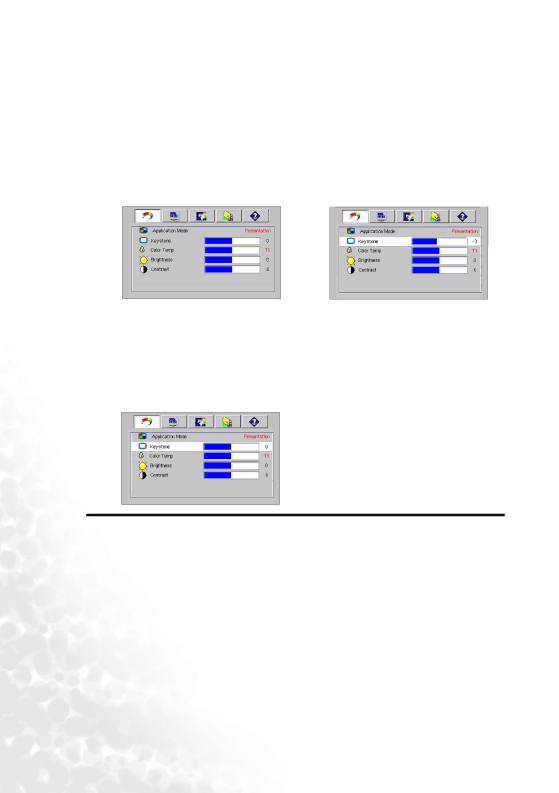
The following example describes the adjustment of the keystone.

1. Press 6Menu on the projector or Menu 4.

Adjust keystone values by

on the remote control to turn the on-

pressing 3/ 4on the projector

screen menu on.

or remote control.


2.Use 3 / 4 on the projector or remote

control to select the Picture menu.

3.Press 5Exit / 6Menu on the projector or 6/ 5on the remote control to select Keystone.

5.Press5Exit on the projector repeatedly or press Menu on the remote control to leave and save the setting.

32 Operation

Image 38
Contents Welcome Copyright DisclaimerTable of contents Iv Table of contents Supported timing for Component-YPbPr inputTable of contents Regulation StatementsMemo Vi Table of contents But could fail if power cuts or surges Important safety instructionsRefer servicing to qualified service personnel Important safety instructionsSafety Instructions Bedding or any other soft surface Safety Instructions Introduction Projector featuresIntroduction Shipping contents Rear side Projector exterior viewFront / upper side Kensington anti-theft lock slot Side viewLower side Lamp coverInformation Controls and functionsExternal control panel Turns the projector on or offII/ Freeze Remote controlExit 5Up, 6 Down 3Left, Right4 Pull out the battery holder Remote control effective rangeReplacing the remote control battery Operating the projector fromPositioning your projector Positioning your projectorChoosing a location Floor front Obtaining a preferred projected image size Positioning your projector 1219 Maximum zoom Minimum zoomScreen Center of lens Projection distance 1500Connection Wireless connection optionalConnecting a computer or monitor Cable connectionVGA VGA-DVI Connecting a monitor With a VGA cable With a VGA-DVI cableConnecting Video source devices Best video qualityConnecting a Component Video source device Connecting an S-Video source device Connecting a composite Video source device Start up Utilizing the password functionOperation To enter the password recall procedure To set a passwordIf you forget the password To change the passwordAdjusting the height Auto-adjusting the imageThat you need using the zoom ring Focus ring Fine-tuning the image size and clarityAdjust the projected image to the size Correcting keystone Brightest default Presentation SRGB/Photo Gaming Video Selecting an application mode Switching input signal Movie default Cinema Gaming PhotoFreezing the image Power indicator light flashesRemote paging operations ShutdownMenu operation Menu systemUsing the menus Picture menu Selected Color TempDepends on BrightnessPro-Picture menu Setting menu Advance menu Auto Off off Mode offHigh Altitude EconomicInformation menu ResolutionMode Equivalent Lamp Hour SystemMaintenance Care of the projectorTo clean the filter How to replace the filter sponge Message Status Lamp informationCalculation of lamp hour Disconnect the lamp connector from the projector Maintenance Replacing the lampMaintenance Restart the projector Temperature informationResetting the lamp counter Iii. Wait about 5 seconds to let the OSD disappearLight Status & Description Power Temp Lamp Lamp events IndicatorsLight Status & Description Power Temp Lamp Power events Stand-by modeThermal events For assistanceMaintenance Make sure that it is switched on TroubleshootingPlug the power cord into the AC inlet on Cause RemedySpecifications Projector specificationsSupported timing for Component-YPbPrinput Timing chartSupported timing for PC input Supported timing for Video and S-Video inputsDimensions Unit mm SpecificationsWarranty Limited WarrantyEEC statement Regulation StatementsFCC statement MIC statement