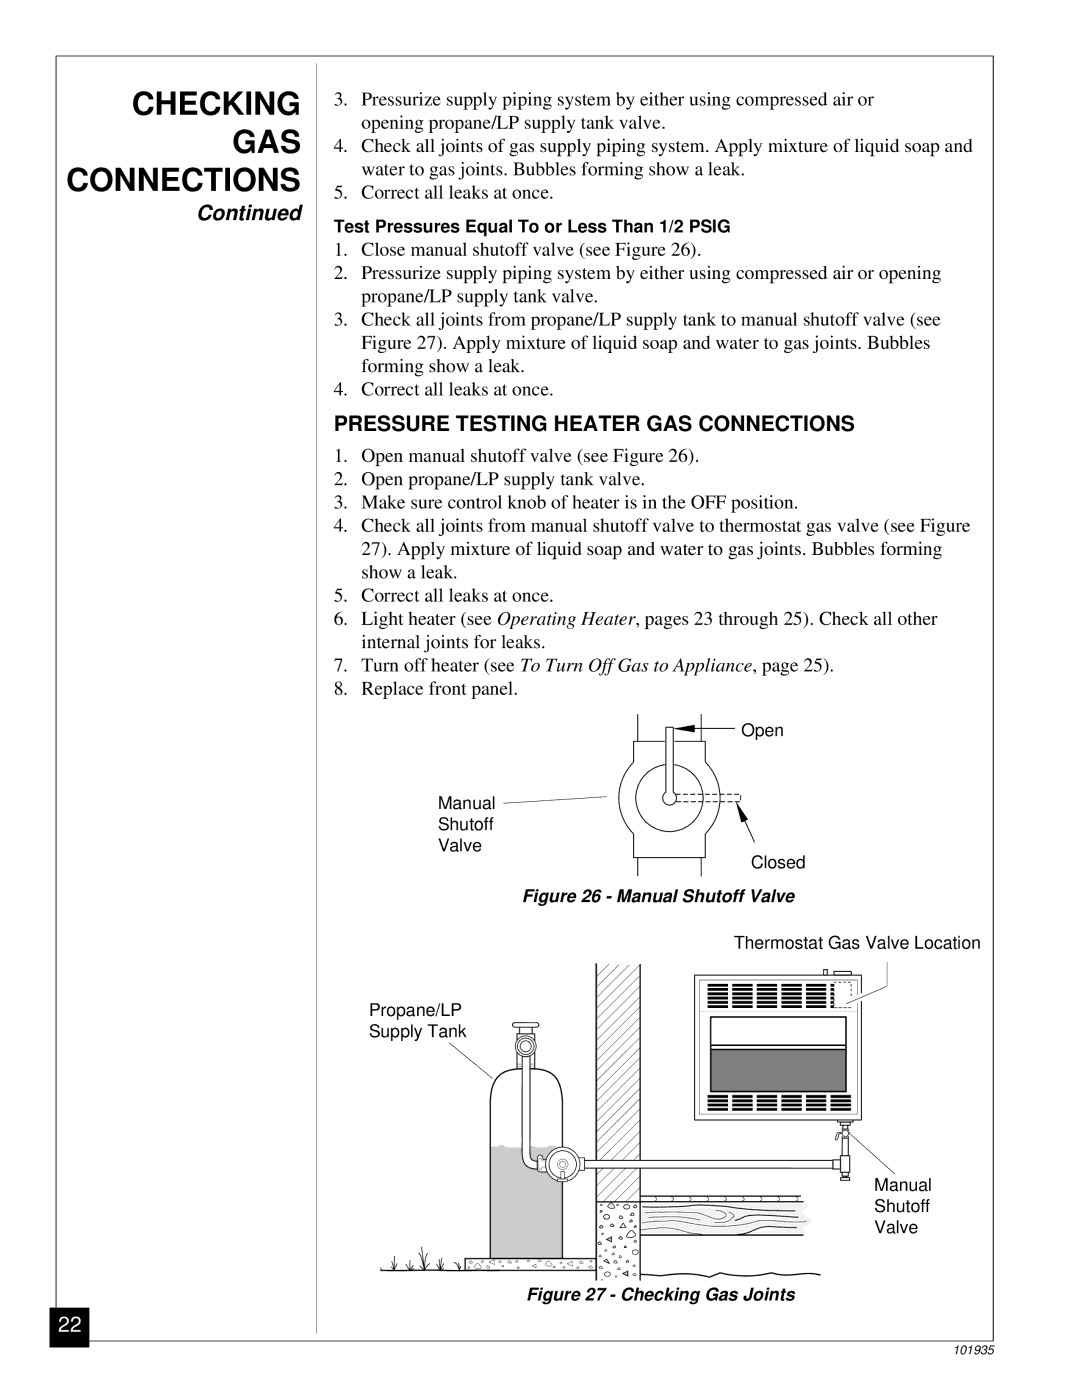
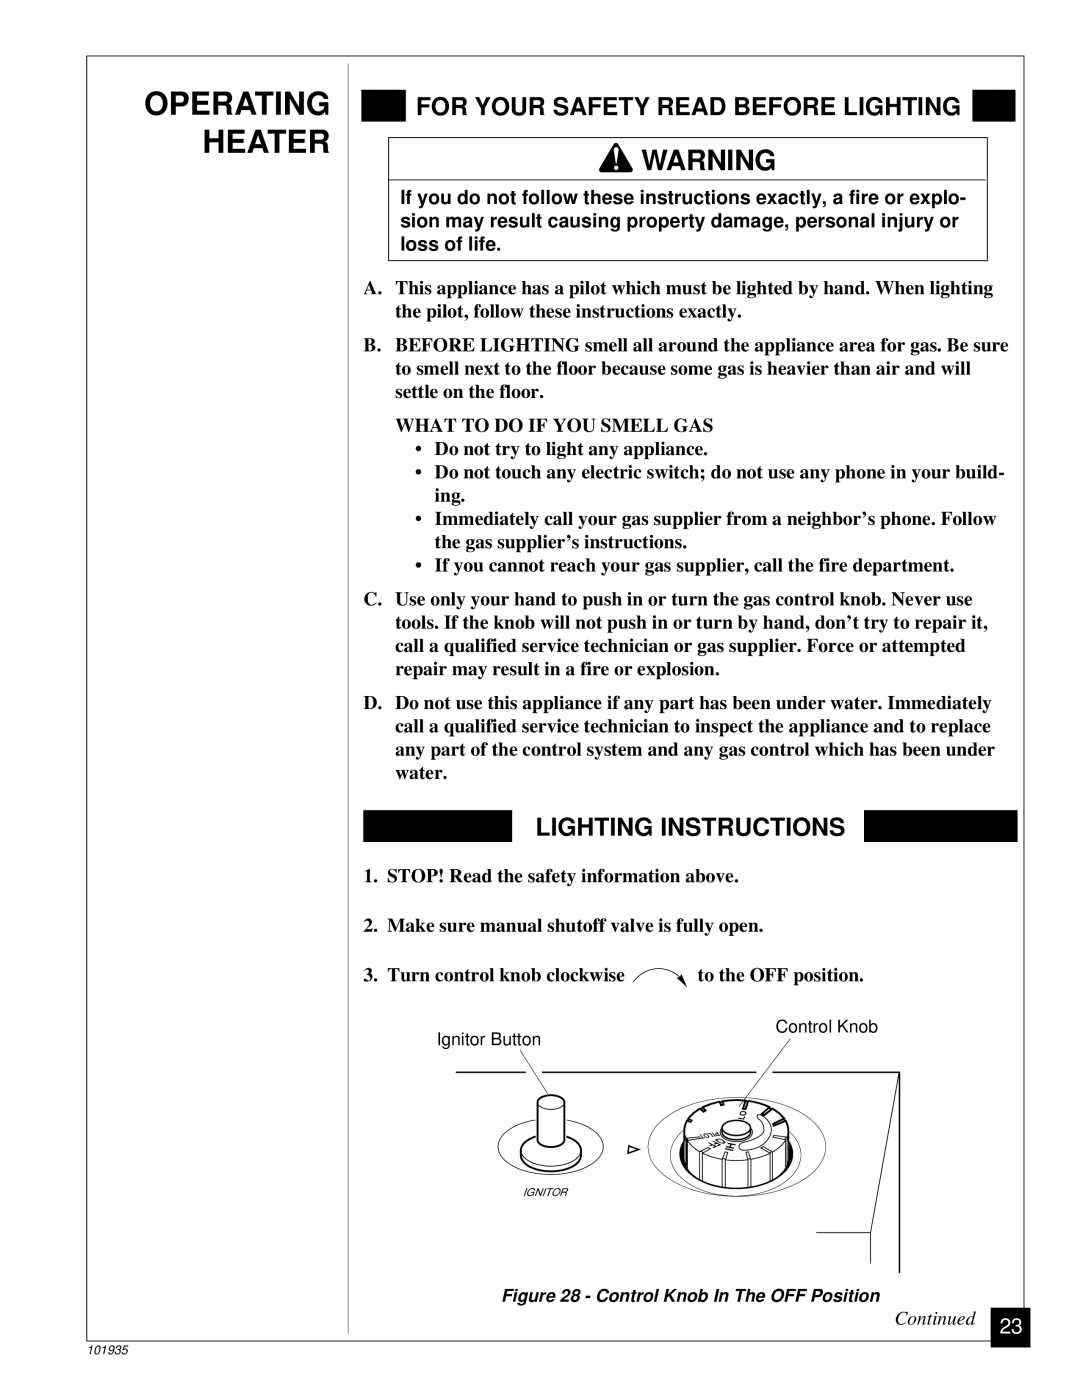
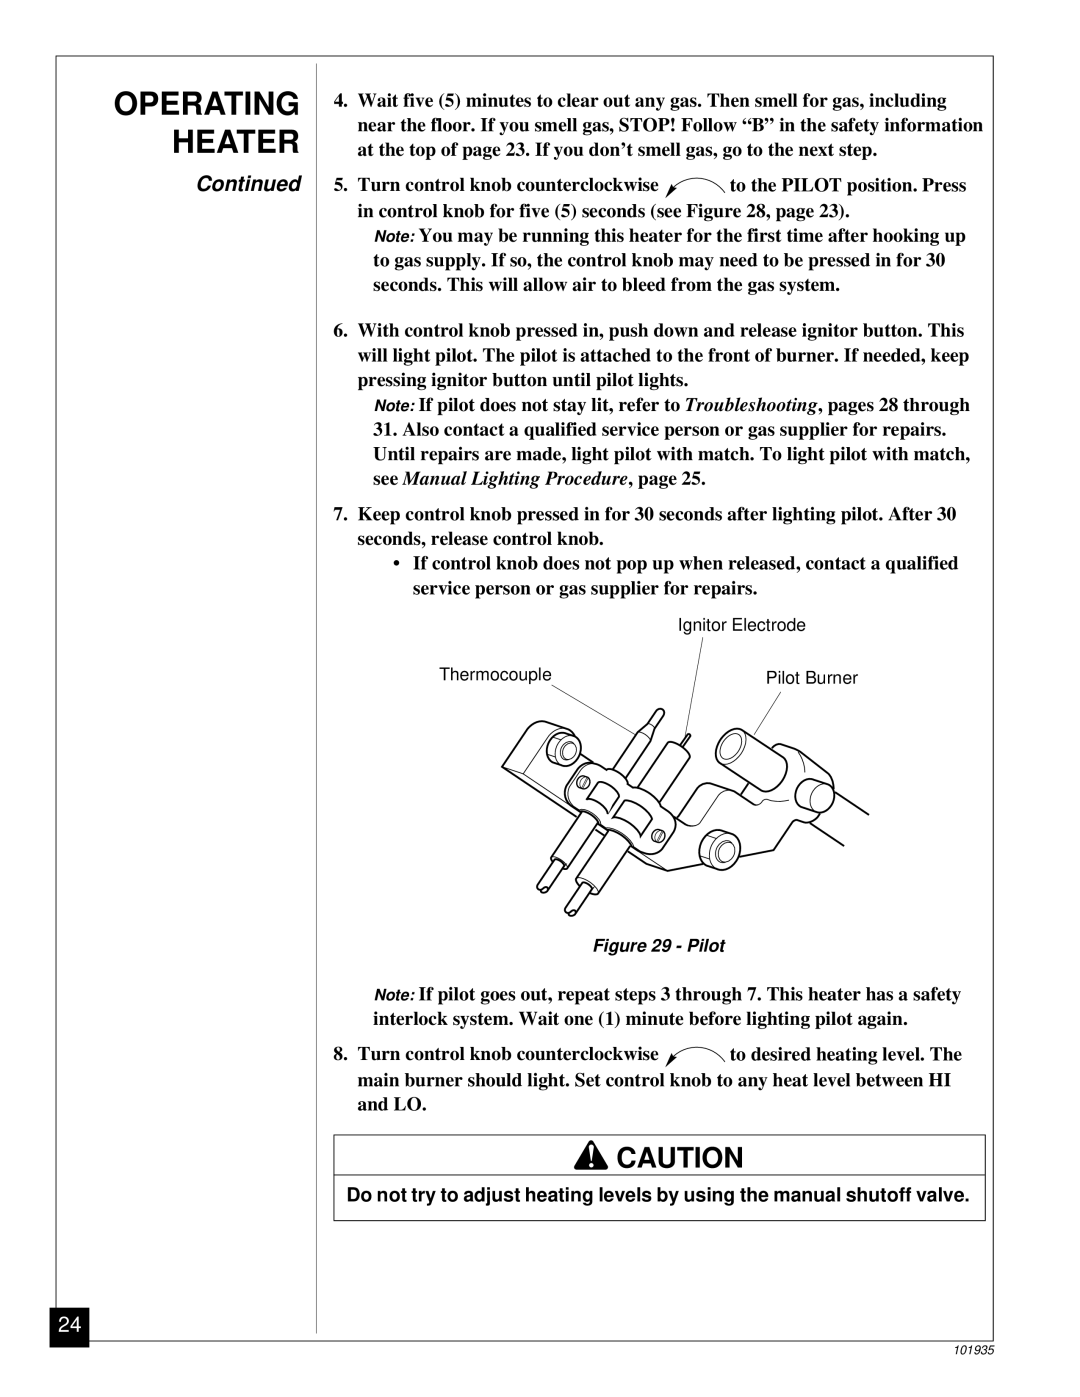
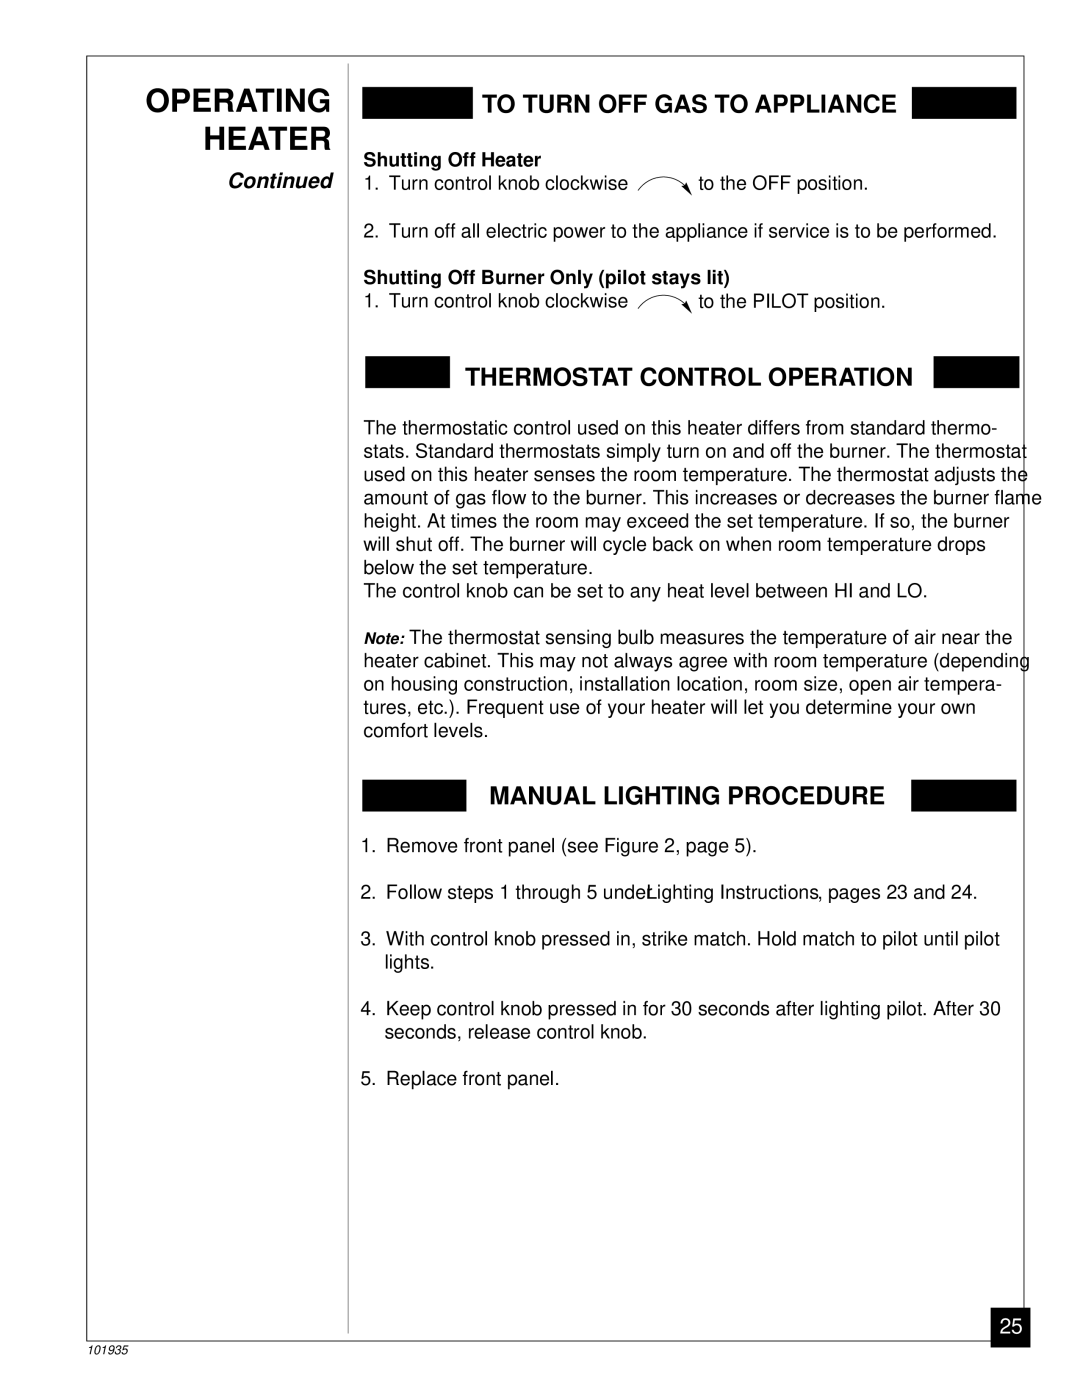
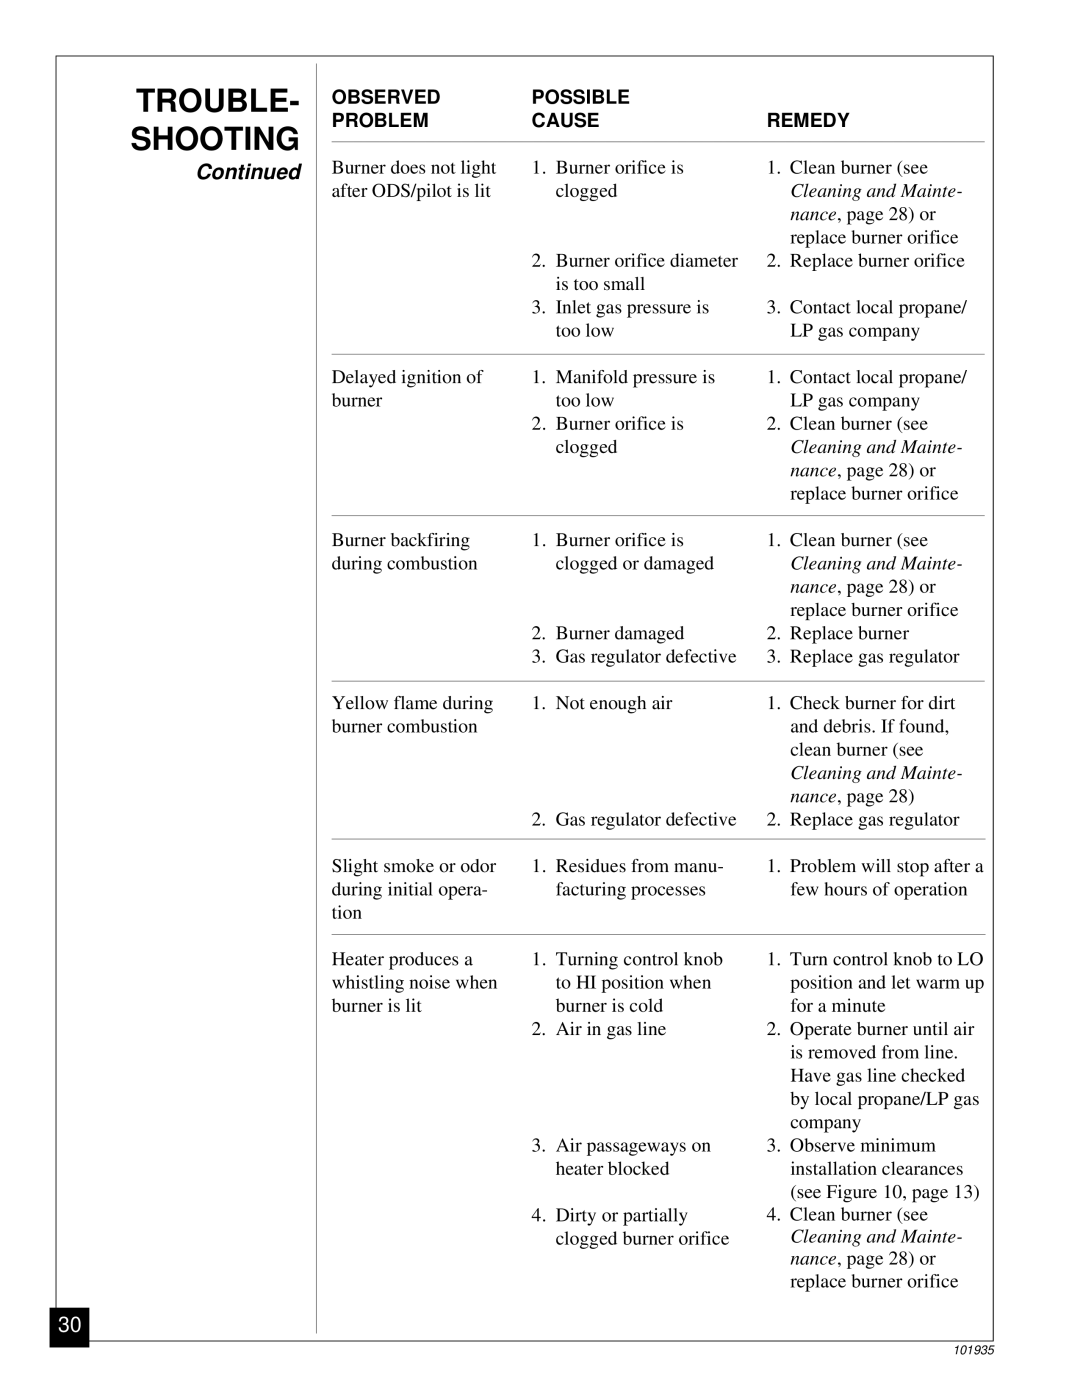
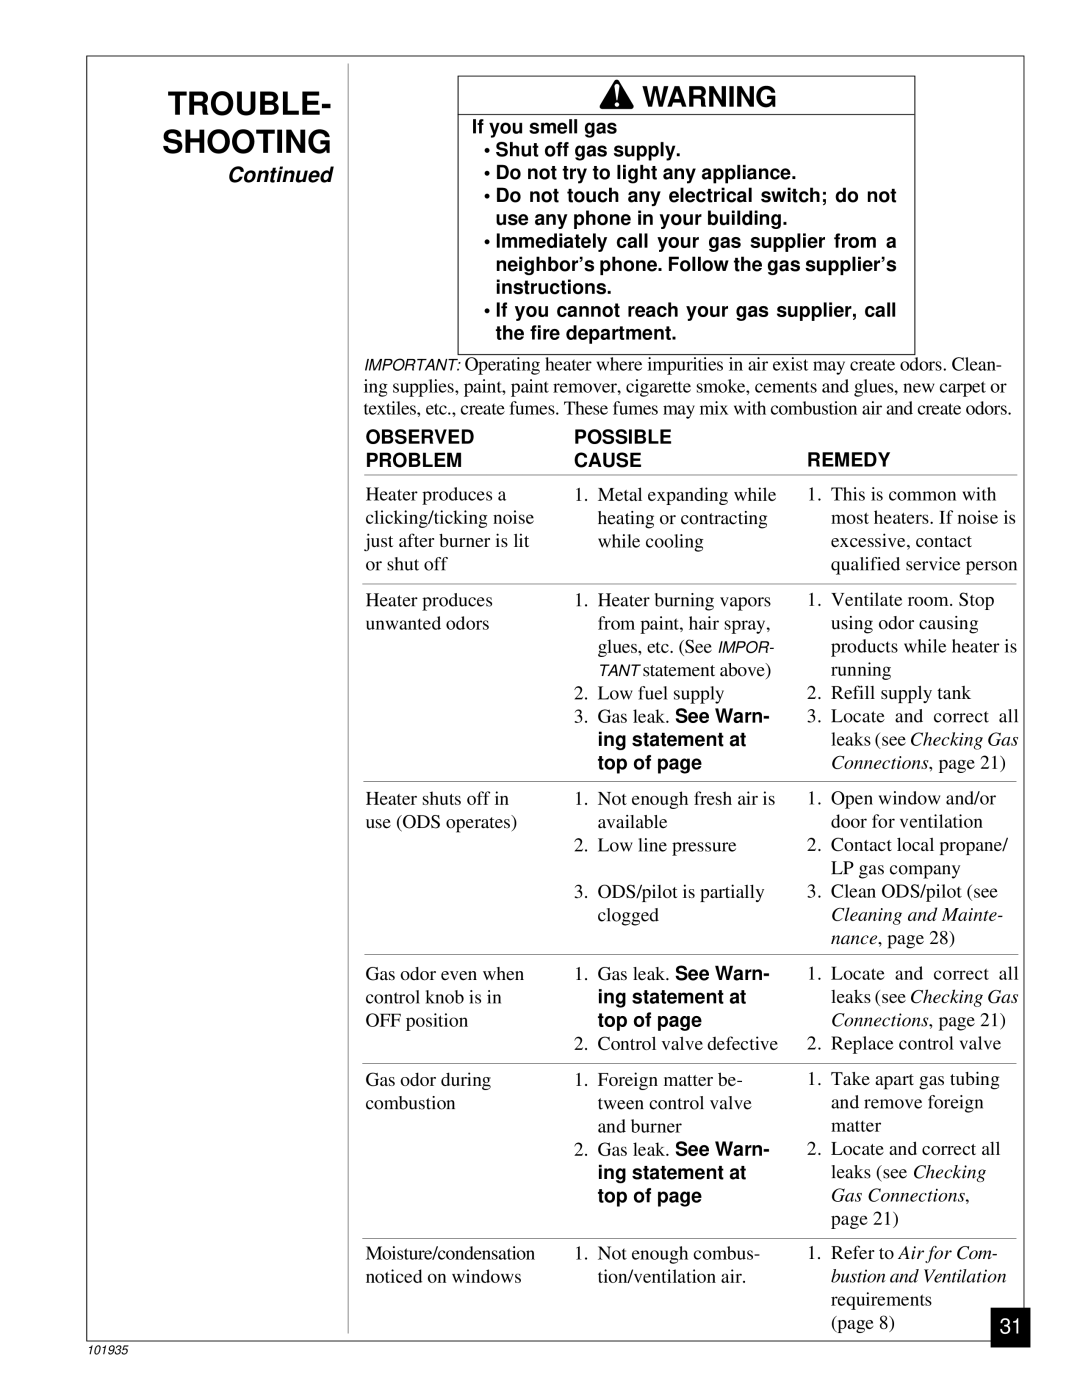
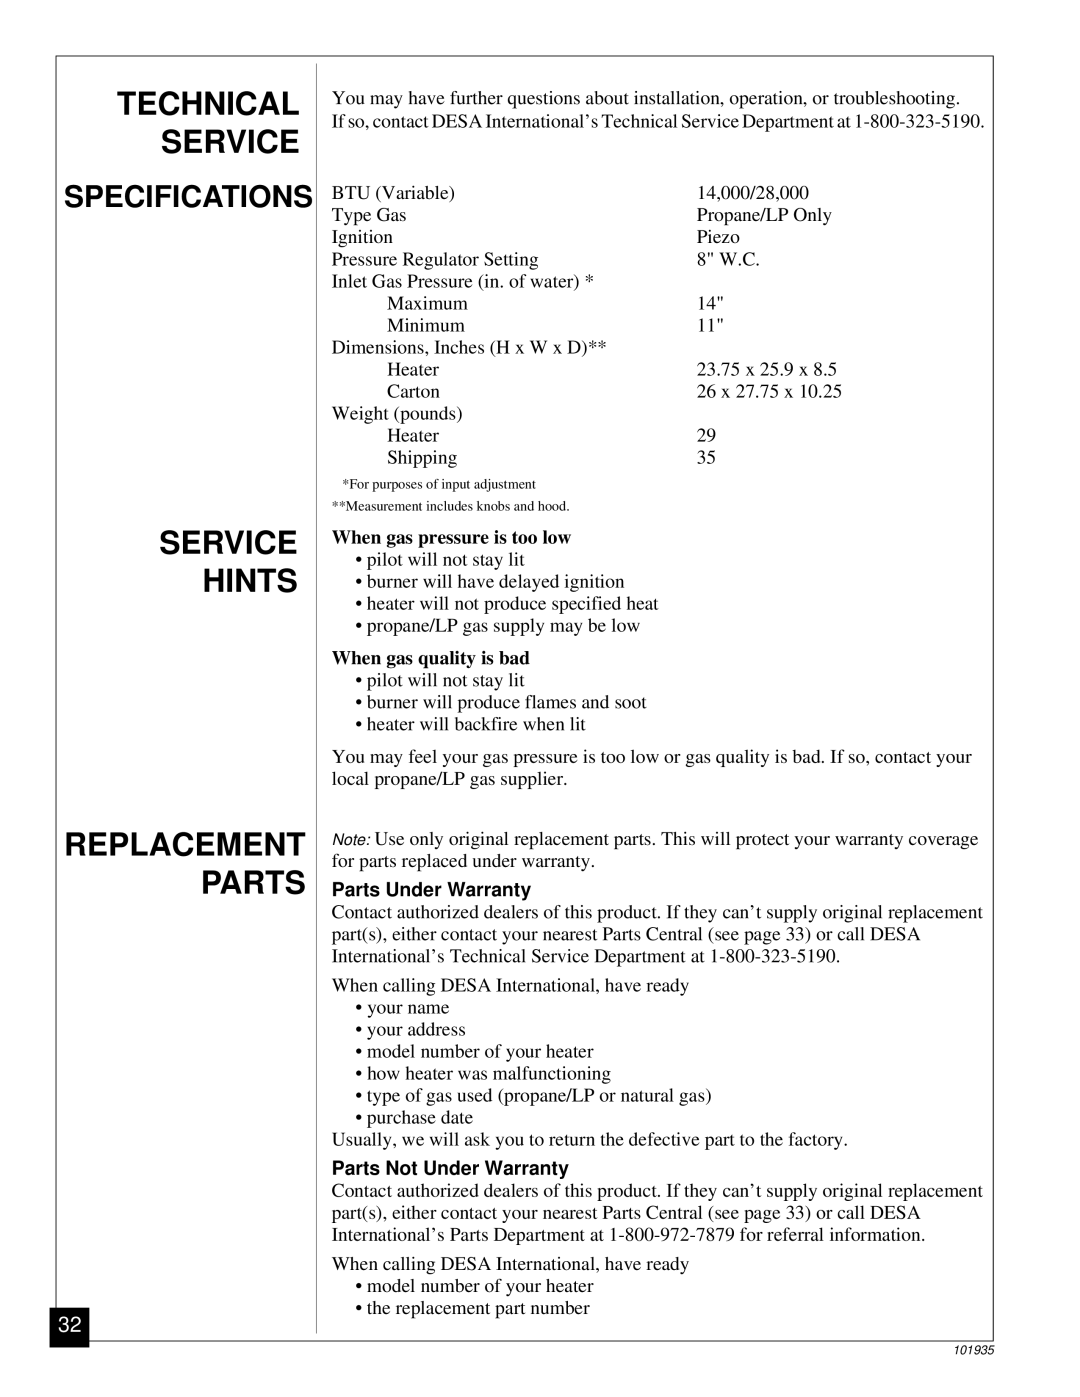
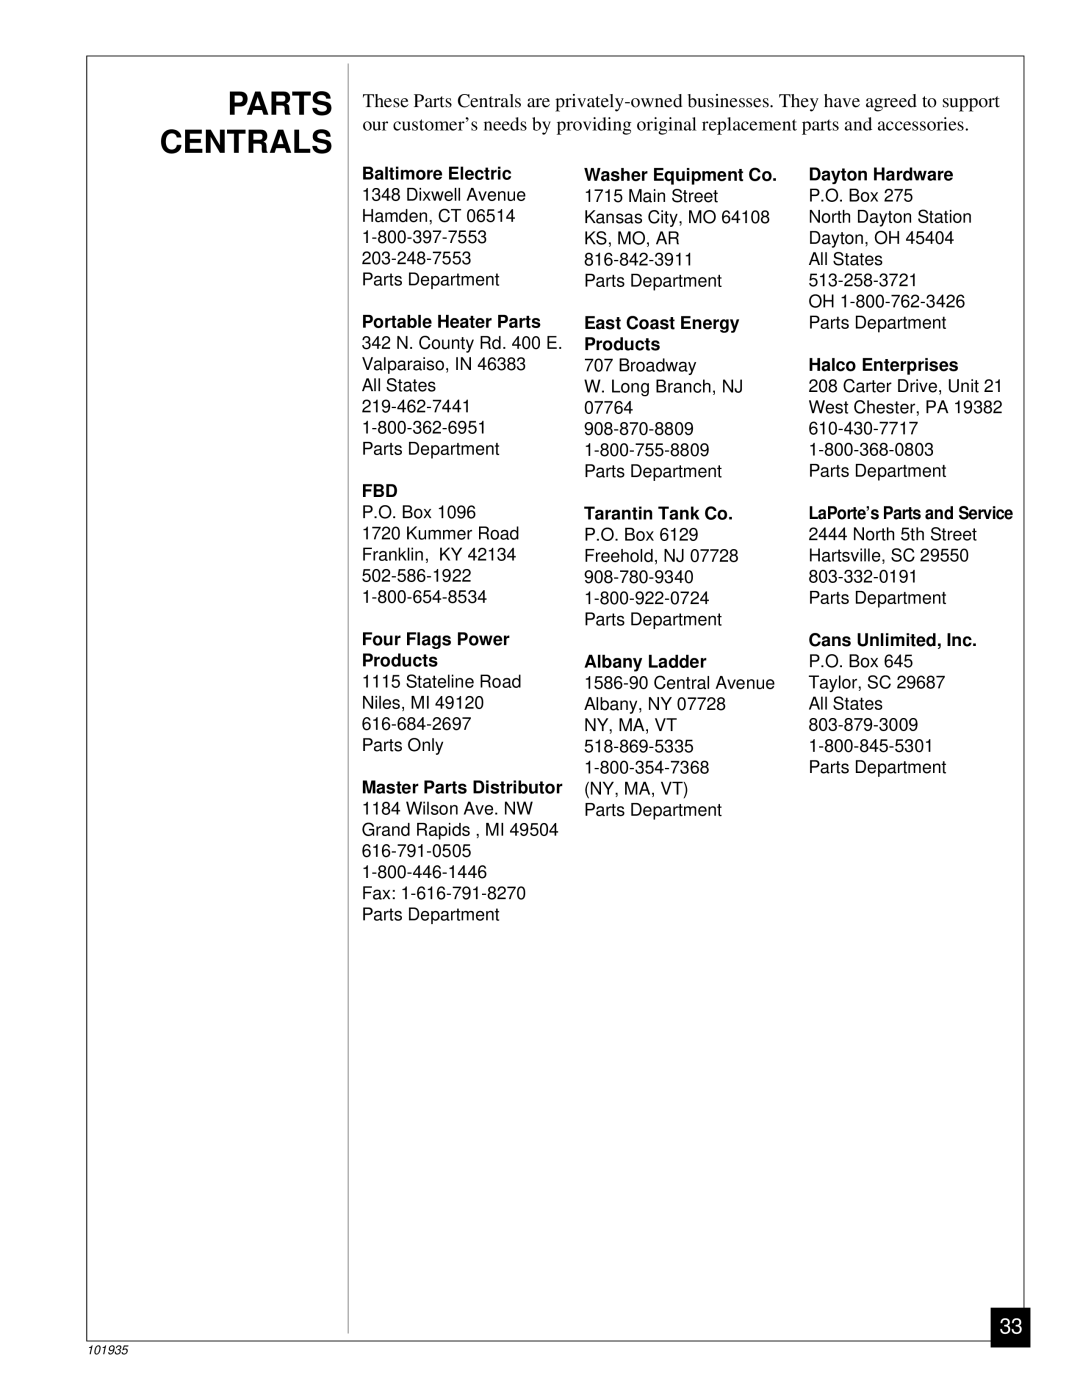
Desa RFP28TB Attaching Mounting Bracket to Wall, Placing Heater On Mounting Bracket, Installation

Page 15
Attaching Mounting Bracket to Wall

INSTALLATION

Attaching Mounting Bracket to Wall

Note: Wall anchors, mounting screws, and spacers are in hardware package. The

Continued

hardware package is provided with heater.


Attaching to wall stud method


For attaching mounting bracket to wall studs.


1.

Drill holes at marked locations using 9/64" drill bit.


2.

Place mounting bracket onto wall. Line up last hole on each end of bracket with


holes drilled in wall.


3.

Insert mounting screws through bracket and into wall studs.


4.

Tighten screws until mounting bracket is firmly fastened to wall studs.

Attaching to wall anchor method

For attaching mounting bracket to hollow walls (wall areas between studs) or solid walls (concrete or masonry)

1.Drill holes at marked locations using 5/16" drill bit. For solid walls (concrete or masonry), drill at least 1" deep.

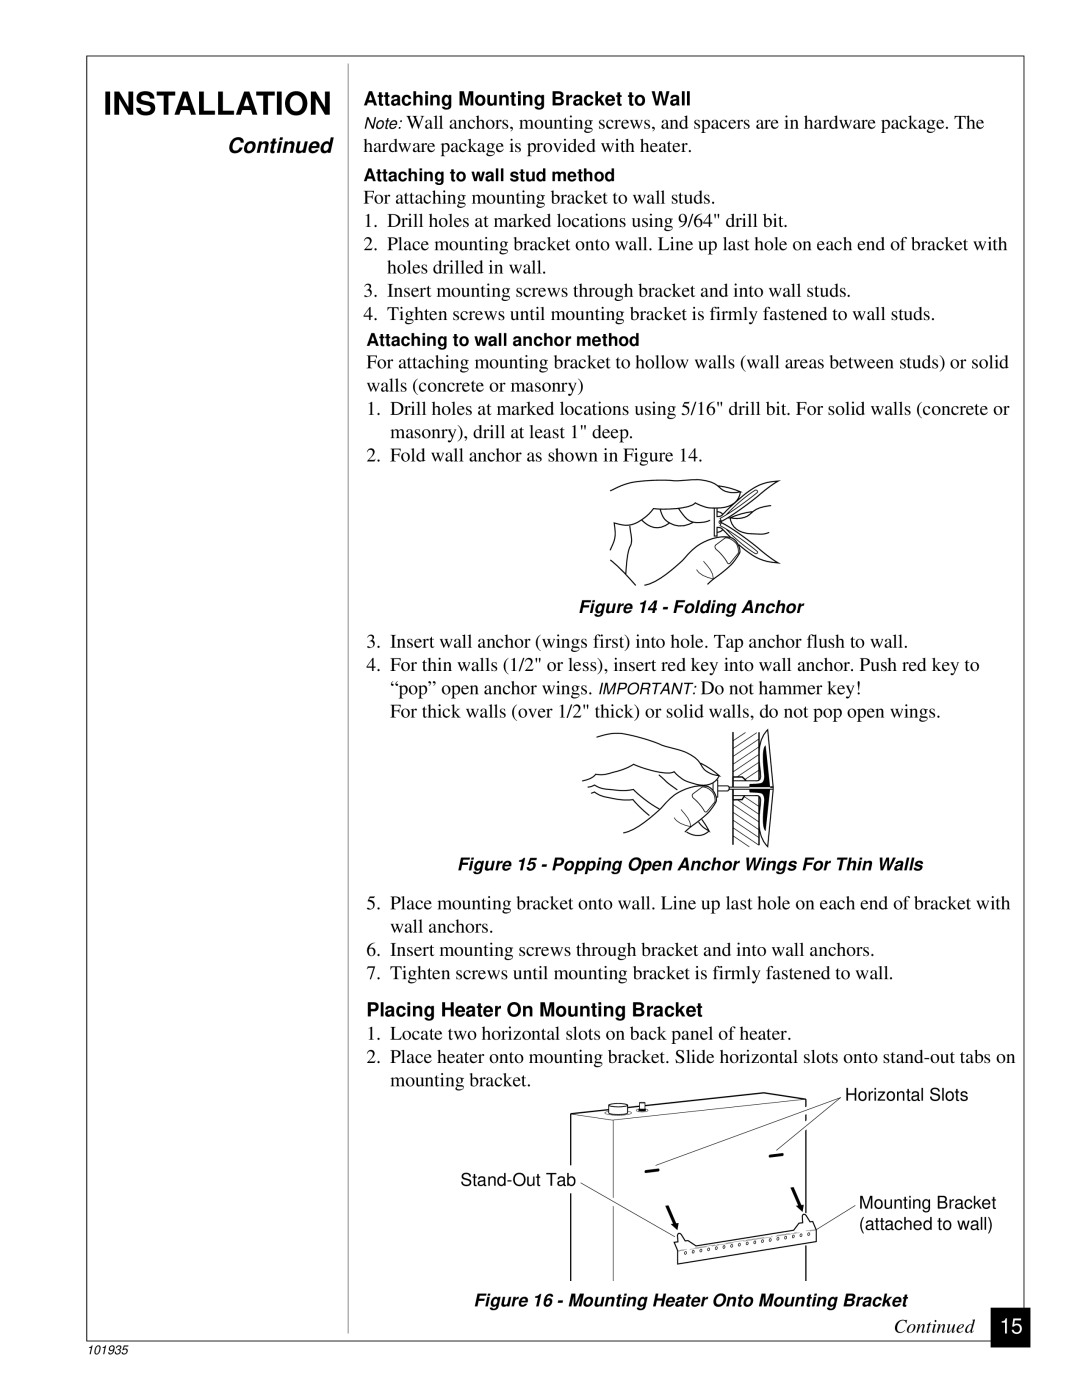
2.Fold wall anchor as shown in Figure 14.

Figure 14 - Folding Anchor

3.Insert wall anchor (wings first) into hole. Tap anchor flush to wall.

4.For thin walls (1/2" or less), insert red key into wall anchor. Push red key to “pop” open anchor wings. IMPORTANT: Do not hammer key!

For thick walls (over 1/2" thick) or solid walls, do not pop open wings.

Figure 15 - Popping Open Anchor Wings For Thin Walls

5.Place mounting bracket onto wall. Line up last hole on each end of bracket with wall anchors.

6.Insert mounting screws through bracket and into wall anchors.

7.Tighten screws until mounting bracket is firmly fastened to wall.

Placing Heater On Mounting Bracket

1.Locate two horizontal slots on back panel of heater.

2.Place heater onto mounting bracket. Slide horizontal slots onto stand-out tabs on mounting bracket.

Horizontal Slots

Stand-Out Tab

Mounting Bracket (attached to wall)

Figure 16 - Mounting Heater Onto Mounting Bracket

Continued 15

101935
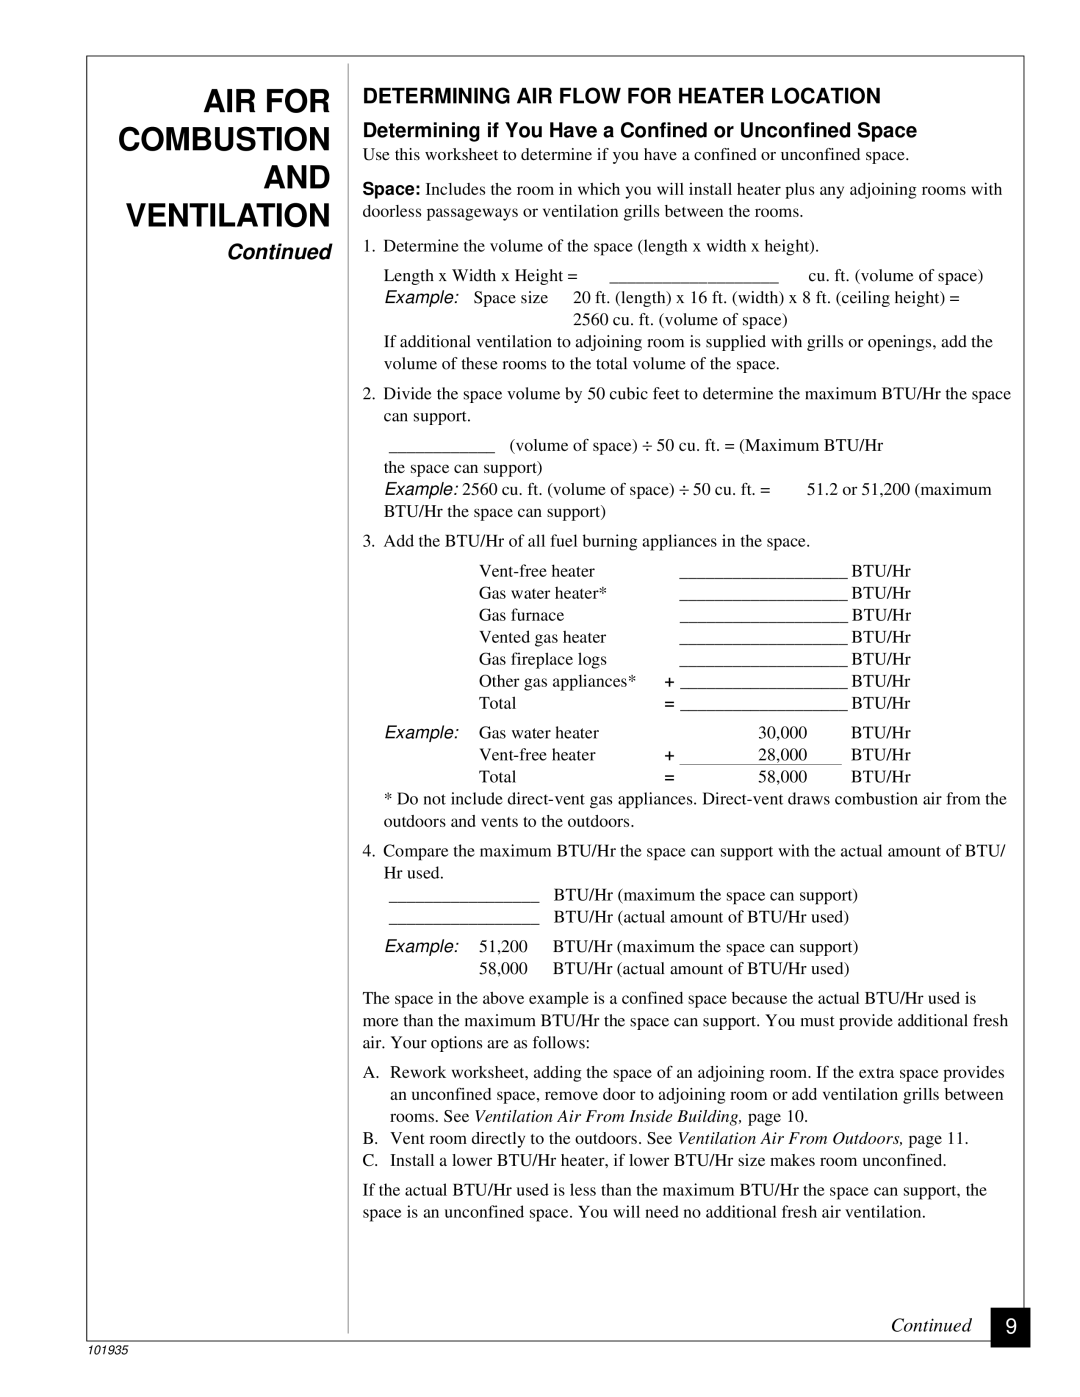
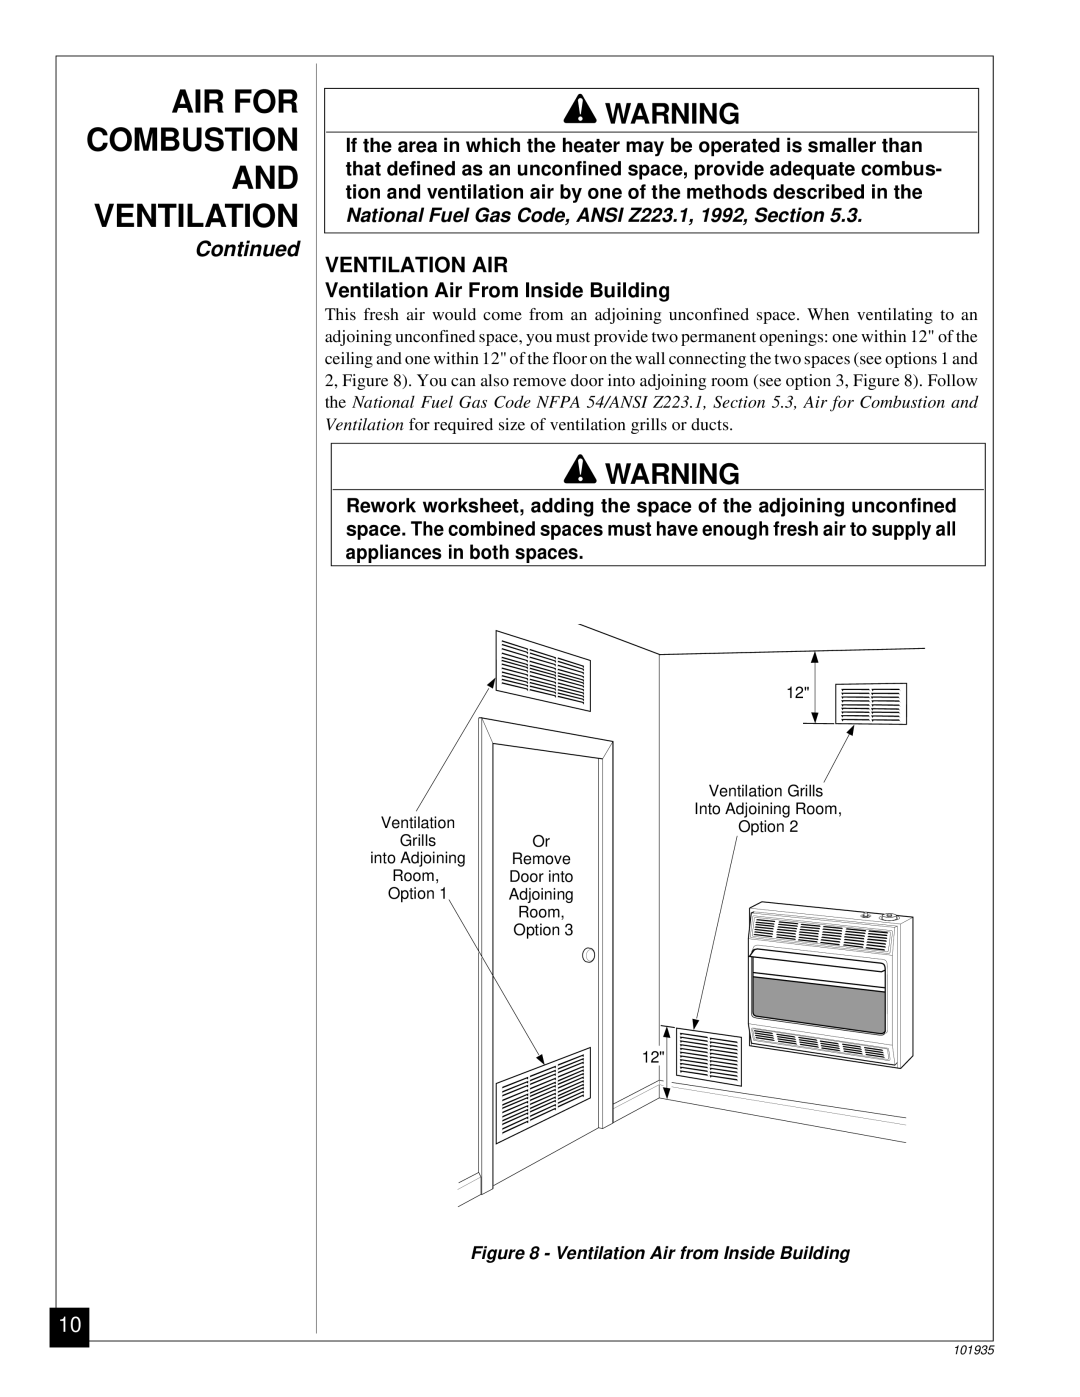
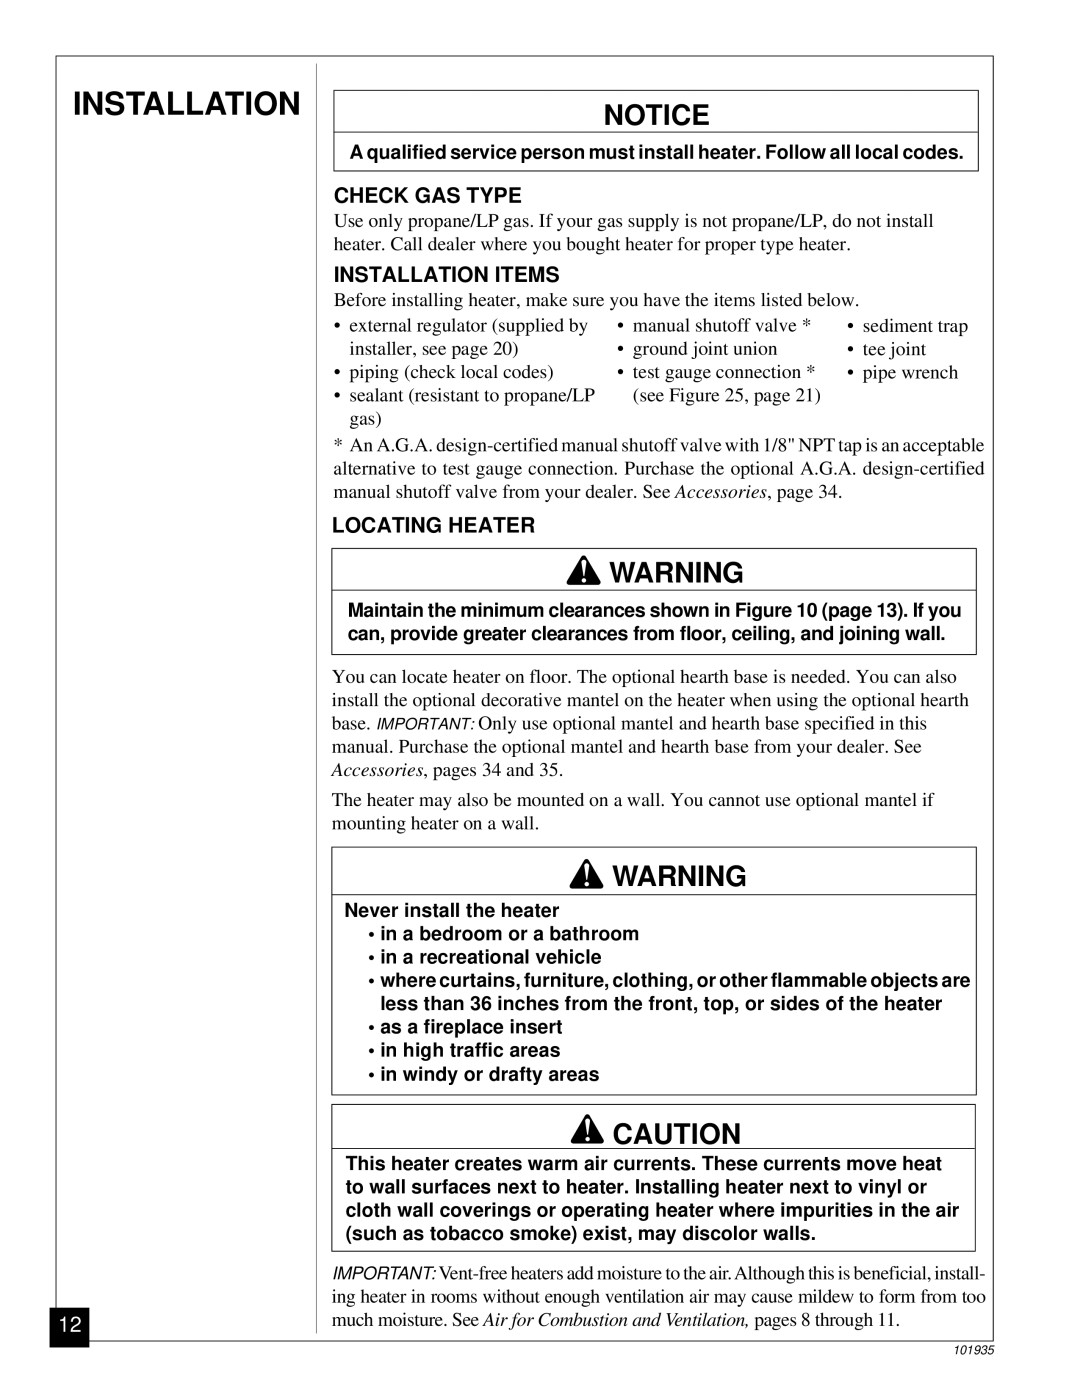
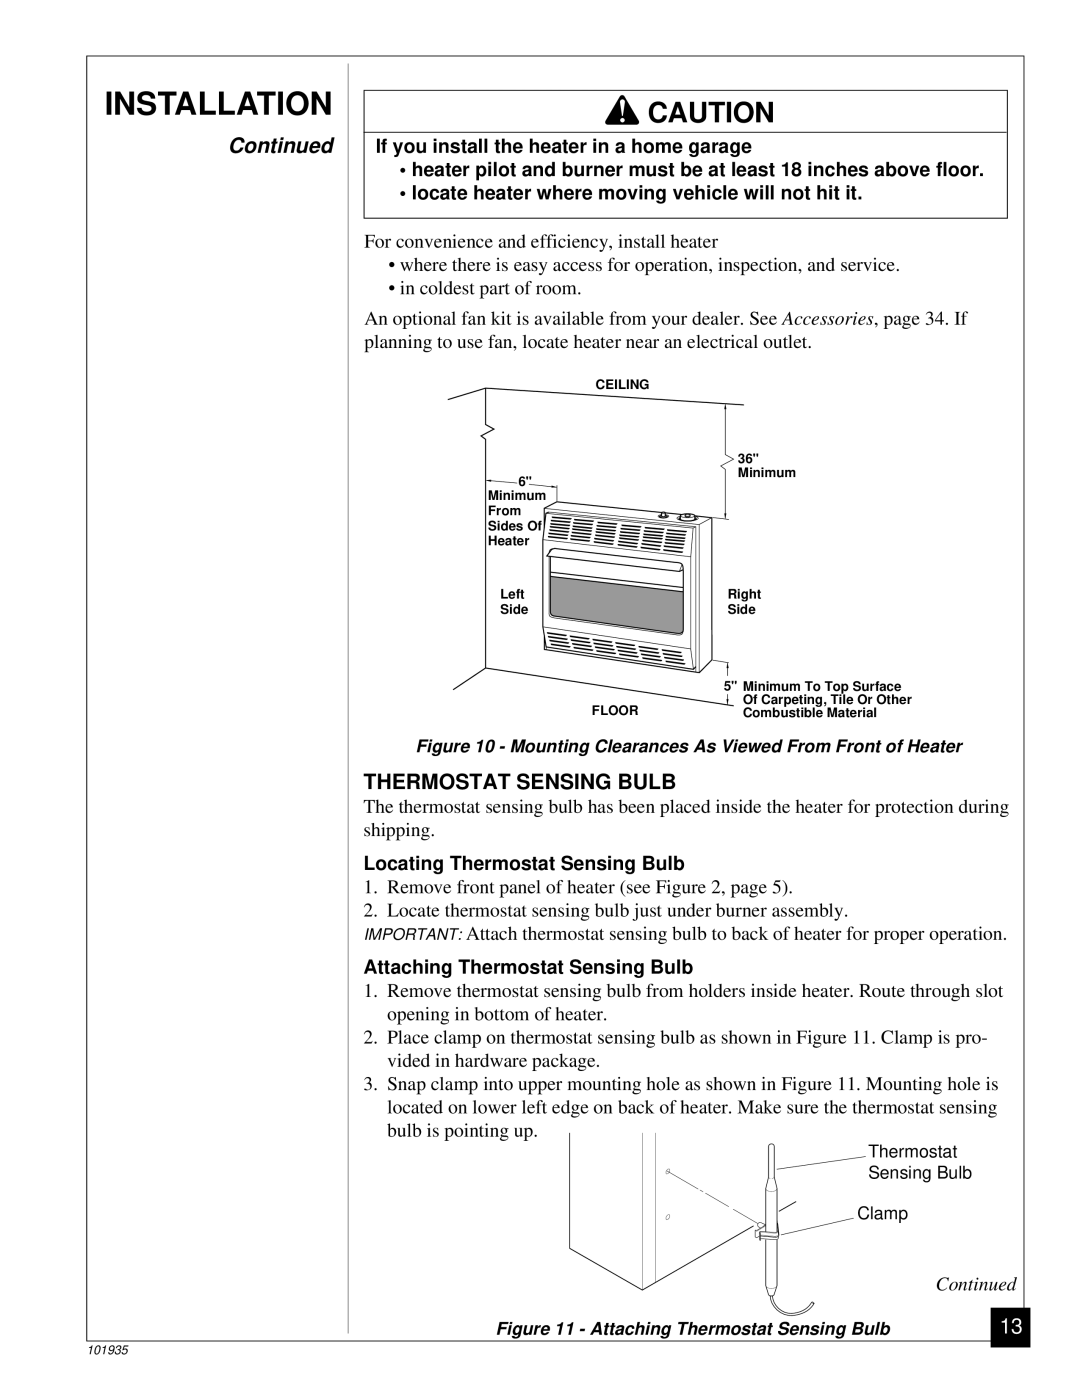
Image 15
Contents WHAT TO DO IF YOU SMELL GAS Do not try to light any appliance OWNER’S OPERATION AND INSTALLATION MANUALVENT-FREE PROPANE/LP GAS COMPACT FIREPLACE Model RFP28TBINFORMATION CONTENTSSAFETY before trying to assemble, operate, or service this heater. ImproperContinued Thermostatic Heat Control Safety DevicePRODUCT IDENTIFICATION Piezo Ignition SystemRemoving Front Panel Of Heater ASSEMBLYInstalling Log ASSEMBLING HEATERAttaching Brass Front Trim to Front Panel Assembling and Attaching Brass Trim ASSEMBLYCOMBUSTION This heater shall not be installed in a confined space unlessAIR FOR VENTILATIONExample 51,200 AIR FOR COMBUSTION AND VENTILATIONDETERMINING AIR FLOW FOR HEATER LOCATION Determining if You Have a Confined or Unconfined Spacetion and ventilation air by one of the methods described in the VENTILATION AIRIf the area in which the heater may be operated is smaller than that defined as an unconfined space, provide adequate combusOutlet VENTILATION AIR ContinuedVentilation Air From Outdoors Ventilated Outlet Attic Airto wall surfaces next to heater. Installing heater next to vinyl or INSTALLATIONINSTALLATION ITEMS Never install the heaterheater pilot and burner must be at least 18 inches above floor If you install the heater in a home garagelocate heater where moving vehicle will not hit it THERMOSTAT SENSING BULBMethods For Attaching Mounting Bracket To Wall INSTALLATIONINSTALLATION OPTIONS Mounting BracketPlacing Heater On Mounting Bracket Attaching Mounting Bracket to WallSecuring Hearth Base to Floor Mounting Heater to Optional Hearth Base Assembling Mantel Installing Mantel to HeaterTighten the screws all the way into the holes Use pipe joint sealant that is resistant to liquid petroleum LP gas CONNECTING TO GAS SUPPLYMake sure external regulator has been installed between propane CONNECTINGPRESSURE TESTING GAS SUPPLY PIPING SYSTEM Test all gas piping and connections for leaks after installing orTest Pressures Equal To or Less Than 1/2 PSIG PRESSURE TESTING HEATER GAS CONNECTIONSFOR YOUR SAFETY READ BEFORE LIGHTING OPERATING HEATERLIGHTING INSTRUCTIONS Do not try to adjust heating levels by using the manual shutoff valve Shutting Off Heater MANUAL LIGHTING PROCEDURETO TURN OFF GAS TO APPLIANCE THERMOSTAT CONTROL OPERATIONPILOT FLAME PATTERN INSPECTING BURNERBURNER FLAME PATTERN CORRECT FLAME PATTERN AT HIGH POSITIONINCORRECT FLAME PATTERN AT HIGH POSITION PROBLEM Turn off heater and let cool before cleaningqualified service person should service and repair heater Never use a wire, needle, or similar object to clean ODS/pilot. ThisContinued TROUBLE- SHOOTING If you cannot reach your gas supplier, call the fire department If you smell gasShut off gas supply Do not try to light any applianceParts Not Under Warranty SERVICEREPLACEMENT Parts Under WarrantyPARTS CENTRALS HEARTH BASE - GHB802B or GHB38 ACCESSORIESMANUAL SHUTOFF VALVE - GA5010 FAN KIT - GA3100A Manual or GA3200TA ThermostatSTANDARD MANTEL Unfinished - GMU801A,B Finished - GMF800A,B PRESTIGE MANTEL Unfinished - GMC23UA Finished - GMC22FA GMC24UACORNER MANTEL Unfinished - GMC33U Finished - GMC32F RFP28TB 12-212-1 PARTS AVAILABLE - NOT SHOWN PARTS LIST RFP28TBPART NUMBER DESCRIPTION101935 101935 WARRANTY INFORMATION LIMITED WARRANTYCOMFORT GLOW VENT-FREE PROPANE/LP GAS COMPACT FIREPLACE