WARNING
•To reduce the risk associated with pinch, entanglement and hazardous voltage:
−Turn electrical supply off and disconnect before performing any adjustments, maintenance or servicing the machine or taping heads
13.8Drive Belt Replacement
Note – 3M recommends the replacement of drive belts in pairs, especially if belts are unevenly worn.
Replacement - See Steps 1 thru 8
Tension Adjustment - See Steps 3, 7 and 9.
1.Crank the upper taping head to its fully raised position.
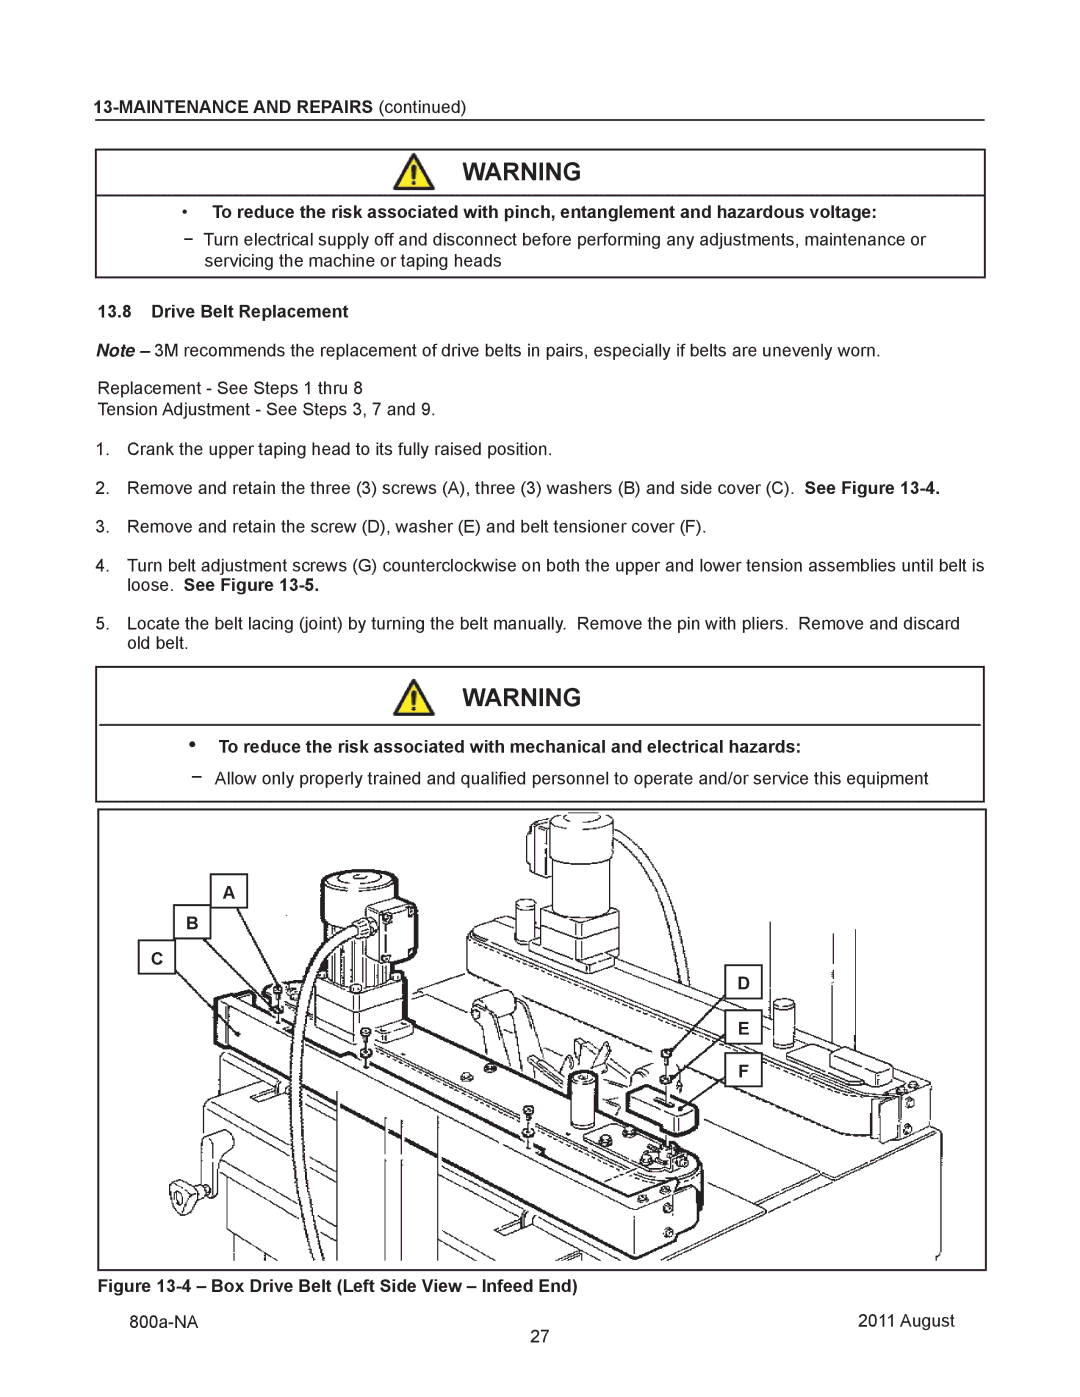
2.Remove and retain the three (3) screws (A), three (3) washers (B) and side cover (C). See Figure
3.Remove and retain the screw (D), washer (E) and belt tensioner cover (F).
4.Turn belt adjustment screws (G) counterclockwise on both the upper and lower tension assemblies until belt is loose. See Figure
5.Locate the belt lacing (joint) by turning the belt manually. Remove the pin with pliers. Remove and discard old belt.
WARNING
•To reduce the risk associated with mechanical and electrical hazards:
−Allow only properly trained and qualified personnel to operate and/or service this equipment
A
B
C
D
E
F
Figure |
| |
| 27 | 2011 August |
|
| |