Maintenance (Continued)
WARNING – Turn air and electrical supplies off and disconnect before beginning maintenance. Failure to comply with this warning could result in severe personal injury or equipment
damage.
Drive Belt Replacement/Tension Adjustment
Note – 3M recommends the replacement of drive belts in pairs, especially if belts are unevenly worn.
REPLACEMENT – STEPS 1-11
TENSION ADJUSTMENT – STEPS 1, 2,
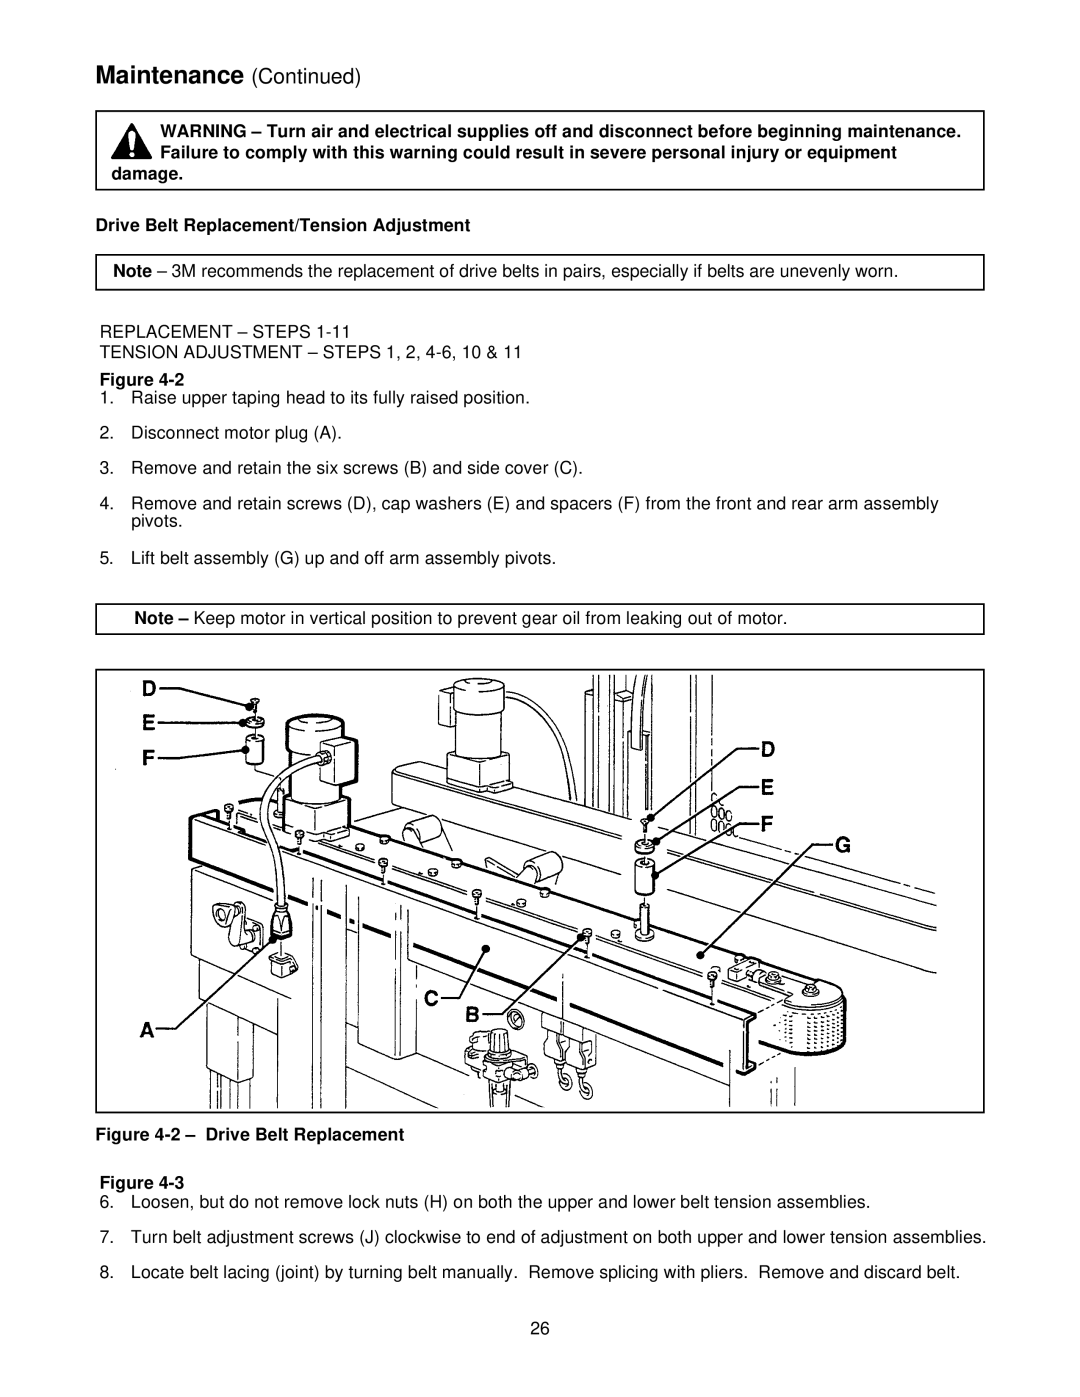
Figure
1.Raise upper taping head to its fully raised position.
2.Disconnect motor plug (A).
3.Remove and retain the six screws (B) and side cover (C).
4.Remove and retain screws (D), cap washers (E) and spacers (F) from the front and rear arm assembly pivots.
5.Lift belt assembly (G) up and off arm assembly pivots.
Note
Figure 4-2 – Drive Belt Replacement
Figure
6.Loosen, but do not remove lock nuts (H) on both the upper and lower belt tension assemblies.
7.Turn belt adjustment screws (J) clockwise to end of adjustment on both upper and lower tension assemblies.
8.Locate belt lacing (joint) by turning belt manually. Remove splicing with pliers. Remove and discard belt.
26