Manual
Page 11 / 33- Revision 01
ARE I2 / RS 232 – Installation Guide
4.3.5Final Assembly of the Cable Pipe
•Pull by and by all the cable back, until the isolation of the cables are near to beginning of the cable pipes.
•Fasten nuts (5) of the cable pipes with the right tool (17mm).
•Do this carefully, to ensure the tightness of the protection class of IP 65..
•Plug the finished assembled
4.3.6Plug in of the SAB Cab
Attention:
Before plugging the SAB Cab to the connectors of the reader, make sure that the grounding of the device is well done. Otherwise the electronic may be destroyed by elec- trostatic discharge (ESD).
1
B ![]()
A ![]()
![]() 2
2
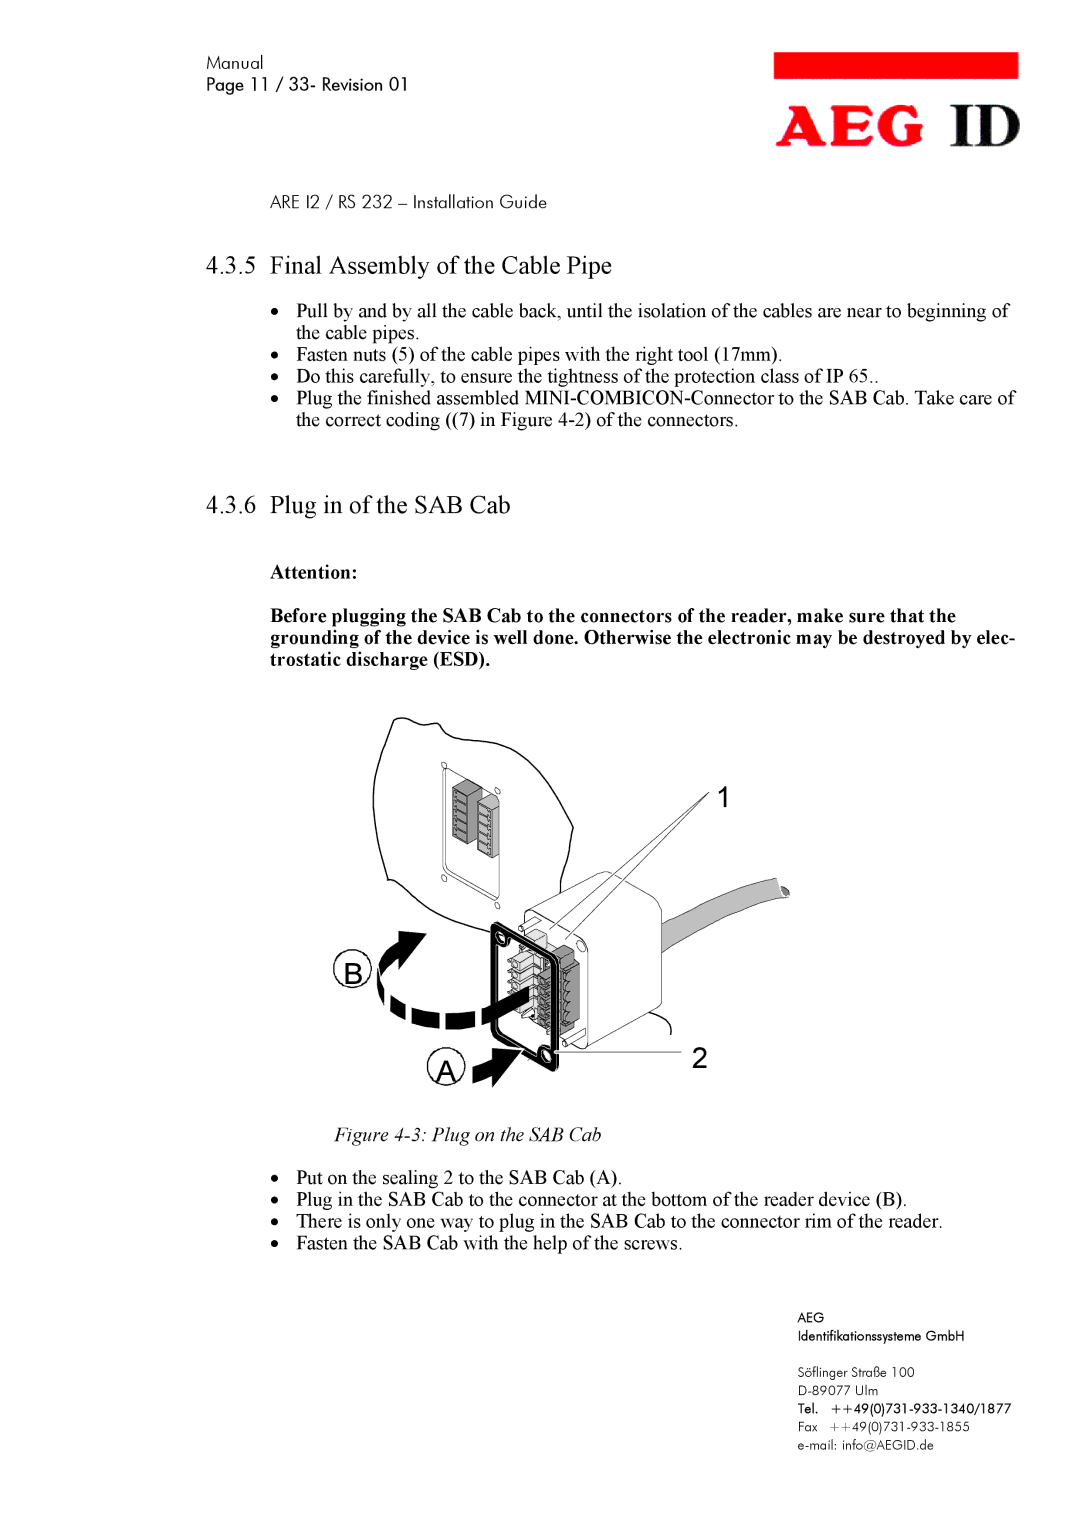
Figure 4-3: Plug on the SAB Cab
•Put on the sealing 2 to the SAB Cab (A).
•Plug in the SAB Cab to the connector at the bottom of the reader device (B).
•There is only one way to plug in the SAB Cab to the connector rim of the reader.
•Fasten the SAB Cab with the help of the screws.
AEG
Identifikationssysteme GmbH
Söflinger Straße 100
Tel.
