Manual
Page 9 / 33- Revision 01
ARE I2 / RS 232 – Installation Guide
4.3.3 Mounting of the Power Supply Cable
The power supply cable must be mounted in following steps:
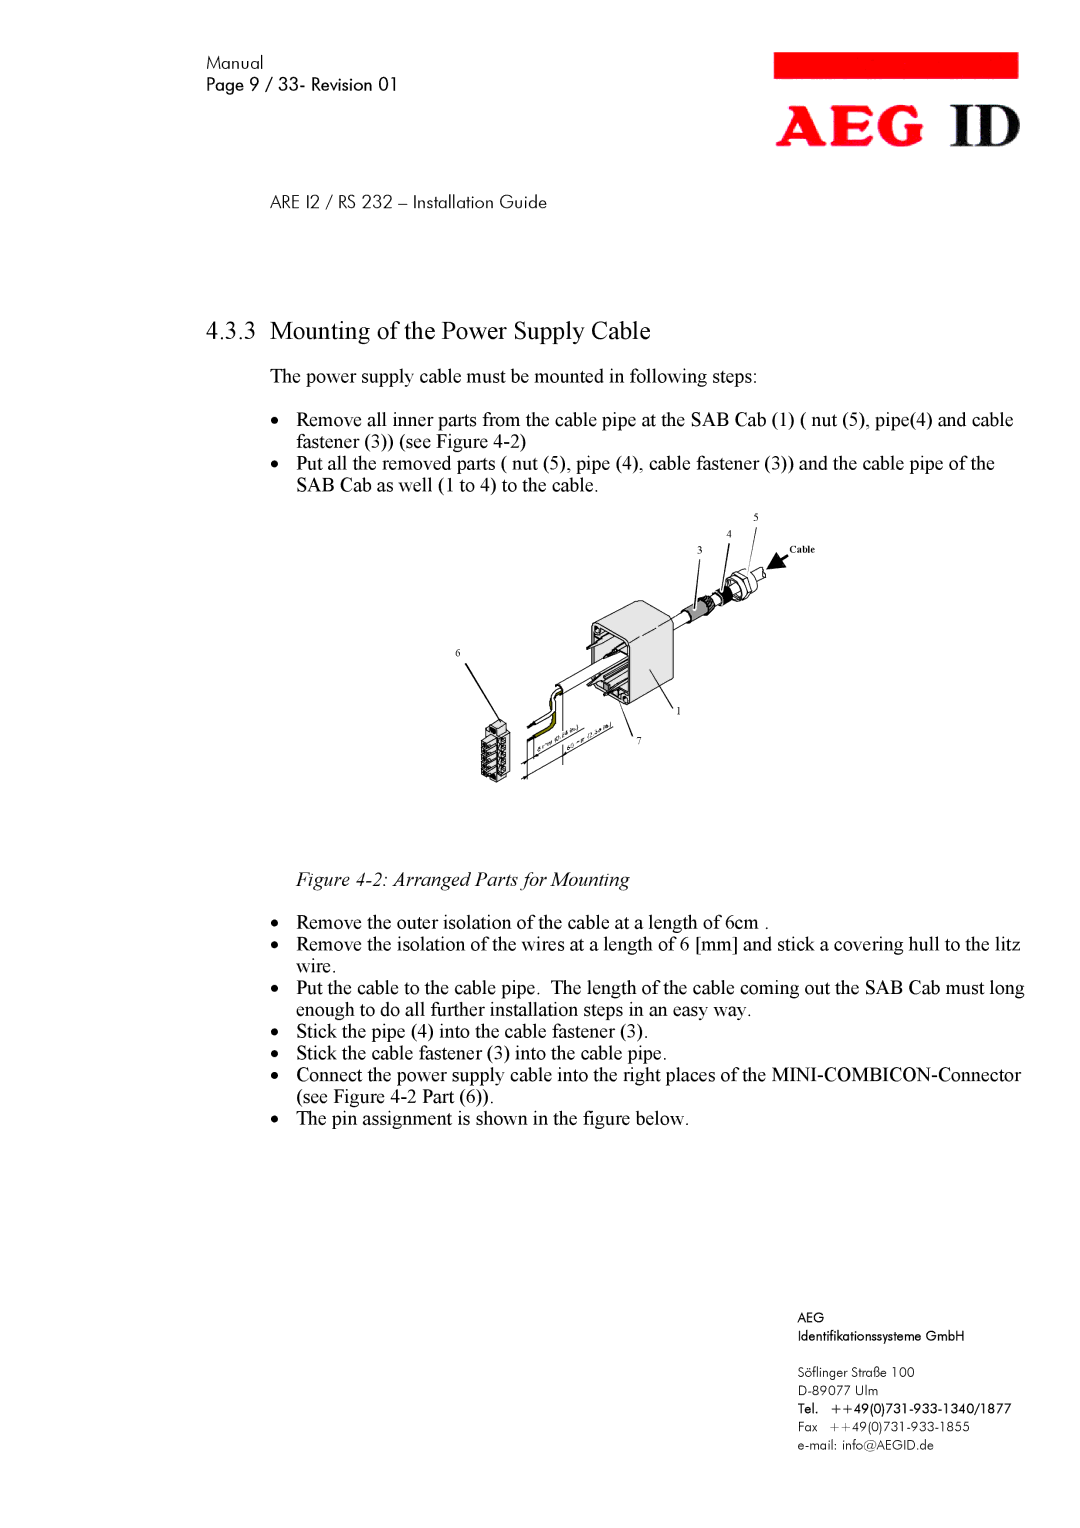
•Remove all inner parts from the cable pipe at the SAB Cab (1) ( nut (5), pipe(4) and cable fastener (3)) (see Figure
•Put all the removed parts ( nut (5), pipe (4), cable fastener (3)) and the cable pipe of the SAB Cab as well (1 to 4) to the cable.
5
4
3Cable
6
1
7
Figure 4-2: Arranged Parts for Mounting
•Remove the outer isolation of the cable at a length of 6cm .
•Remove the isolation of the wires at a length of 6 [mm] and stick a covering hull to the litz wire.
•Put the cable to the cable pipe. The length of the cable coming out the SAB Cab must long enough to do all further installation steps in an easy way.
•Stick the pipe (4) into the cable fastener (3).
•Stick the cable fastener (3) into the cable pipe.
•Connect the power supply cable into the right places of the
•The pin assignment is shown in the figure below.
AEG
Identifikationssysteme GmbH
Söflinger Straße 100
Tel.