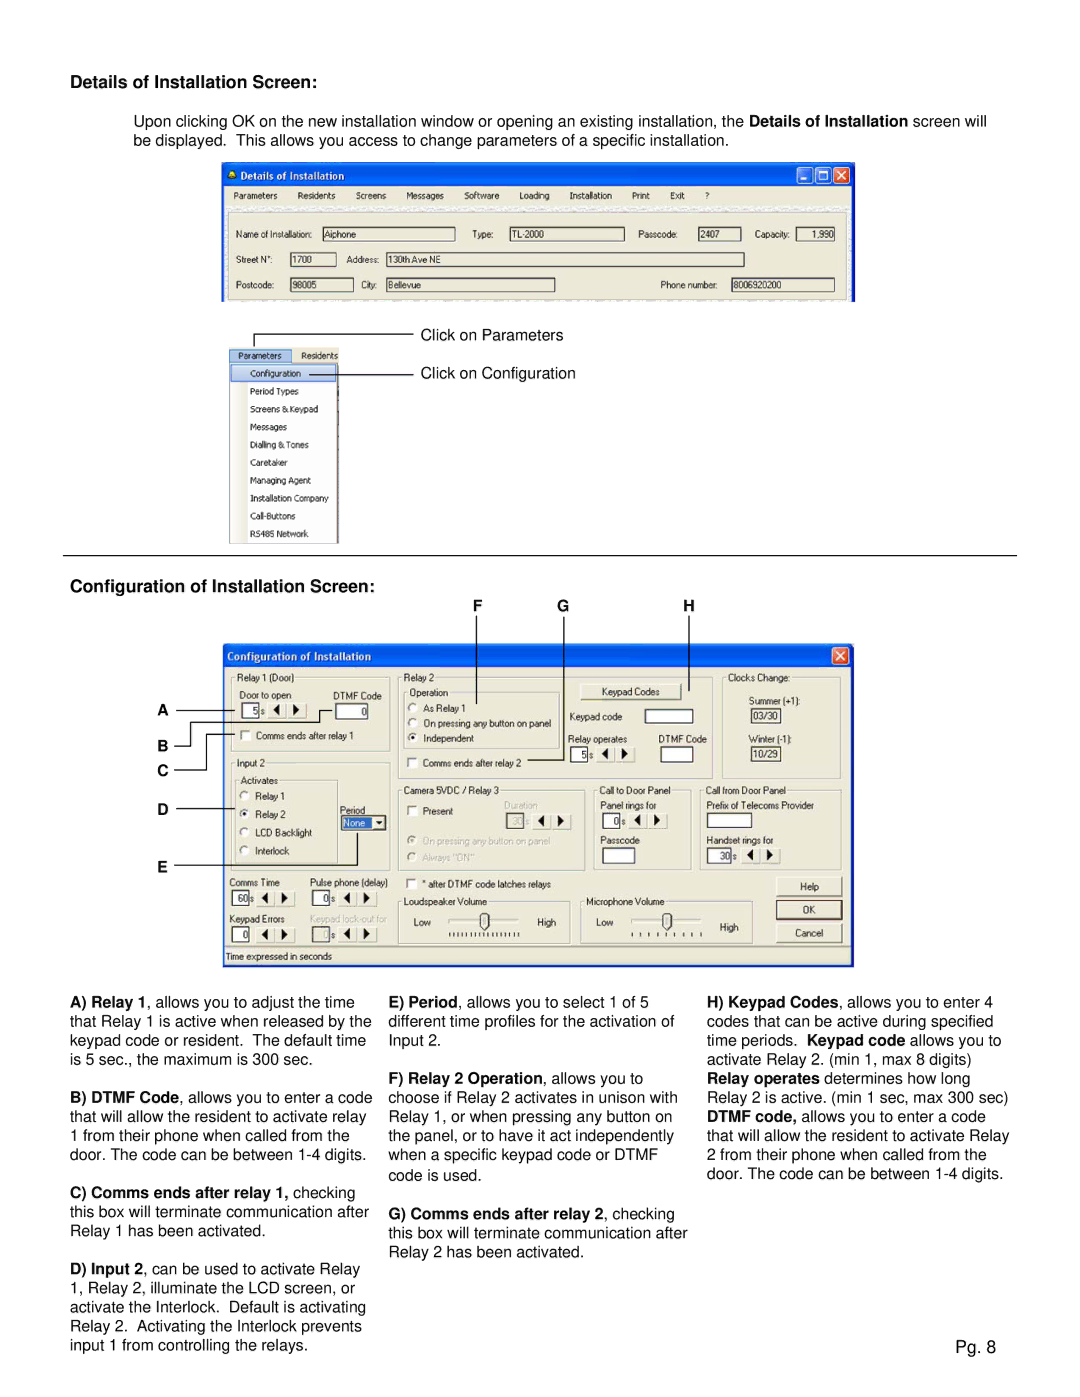
Details of Installation Screen:
Upon clicking OK on the new installation window or opening an existing installation, the Details of Installation screen will be displayed. This allows you access to change parameters of a specific installation.
Click on Parameters
Click on Configuration
Configuration of Installation Screen:
A
B![]()
C
D
E
F GH
A) Relay 1, allows you to adjust the time |
that Relay 1 is active when released by the |
keypad code or resident. The default time |
is 5 sec., the maximum is 300 sec. |
B) DTMF Code, allows you to enter a code |
that will allow the resident to activate relay |
1 from their phone when called from the |
door. The code can be between |
C) Comms ends after relay 1, checking |
this box will terminate communication after |
Relay 1 has been activated. |
D) Input 2, can be used to activate Relay |
1, Relay 2, illuminate the LCD screen, or |
activate the Interlock. Default is activating |
Relay 2. Activating the Interlock prevents |
E)Period, allows you to select 1 of 5 different time profiles for the activation of Input 2.
F)Relay 2 Operation, allows you to choose if Relay 2 activates in unison with Relay 1, or when pressing any button on the panel, or to have it act independently when a specific keypad code or DTMF code is used.
G)Comms ends after relay 2, checking this box will terminate communication after Relay 2 has been activated.
H)Keypad Codes, allows you to enter 4 codes that can be active during specified time periods. Keypad code allows you to activate Relay 2. (min 1, max 8 digits)
Relay operates determines how long Relay 2 is active. (min 1 sec, max 300 sec) DTMF code, allows you to enter a code that will allow the resident to activate Relay 2 from their phone when called from the door. The code can be between
input 1 from controlling the relays. |
Pg. 8