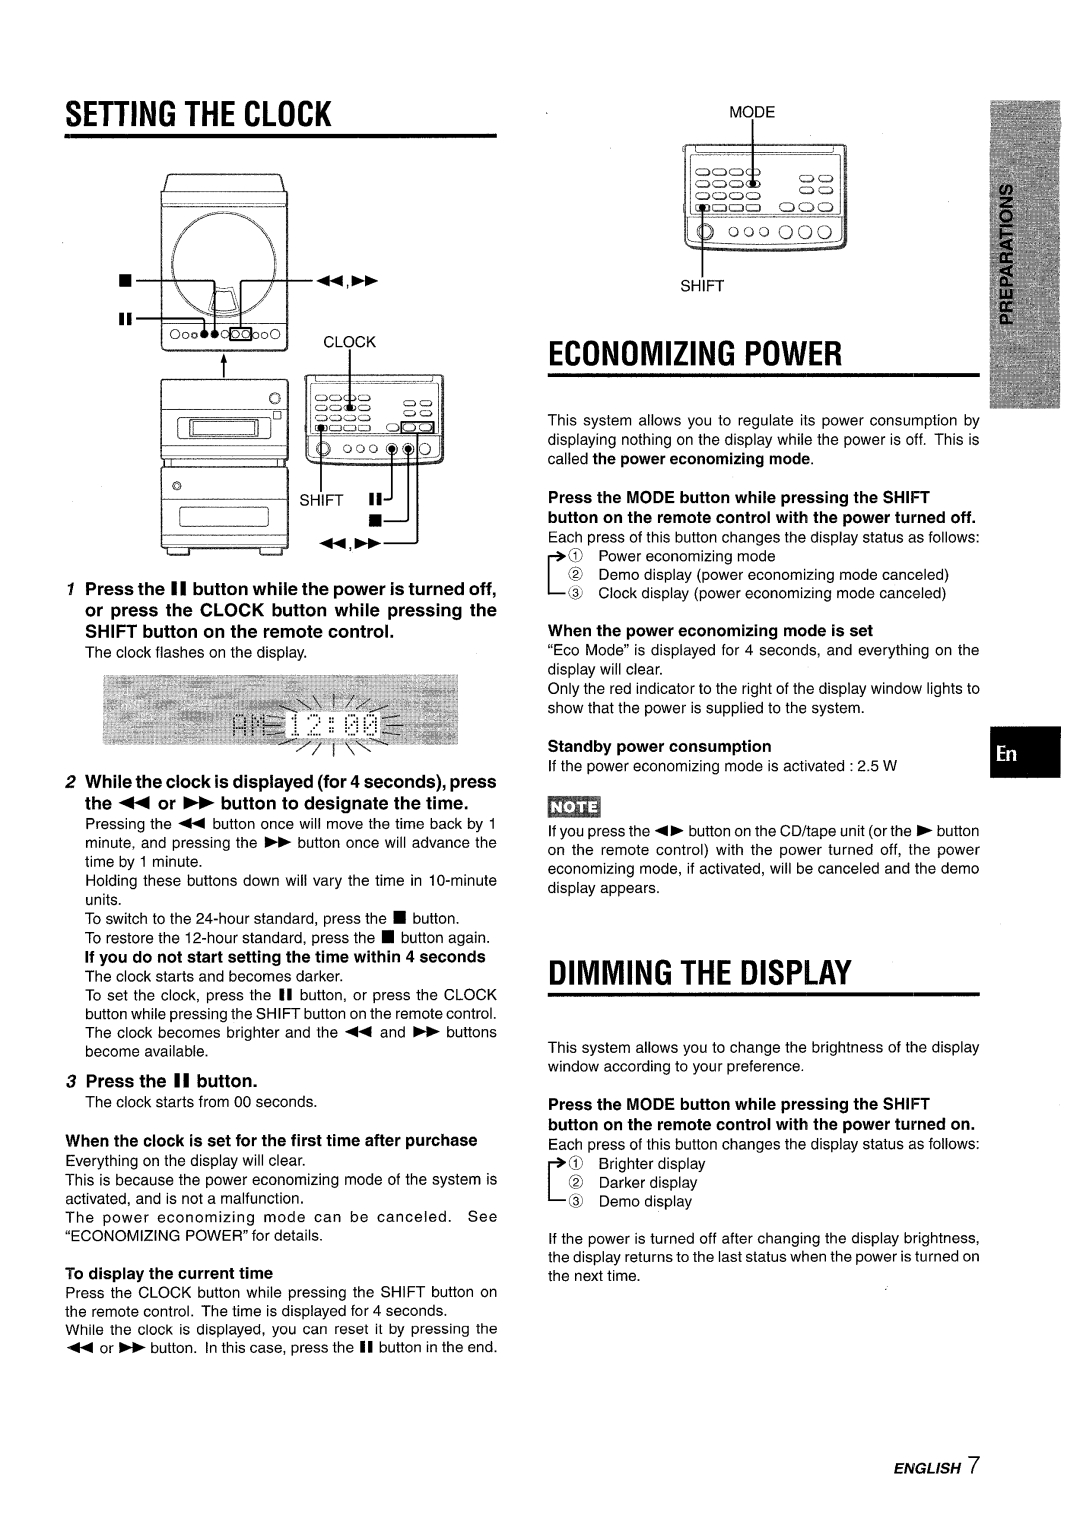
SETTING THE CLOCK
CLOCK
b
Ikia=LQl”
1 Press the II button while the power is turned off, or press the CLOCK button ‘while pressing the SHIFT button on the remote control.
The clock flashes on the display.
2While the clock is displayed (for 4 seconds), press
the ++ or ~ button to designate the time.
Pressing the + button once will move the time back by 1 minute, and pressing the ➤F button once will advance the time by 1 minute.
Holding these buttons down will vary the time in
To switch to the
To restore the
If you do not start setting the time within 4 seconds
The clock starts and becomes darker.
To set the clock, press the El button, or press the CLOCK button while pressing the SHIFT button on the remote control. The clock becomes brighter and the ++ and _ buttons become available.
3Press the 11 button.
The clock starts from 00 seconds.
When the clock is set for the first time after purchase
Everything on the display will clear.
This is because the power economizing mode of the system is activated, and is not a malfunction.
The power economizing mode can be canceled. See “ECONOMIZING POWER” for details.
To display the current time
Press the CLOCK button while pressing the SHIFT button on the remote control. The time is displayed for 4 seconds.
While the clock is displayed, you can reset it by pressing the
+ | or - | button. In this case, press the II button in the end. |
MODE
SHiFT
ECONOMIZING POWER
This system allows you to regulate its power consumption by displaying nothing on the display while the power is off. This is
called the power economizing mode.
Press the MODE button while pressing the SHIFT button on the remote control with the power turned off.
Each press of this button changes the display status as follows:
@@Power economizing mode
I@ Demo display (power economizing mode canceled)
~@ Clock display (power economizing mode canceled)
When the power economizing mode is set
“ECOMode” is displayed for 4 seconds, and everything on the display will clear.
Only the red indicator to the right of the display window lights to show that the power is supplied to the system.
Standby power consumption
If the power economizing mode is activated :2.5 W
m
If you press the <P button on the CD/tape unit (or the P button on the remote control) with the power turned off, the power economizing mode, if activated, will be canceled and the demo display appears.
DIMMING THE DISPLAY
This system allows you to change the brightness of the display window according to your preference.
Press the MODE button while pressing the SHIFT
button on the remote control with the power turned on.
Each press of this button changes the display status as follows:
@Brighter display
@Darker display r @ Demo display
If the power is turned off after changing the display brightness, the display returns to the last status when the power is turned on the next time.
ENGLISH 7
