9102/3 Mounting Options | Shelf Mounting Options |
1.5.2 9102/3 Mounting Options
Because of the depth of the 9102/3 unit, there are adjustable bracket extensions, and attached to these extensions are the rear brackets.
Note: Regardless of the mounting option chosen, the rear brackets must be used.
1.5.2.1 Front Mounting Option
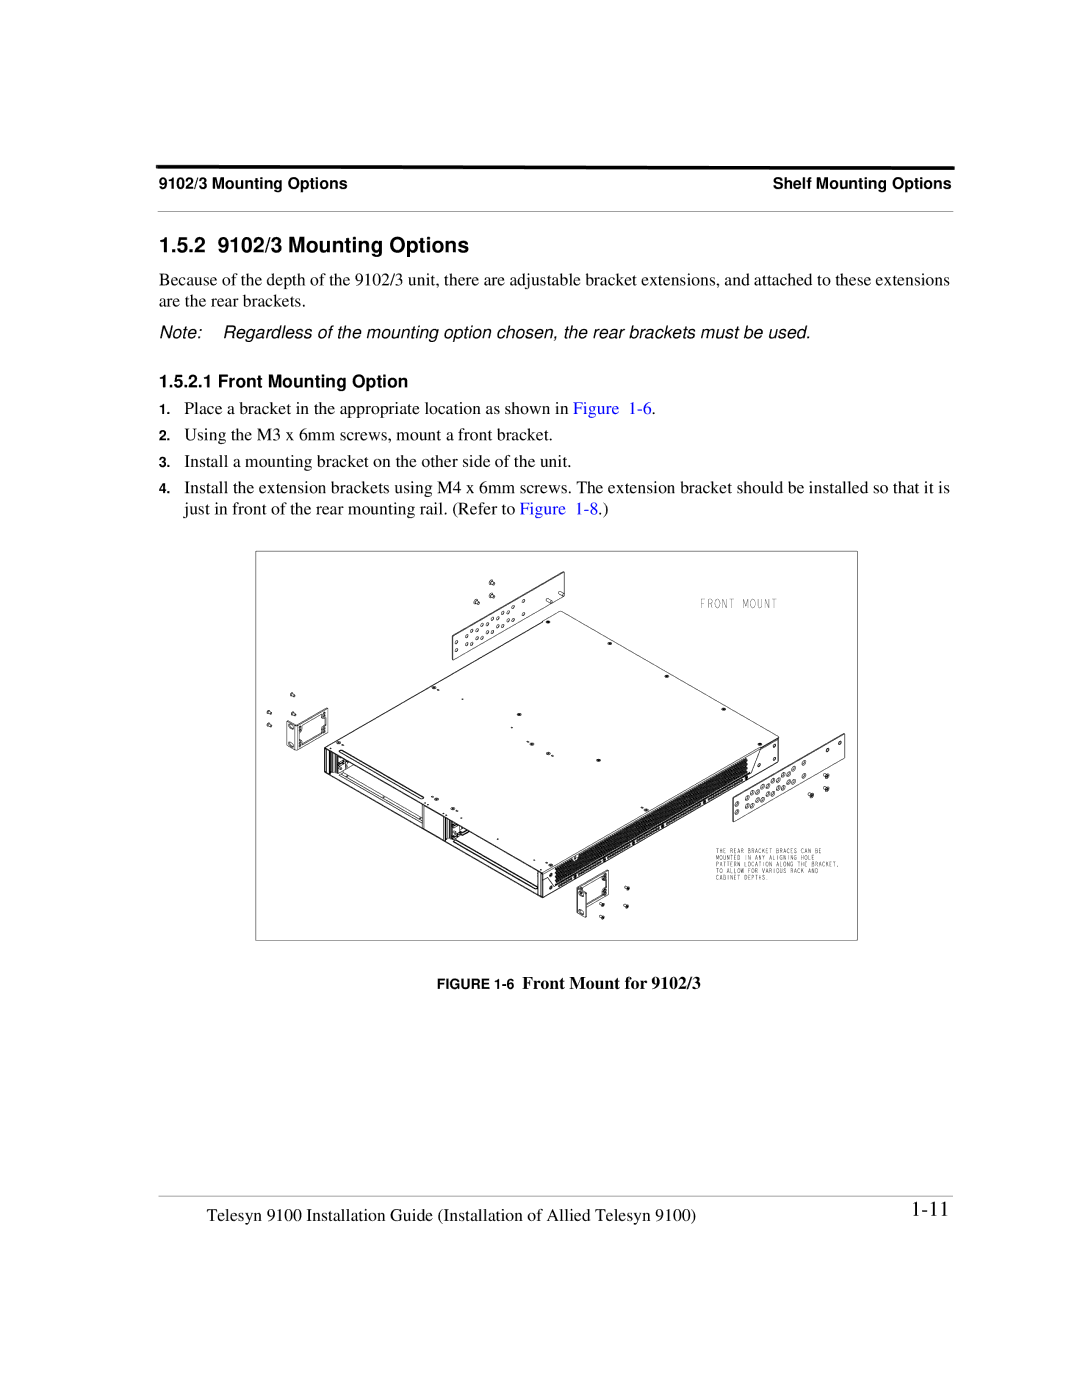
1.Place a bracket in the appropriate location as shown in Figure
2.Using the M3 x 6mm screws, mount a front bracket.
3.Install a mounting bracket on the other side of the unit.
4.Install the extension brackets using M4 x 6mm screws. The extension bracket should be installed so that it is just in front of the rear mounting rail. (Refer to Figure
FIGURE 1-6 Front Mount for 9102/3
Telesyn 9100 Installation Guide (Installation of Allied Telesyn 9100) |