INSTALLATION
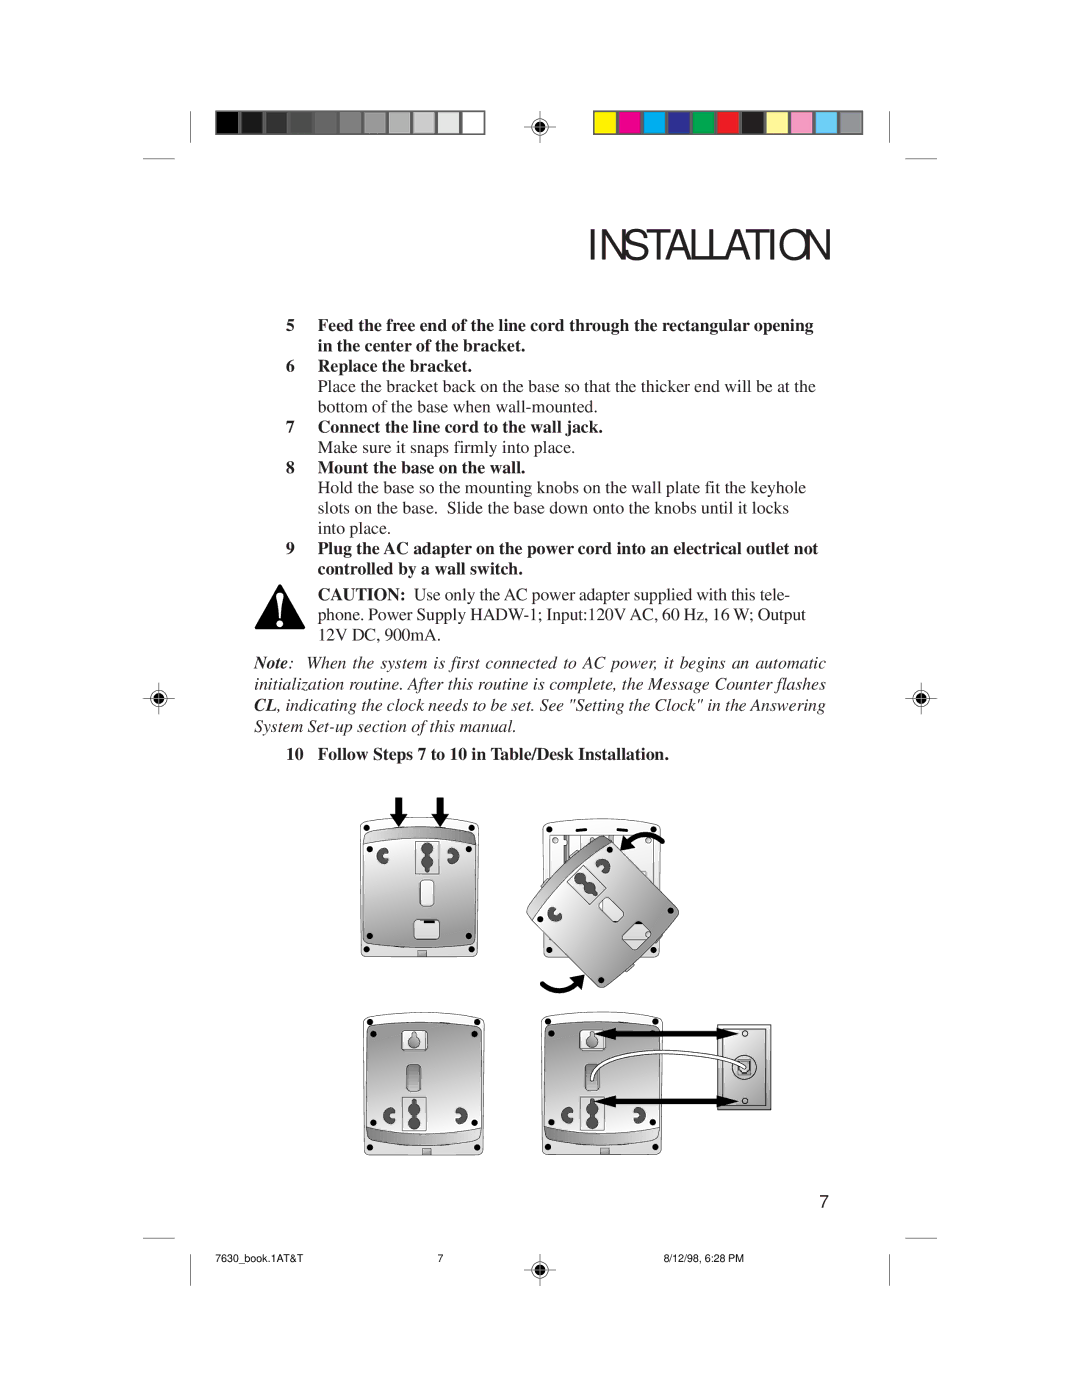
5Feed the free end of the line cord through the rectangular opening in the center of the bracket.
6Replace the bracket.
Place the bracket back on the base so that the thicker end will be at the bottom of the base when
7Connect the line cord to the wall jack. Make sure it snaps firmly into place.
8Mount the base on the wall.
Hold the base so the mounting knobs on the wall plate fit the keyhole slots on the base. Slide the base down onto the knobs until it locks into place.
9Plug the AC adapter on the power cord into an electrical outlet not controlled by a wall switch.
CAUTION: Use only the AC power adapter supplied with this tele- phone. Power Supply
Note: When the system is first connected to AC power, it begins an automatic initialization routine. After this routine is complete, the Message Counter flashes CL, indicating the clock needs to be set. See "Setting the Clock" in the Answering System
10 Follow Steps 7 to 10 in Table/Desk Installation.
7
7630_book.1AT&T | 7 | 8/12/98, 6:28 PM |