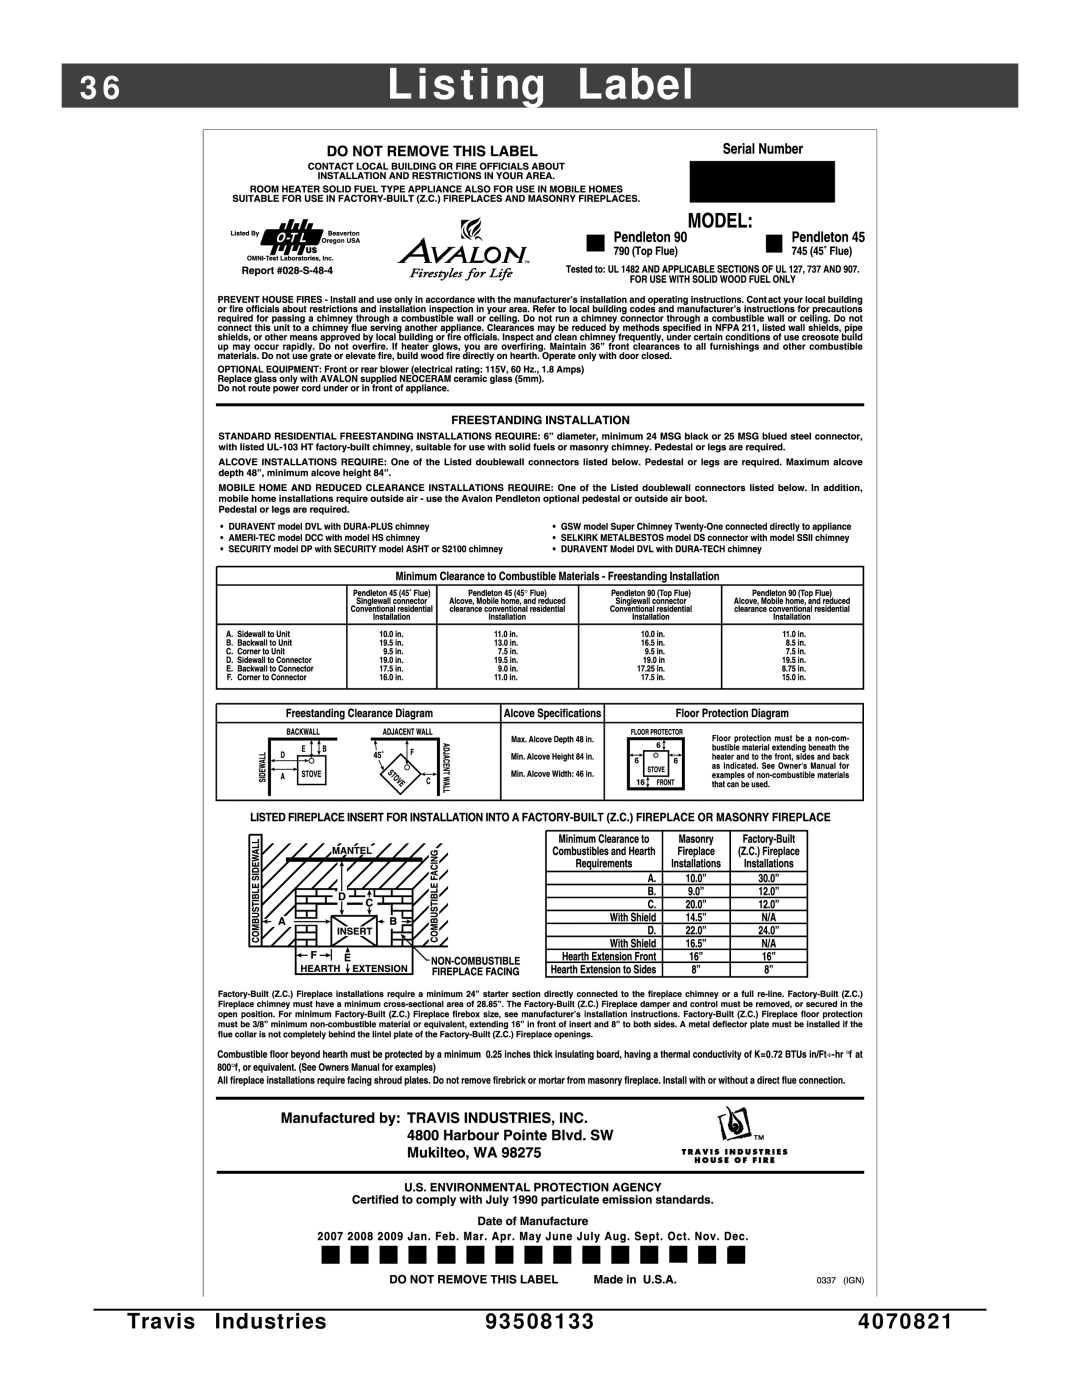
790, 745 specifications
Avalon Stoves has made a name for itself in the realm of high-efficiency wood stoves, and the Avalon 745 and Avalon 790 models stand out as exceptional choices for homeowners looking to heat their spaces sustainably and effectively. These units are designed with a focus on performance, aesthetics, and user-friendliness, making them ideal for both new installations and replacements.One of the main features of the Avalon 745 is its unique design that accommodates larger logs while maintaining an efficient burn. With a firebox capacity of 3.4 cubic feet, this stove can hold logs up to 18 inches in length, allowing for longer burn times and reduced wood handling. The 790 model, on the other hand, offers an even larger capacity, making it suited for heating larger spaces or for users who prefer fewer reloads. Both models feature a top-loading design that simplifies the process of adding fuel.
In terms of technology, Avalon stoves employ a range of advanced features to optimize heating output. One key aspect is the secondary combustion system, which enhances efficiency by allowing the smoke and gases released during burning to combust again. This not only maximizes heat output but also minimizes emissions, making the stove a more environmentally friendly option. Additionally, the air wash system helps keep the glass clean, providing an unobstructed view of the fire while reducing the frequency of maintenance.
The construction quality of Avalon stoves is noteworthy. Built with heavy-duty steel and lined with firebrick, these stoves are designed for durability and heat retention. The high-efficiency design ensures that the heat generated is distributed evenly throughout the room, providing consistent warmth even during the coldest months. With an EPA certification, both the 745 and 790 models meet stringent emission standards, making them one of the cleaner-burning options available.
Aesthetic appeal is also a significant consideration in the design of Avalon stoves. Both models feature a sleek, contemporary look that can seamlessly integrate into a variety of home decors. Customers can choose from a range of finishes and door styles to match their personal preferences and existing interiors.
In conclusion, the Avalon 745 and 790 stoves highlight the brand's commitment to efficiency, quality, and style. With their advanced technologies, robust construction, and elegant designs, these stoves not only provide warmth but also enhance the ambiance of any living space. For homeowners seeking a reliable and attractive heating solution, Avalon stoves are a commendable choice.