3.Turn on the printer and configure using Telnet or other communications program.
4.Connect the printer’s radio cable to the printer’s serial port.
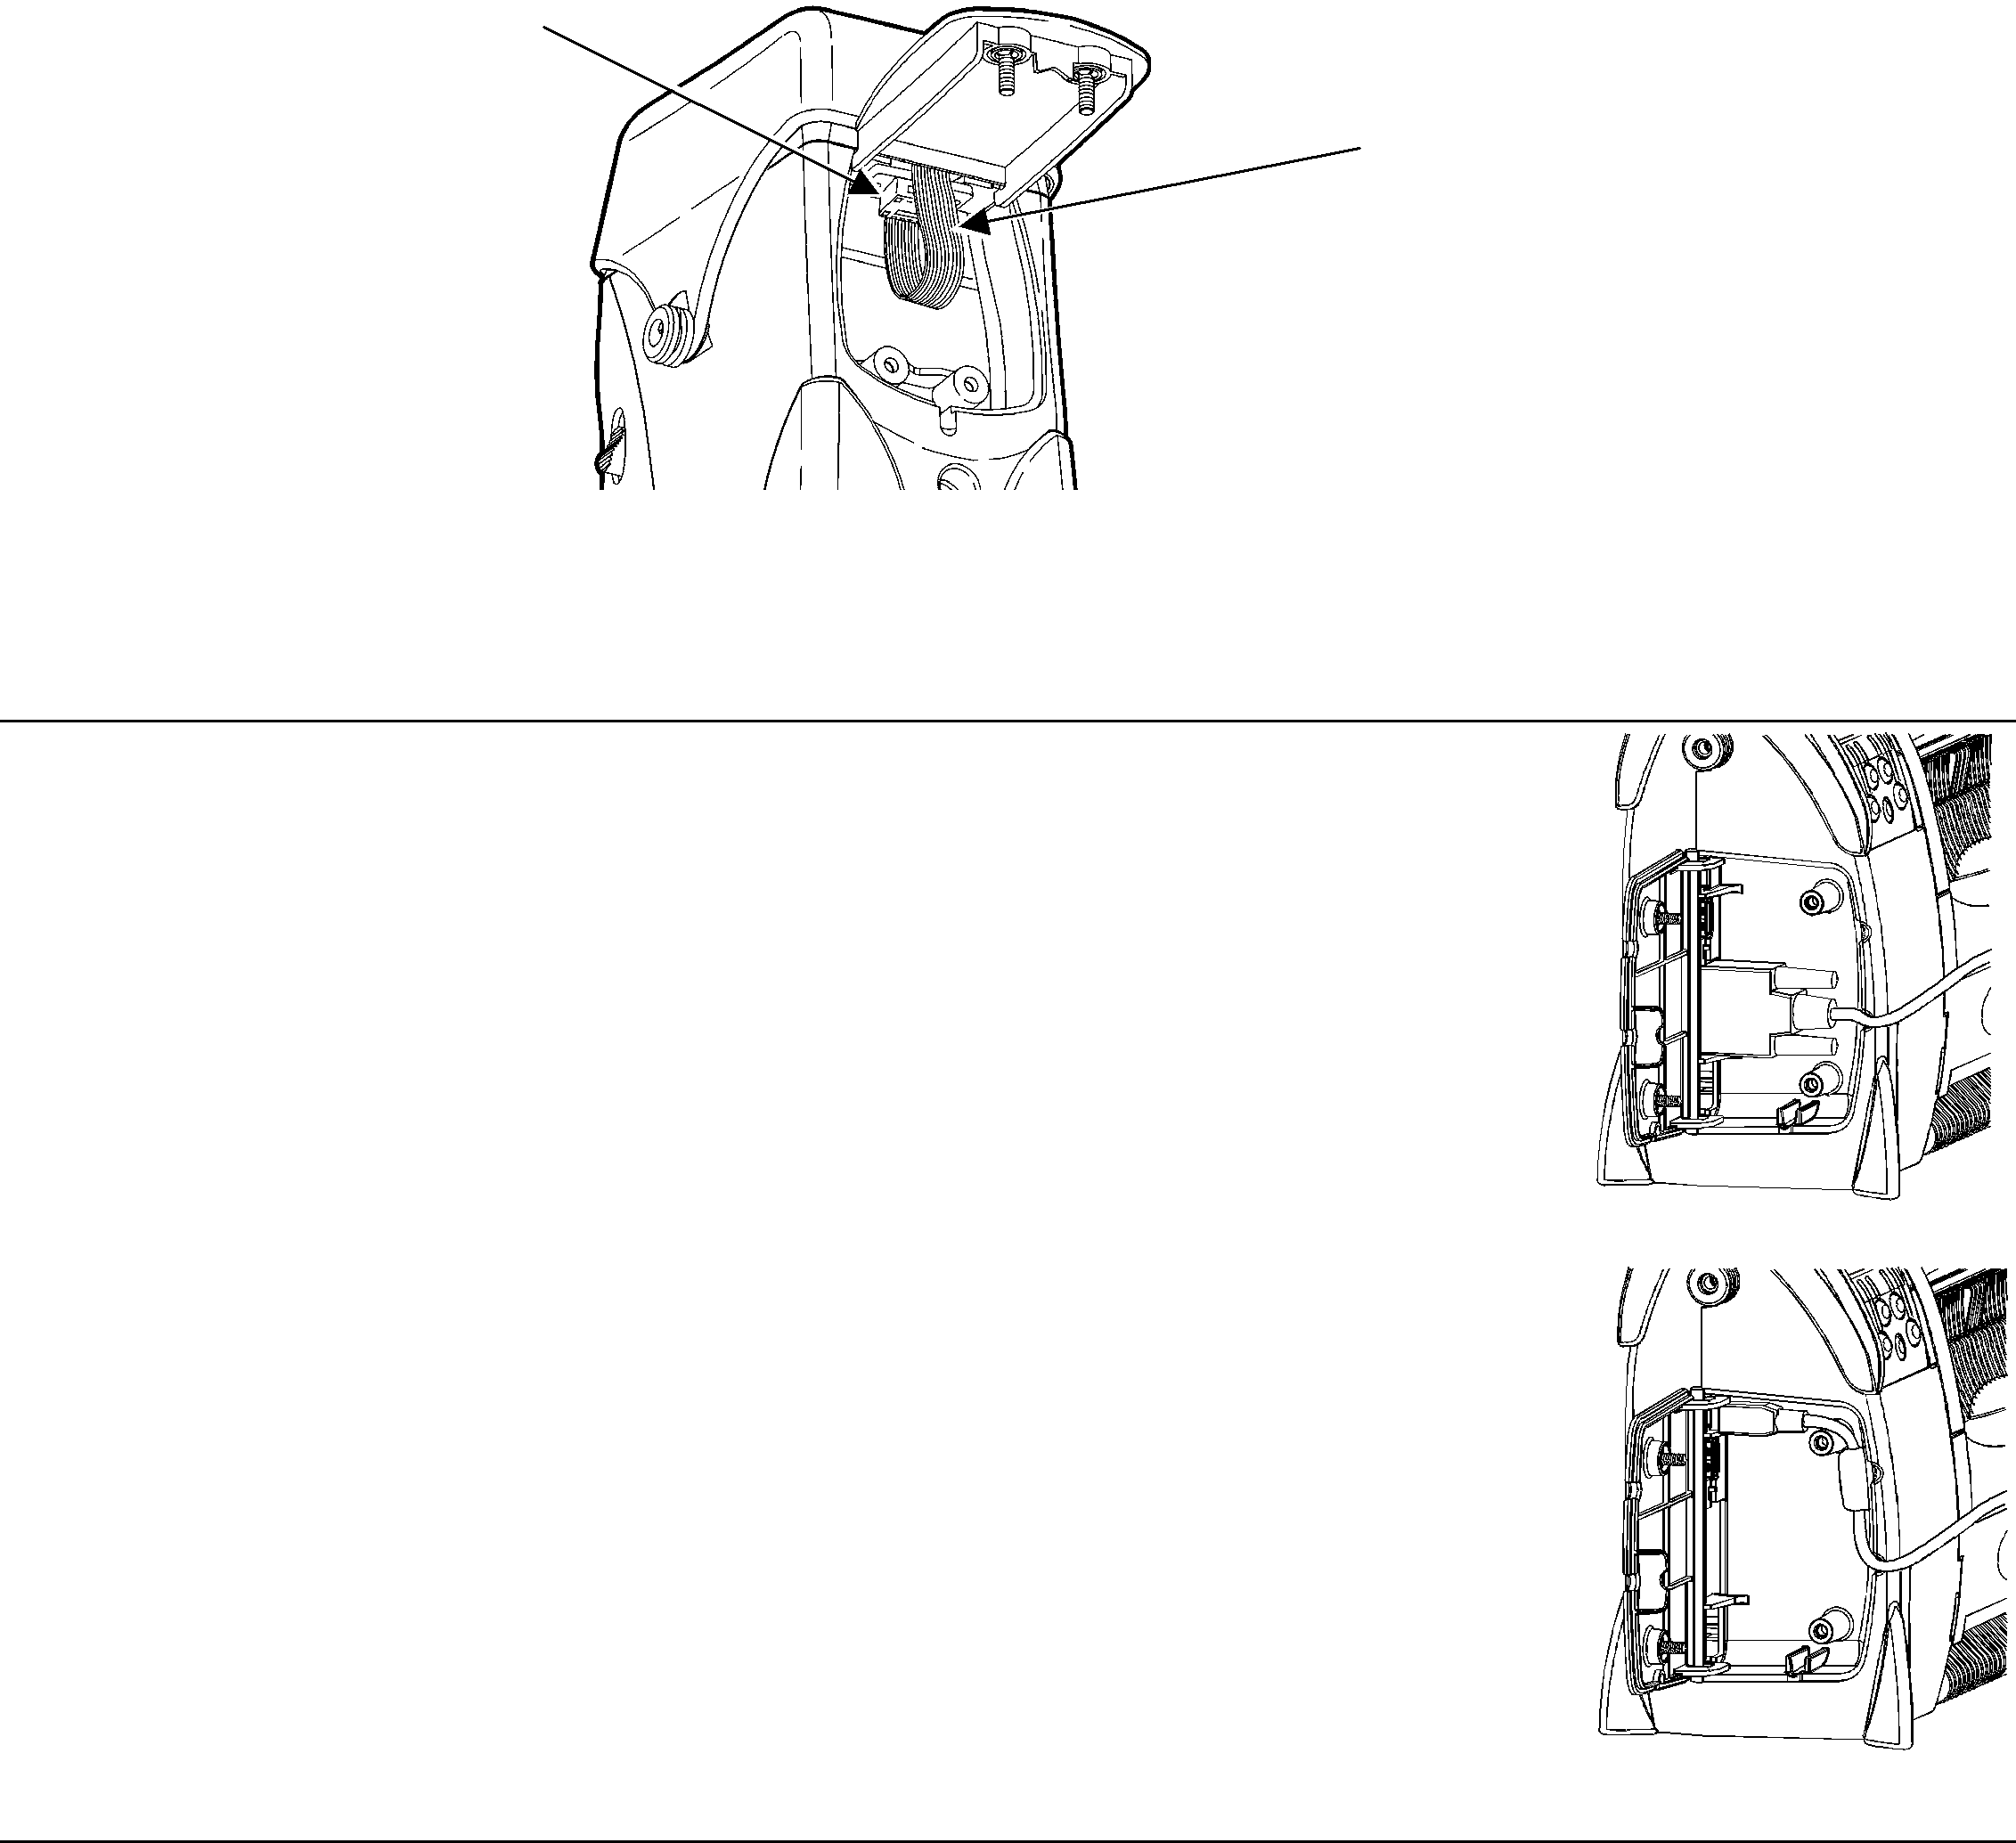
Serial Port
Radio Cable
5.Turn off the printer, wait a few seconds, and then turn on the printer. Your printer is ready to use.
S e t t i n g u p t h e 9 4 9 3 ™ U s i n g D i r e c t S e r i a l C o n n e c t i o n s
Use a serial cable or a USB cable for direct communication with the printer. The USB port can function as either a serial port or a parallel port. Refer to the System Administrator’s Guide for more information about changing the USB port’s function.
1. Open the hinged cable door on the side of the printer by loosening the two screws with a Phillips screwdriver.
6.Plug the DB9 connector into the DB9 port or plug a USB type A or USB
7.Place the cable in one of the cable cavities.
8.Turn on the printer and configure using Telnet or other communications program. See Chapter 6, “Telnet Console Commands” for more information.
9.Turn off the printer, wait a few seconds, and
then turn on the printer. Your printer is ready to use.
DB9 cable shown
I n s t a l l i n g t h e S o f t w a r e
USB
The software works with Microsoft Windows NT 4, 2000, XP, and Vista™ operating systems. Follow these steps to install the NetManager software and configure the print server. You can also download the utility from our Web site.
1. Insert the Monarch® Printer Documentation
2. Select Drivers & Utilities, then NetManager.