60AXIS 223M - Replacing the lens
Replacing the lens
If the lens on the AXIS 223M needs to be replaced or if the camera was supplied without a lens, a new lens can be fitted quickly and easily. As the AXIS 223M is designed with a
Note: Although the lens supplied with your product can be directly replaced with any
Removing and attaching the lens
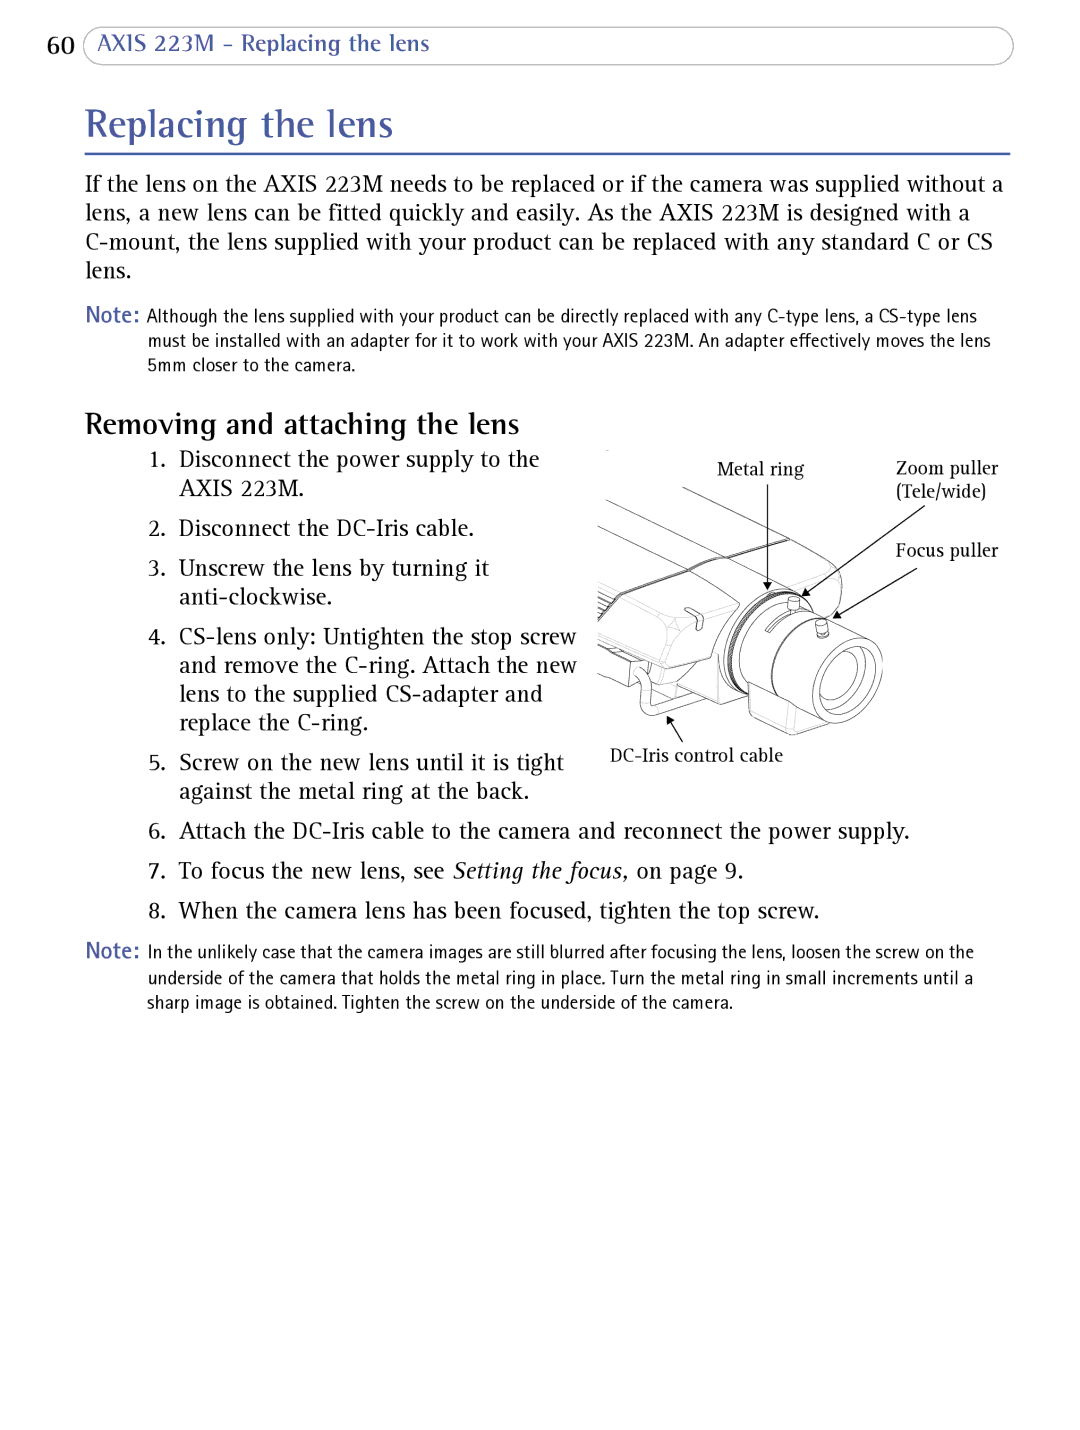
1.Disconnect the power supply to the AXIS 223M.
2.Disconnect the
3.Unscrew the lens by turning it
4.
5.Screw on the new lens until it is tight against the metal ring at the back.
Metal ring | Zoom puller | |
|
| (Tele/wide) |
|
| |
|
| Focus puller |
|
|
|
6.Attach the
7.To focus the new lens, see Setting the focus, on page 9.
8.When the camera lens has been focused, tighten the top screw.
Note: In the unlikely case that the camera images are still blurred after focusing the lens, loosen the screw on the underside of the camera that holds the metal ring in place. Turn the metal ring in small increments until a sharp image is obtained. Tighten the screw on the underside of the camera.