14 | Installing the AXIS 230 | AXIS 230 |
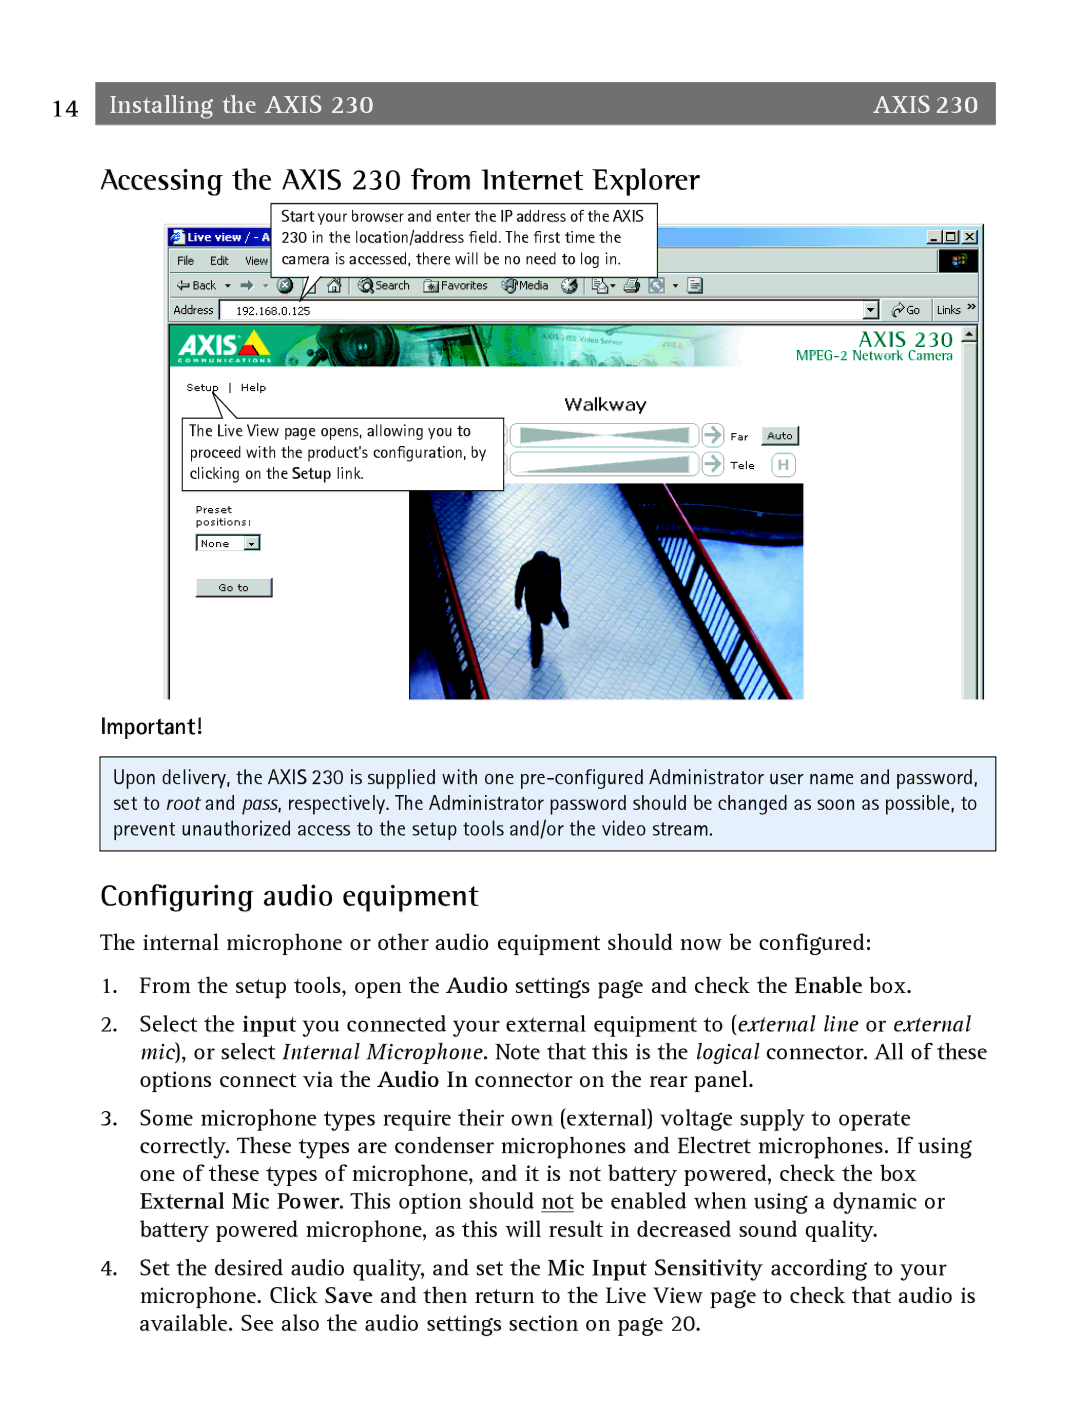
Accessing the AXIS 230 from Internet Explorer
Start your browser and enter the IP address of the AXIS 230 in the location/address field. The first time the camera is accessed, there will be no need to log in.
The Live View page opens, allowing you to proceed with the product’s configuration, by clicking on the Setup link.
Important!
Upon delivery, the AXIS 230 is supplied with one
Configuring audio equipment
The internal microphone or other audio equipment should now be configured:
1.From the setup tools, open the Audio settings page and check the Enable box.
2.Select the input you connected your external equipment to (external line or external mic), or select Internal Microphone. Note that this is the logical connector. All of these options connect via the Audio In connector on the rear panel.
3.Some microphone types require their own (external) voltage supply to operate correctly. These types are condenser microphones and Electret microphones. If using one of these types of microphone, and it is not battery powered, check the box External Mic Power. This option should not be enabled when using a dynamic or battery powered microphone, as this will result in decreased sound quality.
4.Set the desired audio quality, and set the Mic Input Sensitivity according to your microphone. Click Save and then return to the Live View page to check that audio is available. See also the audio settings section on page 20.