Manuals
/
Barco
/
Computer Equipment
/
Printer
Barco
32X32, 12X8
manual
Application Examples, Native Mode Application Split Mode Application
Models:
matrixpro-II 12x8
12X8
32X32
1
13
54
54
Download
54 pages
34.84 Kb
10
11
12
13
14
15
16
17
Specs
Install
RGB Delay
LED Indicator Lamp Behavior
Warranty
Preset Setup Menu
Setup Mode
Volume Handling
Power Source
Software Update Overview
Page 13
Image 13
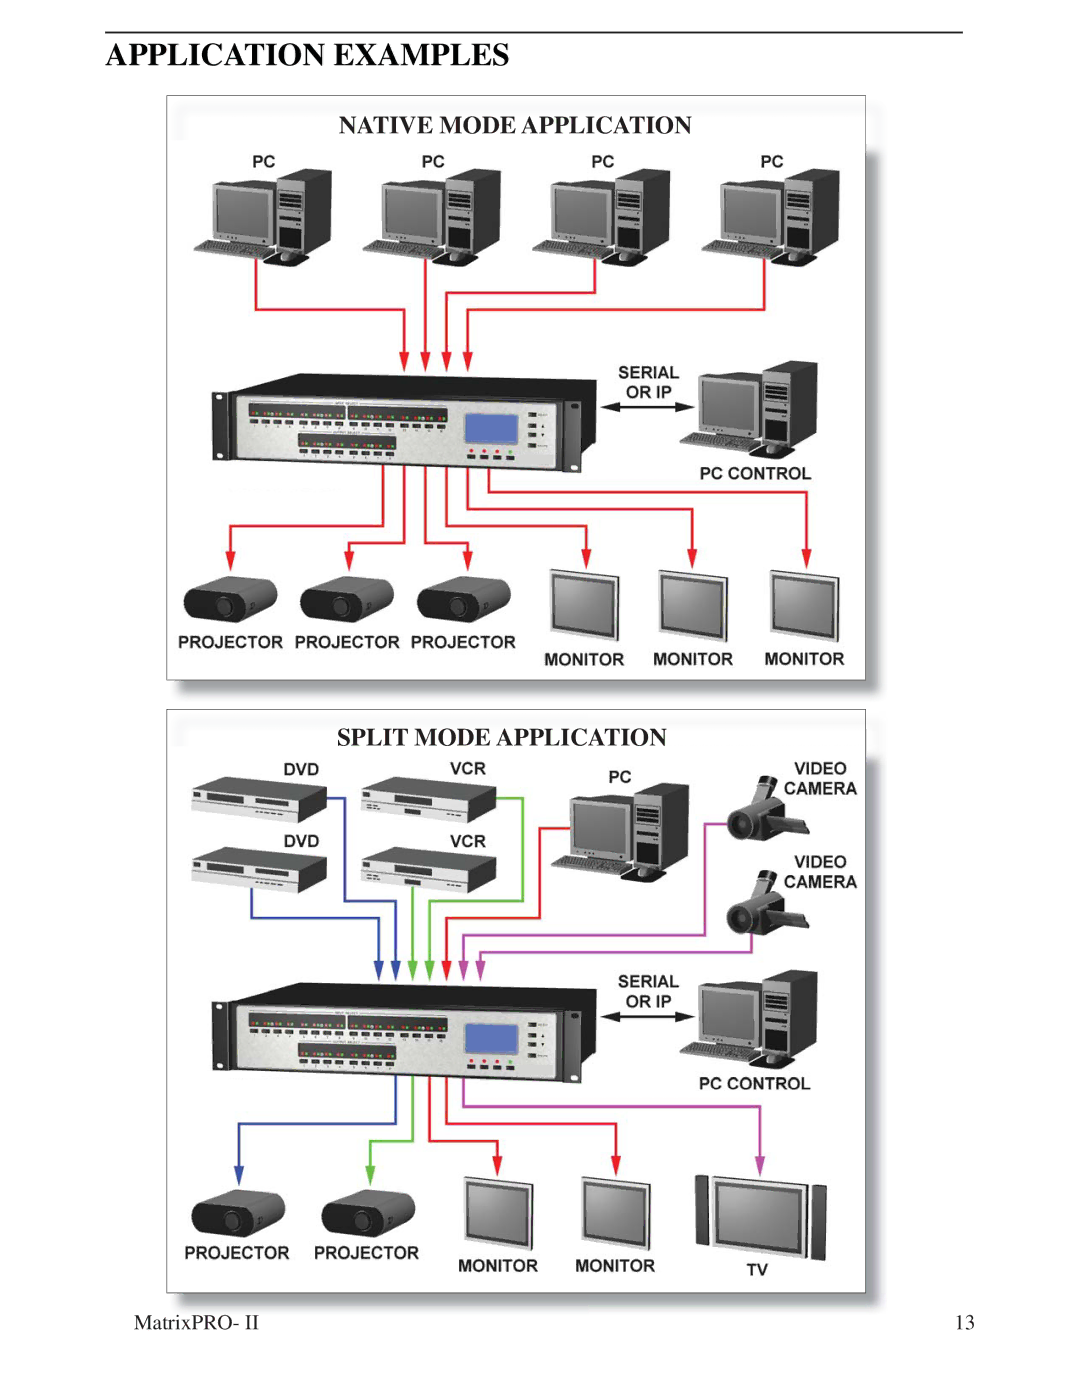
APPLICATION EXAMPLES
NATIVE MODE APPLICATION
SPLIT MODE APPLICATION
MatrixPRO- II
13
Page 12
Page 14
Page 13
Image 13
Page 12
Page 14
Contents
MatrixPRO
MatrixPRO
Return Material Authorization RMA
Warranty
Contact Information
This Appendix
Trademarks
Copyright
Company Address
Use the Proper Power Cord
Power Source
Do Not Remove Covers or Panels
Grounding the Product
Vorsicht
Avertissement
Change History
Table of Contents
Operating Mode
Installing the Legend Label Assembly Setup Mode
SCREENPRO-II/SCREENPRO-II Controller Setup
Specifications Updating Software
Introduction
Applications
Features
Serial and IP Control
Application Examples
Native Mode Application Split Mode Application
Environment
Installation
Wiring Detail for MatrixPRO-II Models with Audio Option
RS-232 Remote Host Port Cabling DB9
RJ-45 LAN Interface Cabling
Mute Trim
LCD Display Menu Tree
Understanding the LCD Display
LED Indicator Lamp Behavior
Front and Rear Panel Views
Installing the Legend Label Assembly
Main Setup Menu
Setup Mode
Input Setup Menu
Input Number
Input Trim
Audio Type
Video Type
Cable Length Input
RGB Delay
Output Setup Menu
Sync EQU
Video Type
Tech Support
System Setup Menu
SET Time Date
Set time and date screen looks like this
AMX Duet
Duet TCPIP/IP Setup
LCD Appearance Setup
Preset Setup Menu
Delay Time
Screen for the preset setup will look like this
Selected Preset Output Number SVD
Main Operating
Operating Mode
Volume Handling
Audio Level Output
Executing Presets
Main Setups Menu
Factory Reset
Configuring the ScreenPRO-II
Setting Up the ScreenPRO-II Controller
MatrixPRO
MatrixPRO
MatrixPRO
Rgbhv Only
Specifications
MatrixPRO
Hardware Requirements
Software Update Overview
Downloading Software
Via Web Site
Updating MatrixPRO-II Software
MatrixPRO
MatrixPRO
MatrixPRO
MatrixPRO
MatrixPRO
MatrixPRO
MatrixPRO
MatrixPRO
Top
Page
Image
Contents