P72895_F1D104fOSD_man.qxd 7/16/01 3:26 PM Page 23
Installation du matériel
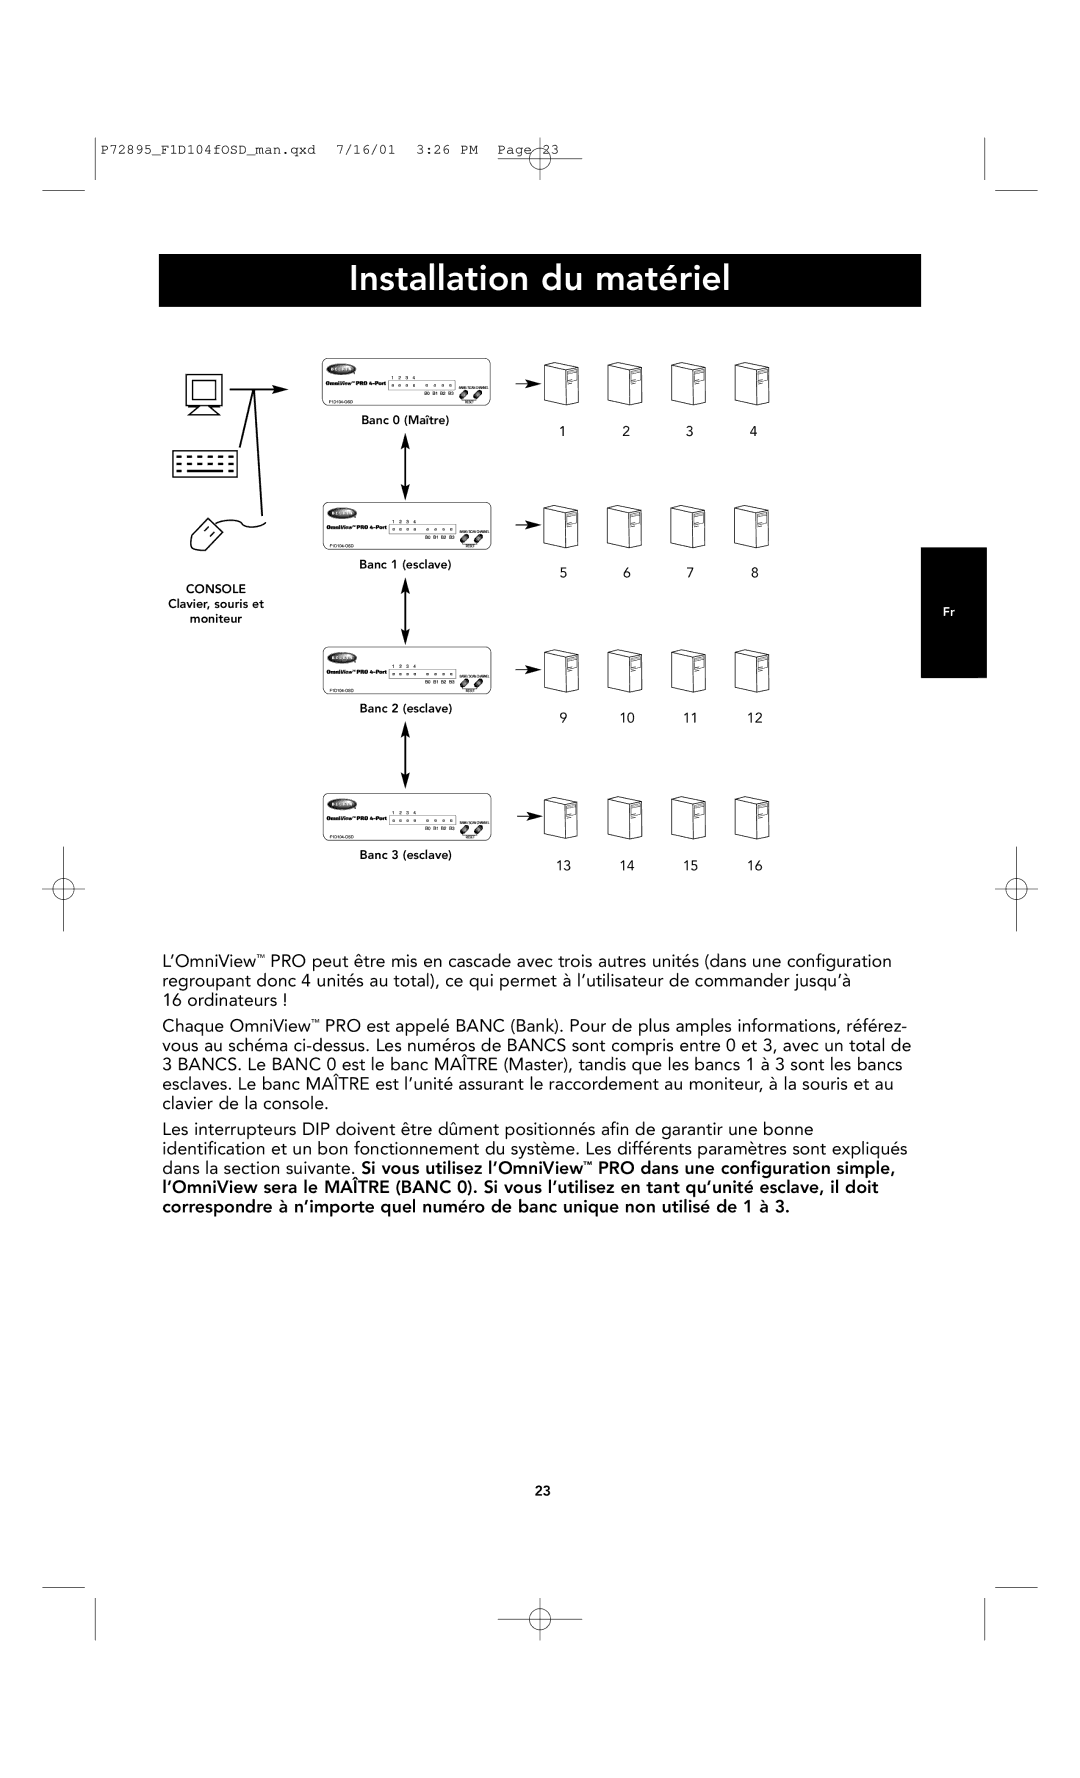
Banc 0 (Maître)
1 2 3 4
Banc 1 (esclave)
5 6 7 8
CONSOLE
Clavier, souris et
moniteur
Fr
Banc 2 (esclave) | 10 | 11 | 12 |
9 |
Banc 3 (esclave)
13 14 15 16
L’OmniView™ PRO peut être mis en cascade avec trois autres unités (dans une configuration regroupant donc 4 unités au total), ce qui permet à l’utilisateur de commander jusqu’à
16 ordinateurs !
Chaque OmniView™ PRO est appelé BANC (Bank). Pour de plus amples informations, référez- vous au schéma
Les interrupteurs DIP doivent être dûment positionnés afin de garantir une bonne identification et un bon fonctionnement du système. Les différents paramètres sont expliqués dans la section suivante. Si vous utilisez l’OmniView™ PRO dans une configuration simple, l’OmniView sera le MAÎTRE (BANC 0). Si vous l’utilisez en tant qu’unité esclave, il doit correspondre à n’importe quel numéro de banc unique non utilisé de 1 à 3.
23