P72895_F1D104gOSD_man.qxd 7/16/01 3:29 PM Page 43
Hardware-Installation
Bank 0 (Master)
1 2 3 4
Bank 1 (slave)
KONSOLE
Tastatur, Maus
und Monitor
De
Bank 3 (slave)
13 14 15 16
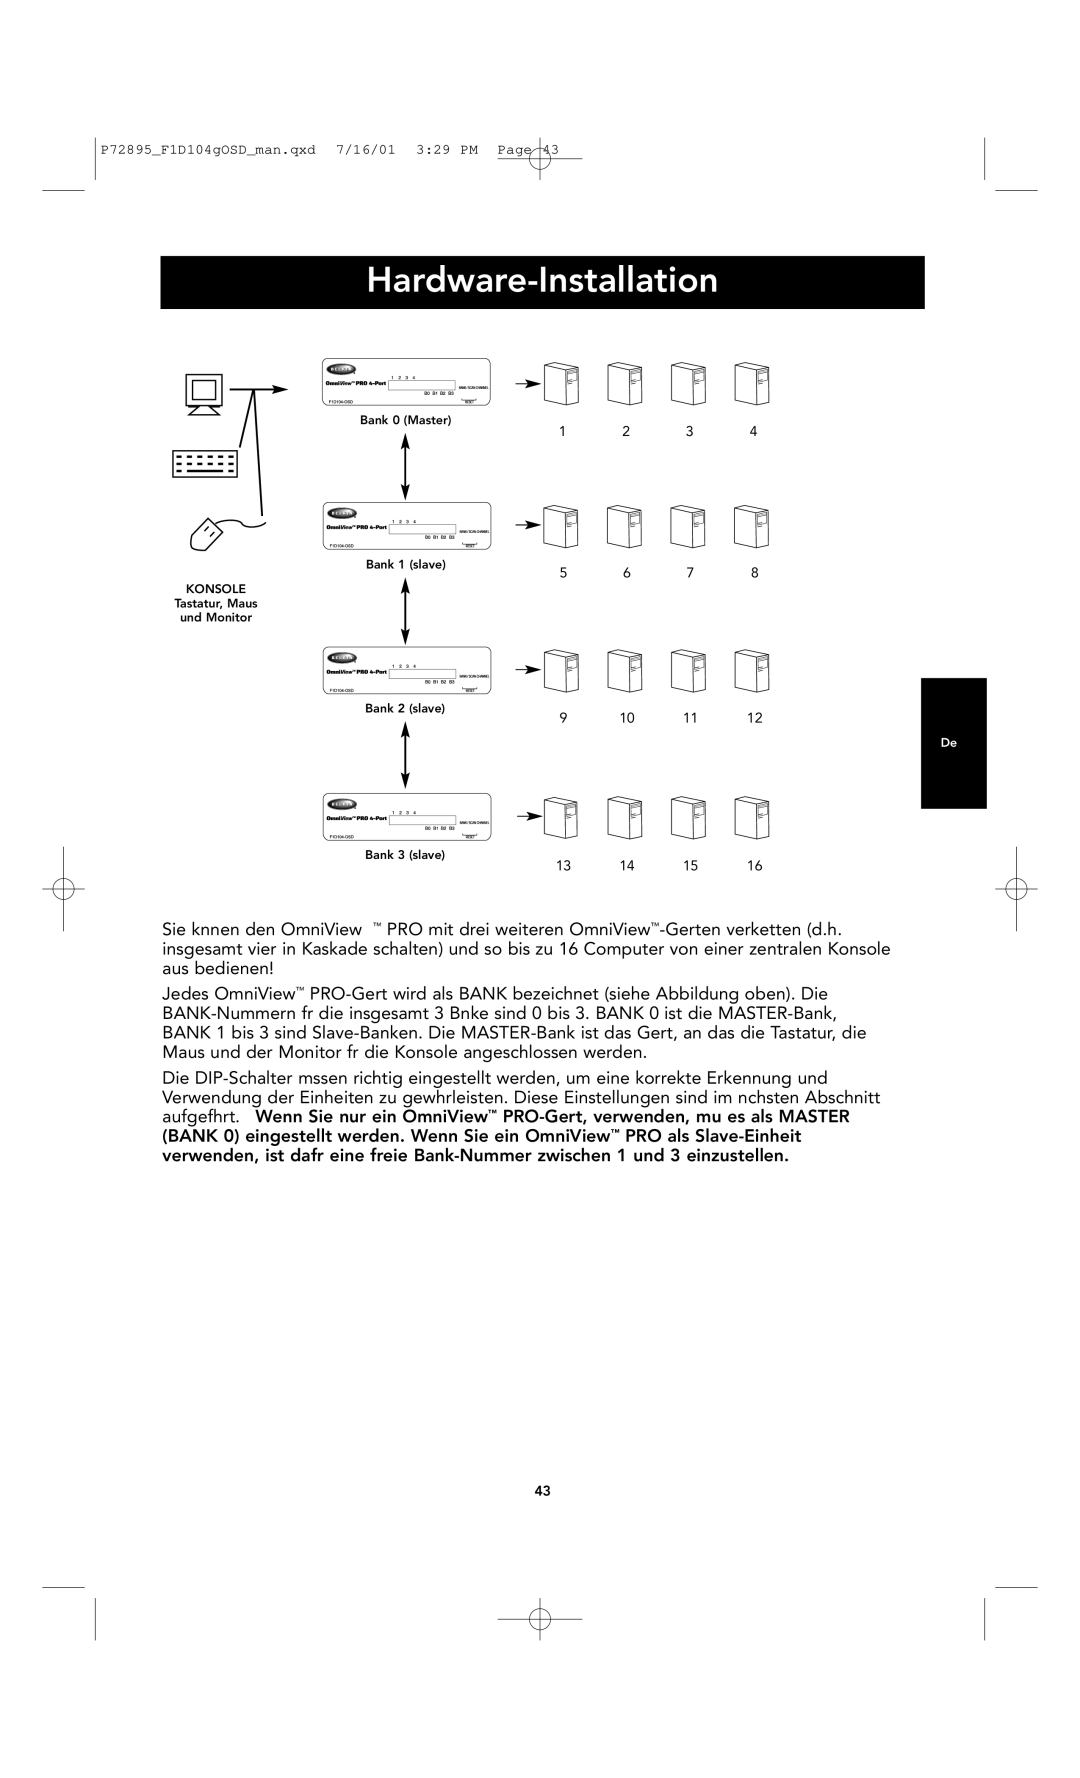
Sie können den OmniView™ PRO mit drei weiteren OmniView™-Geräten verketten (d.h. insgesamt vier in Kaskade schalten) und so bis zu 16 Computer von einer zentralen Konsole aus bedienen!
Jedes OmniView™ PRO-Gerät wird als “BANK” bezeichnet (siehe Abbildung oben). Die BANK-Nummern für die insgesamt 3 Bänke sind 0 bis 3. BANK 0 ist die MASTER-Bank, BANK 1 bis 3 sind Slave-Banken. Die MASTER-Bank ist das Gerät, an das die Tastatur, die Maus und der Monitor für die Konsole angeschlossen werden.
Die DIP-Schalter müssen richtig eingestellt werden, um eine korrekte Erkennung und Verwendung der Einheiten zu gewährleisten. Diese Einstellungen sind im nächsten Abschnitt aufgeführt. Wenn Sie nur ein OmniView™ PRO-Gerät, verwenden, muß es als MASTER (BANK 0) eingestellt werden. Wenn Sie ein OmniView™ PRO als Slave-Einheit verwenden, ist dafür eine freie Bank-Nummer zwischen 1 und 3 einzustellen.