I N STA L L AT I O N
Connect the Computer:
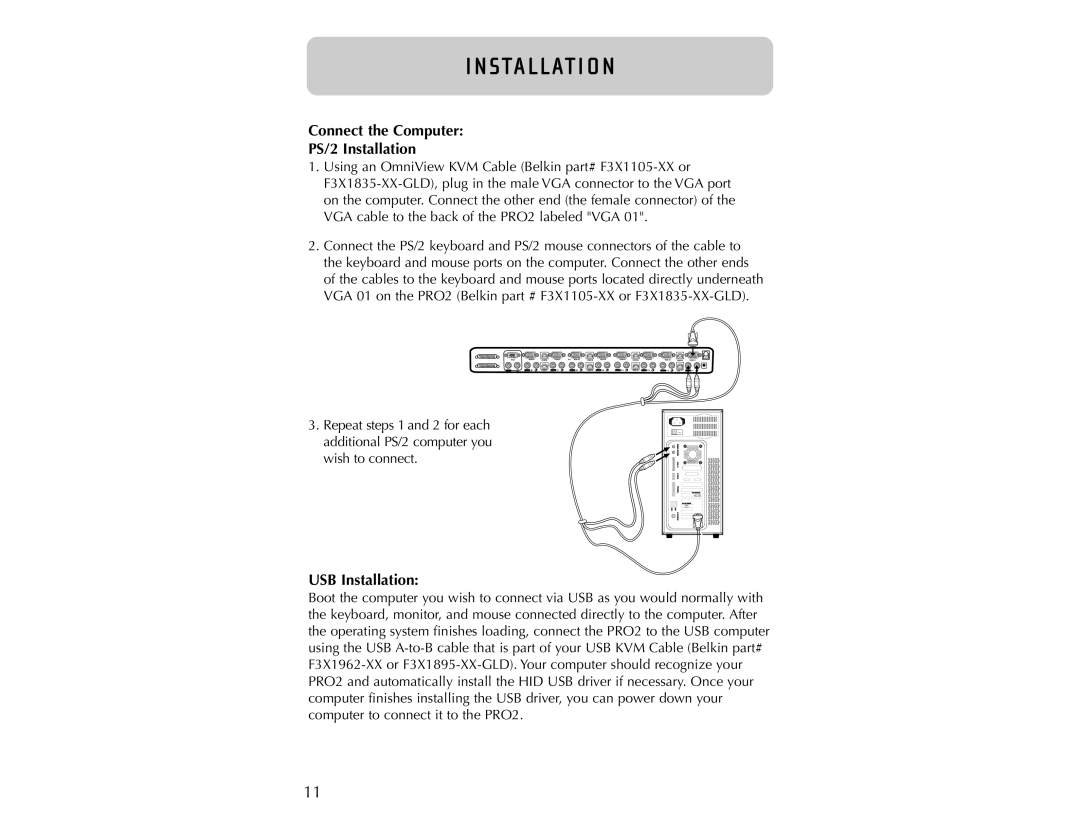
PS/2 Installation
1.Using an OmniView KVM Cable (Belkin part#
2.Connect the PS/2 keyboard and PS/2 mouse connectors of the cable to the keyboard and mouse ports on the computer. Connect the other ends of the cables to the keyboard and mouse ports located directly underneath VGA 01 on the PRO2 (Belkin part #
3.Repeat steps 1 and 2 for each additional PS/2 computer you wish to connect.
VGA | VGA08 | USB 08 | VGA07 | 06 VGA 06 | USB 06 | VGA05 | VGA04 | USB 04 | VGA03 |
| 08 | USB 07 | 07 | 06 | USB 05 | 05 | 04 | USB 03 | 03 |
VGA 02USB 02VGA01
02 | USB 01 | 01 |
USB Installation:
Boot the computer you wish to connect via USB as you would normally with the keyboard, monitor, and mouse connected directly to the computer. After the operating system finishes loading, connect the PRO2 to the USB computer using the USB
11