U S I N G YO U R P R O 2
first active computer will be displayed on the Console monitor. Use the
The “BANK – ” button will take you to the previous BANK. For example, when you are at BANK 02 and want to check computers in BANK 01. Pressing the “BANK – ” button will take you to BANK 01. As default, the first active computer will be displayed on the Console monitor. Use the
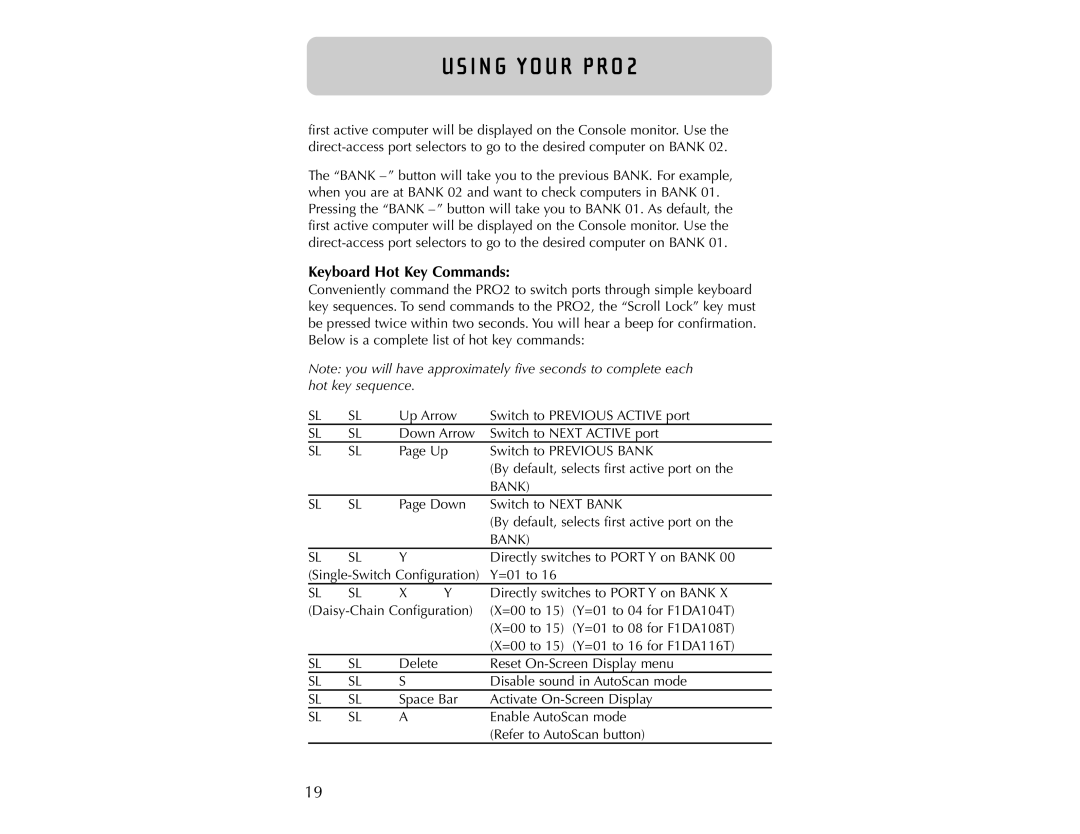
Keyboard Hot Key Commands:
Conveniently command the PRO2 to switch ports through simple keyboard key sequences. To send commands to the PRO2, the “Scroll Lock” key must be pressed twice within two seconds. You will hear a beep for confirmation. Below is a complete list of hot key commands:
Note: you will have approximately five seconds to complete each hot key sequence.
SL | SL | Up Arrow | Switch to PREVIOUS ACTIVE port | ||
SL | SL | Down Arrow | Switch to NEXT ACTIVE port | ||
SL | SL | Page Up | Switch to PREVIOUS BANK | ||
|
|
|
| (By default, selects first active port on the | |
|
|
|
| BANK) |
|
SL | SL | Page Down | Switch to NEXT BANK | ||
|
|
|
| (By default, selects first active port on the | |
|
|
|
| BANK) |
|
SL | SL | Y |
| Directly switches to PORT Y on BANK 00 | |
Y=01 to 16 |
| ||||
SL | SL | X | Y | Directly switches to PORT Y on BANK X | |
(X=00 to 15) | (Y=01 to 04 for F1DA104T) | ||||
|
|
|
| (X=00 to 15) | (Y=01 to 08 for F1DA108T) |
|
|
|
| (X=00 to 15) | (Y=01 to 16 for F1DA116T) |
SL | SL | Delete |
| Reset | |
SL | SL | S |
| Disable sound in AutoScan mode | |
SL | SL | Space Bar | Activate | ||
SL | SL | A |
| Enable AutoScan mode | |
|
|
|
| (Refer to AutoScan button) | |
19