I N STA L L AT I O N
Your PRO2 is now mounted securely into the bracket and you are ready to connect cables to the back of the unit.
Note for Belkin PRO Series owners
Single PRO2 Installation
This section provides complete instructions for the hardware setup of a single PRO2. (F1DA104T, F1DA108T, and F1DA116T)
PS/2 Installation:
Keyboard, Video, and Mouse Connections
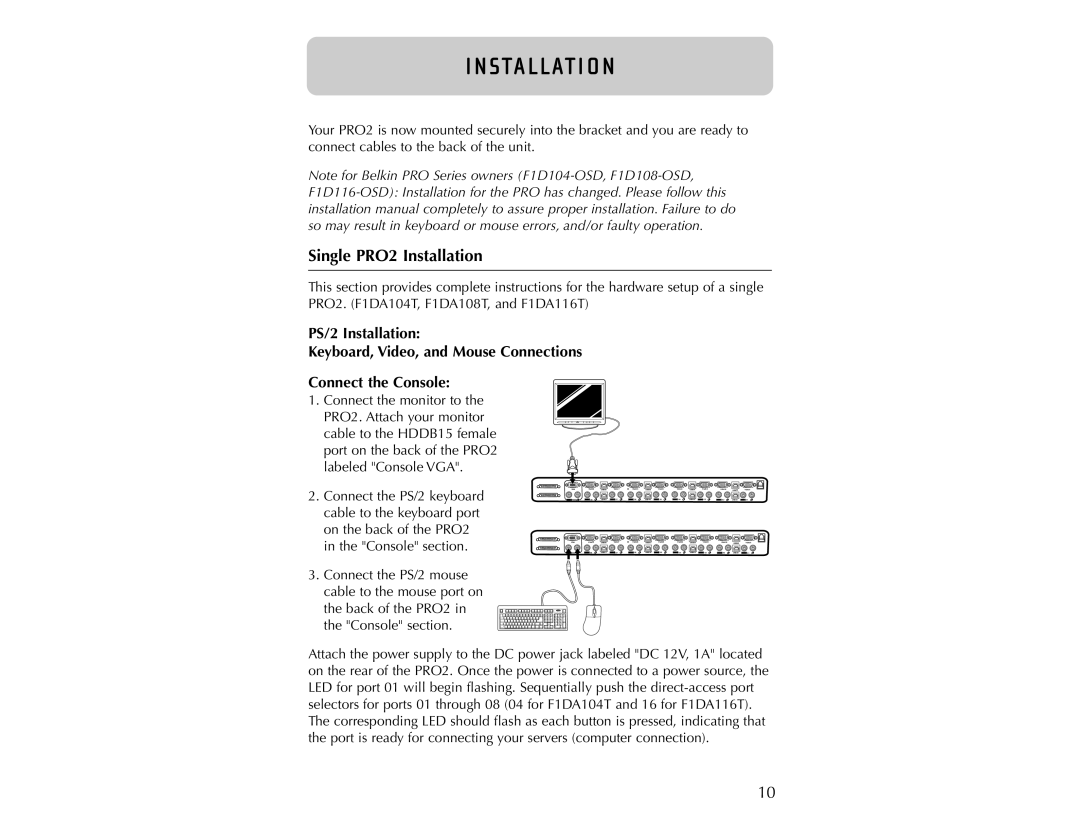
Connect the Console:
1.Connect the monitor to the PRO2. Attach your monitor cable to the HDDB15 female port on the back of the PRO2 labeled "Console VGA".
2. Connect the PS/2 keyboard cable to the keyboard port on the back of the PRO2 in the "Console" section.
3. Connect the PS/2 mouse cable to the mouse port on the back of the PRO2 in the "Console" section.
VGA | VGA08 | USB08 | VGA07 | 06 VGA06 | USB06 | VGA05 | VGA04 | USB04 | VGA03 | VGA 02 | USB02 | VGA01 |
| 08 | USB 07 | 07 | 06 | USB 05 | 05 | 04 | USB 03 | 03 | 02 | USB 01 | 01 |
VGA | VGA08 | USB08 | VGA07 | 06 VGA06 | USB06 | VGA05 | VGA04 | USB04 | VGA03 | VGA 02 | USB02 | VGA01 |
| 08 | USB 07 | 07 | 06 | USB 05 | 05 | 04 | USB 03 | 03 | 02 | USB 01 | 01 |
Attach the power supply to the DC power jack labeled "DC 12V, 1A" located on the rear of the PRO2. Once the power is connected to a power source, the LED for port 01 will begin flashing. Sequentially push the
10