FIGURE 20
Rotate the input shaft and spindle(34) counterclockwise to remove the remainder of the 26 internal balls(29) (a small magnet is a useful tool for this operation.) Separate the piston from the spindle. (See Figure 21). Holding
FIGURE 21
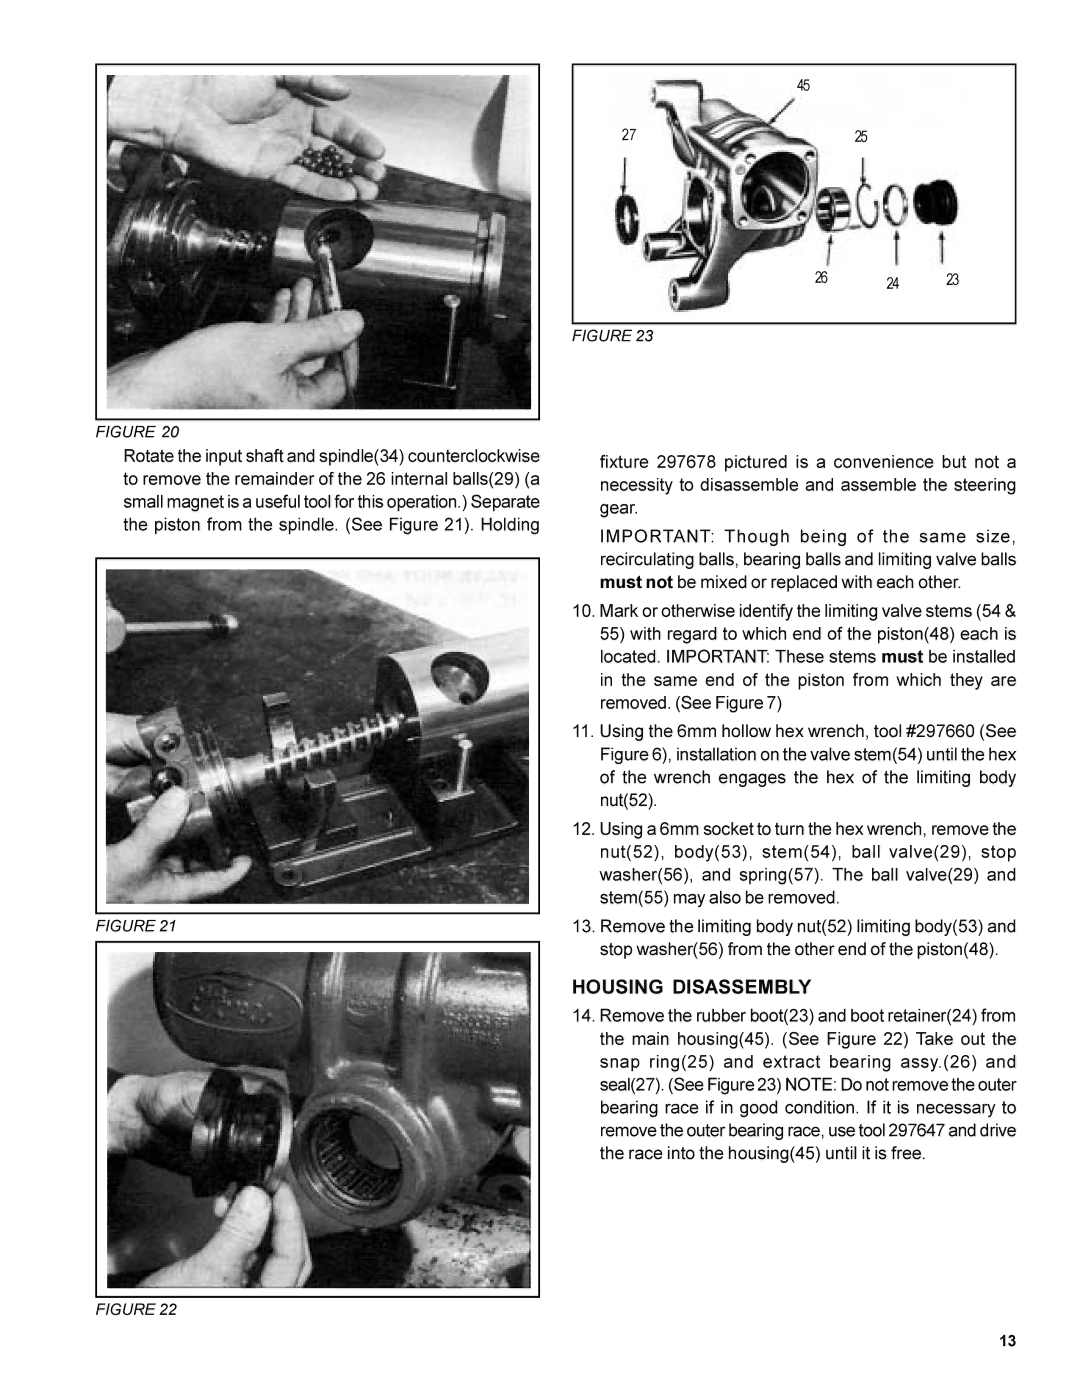
45
27 | 25 |
26 24 23
FIGURE 23
fixture 297678 pictured is a convenience but not a necessity to disassemble and assemble the steering gear.
IMPORTANT: Though being of the same size, recirculating balls, bearing balls and limiting valve balls must not be mixed or replaced with each other.
10.Mark or otherwise identify the limiting valve stems (54 & 55) with regard to which end of the piston(48) each is located. IMPORTANT: These stems must be installed in the same end of the piston from which they are removed. (See Figure 7)
11.Using the 6mm hollow hex wrench, tool #297660 (See Figure 6), installation on the valve stem(54) until the hex of the wrench engages the hex of the limiting body nut(52).
12.Using a 6mm socket to turn the hex wrench, remove the nut(52), body(53), stem(54), ball valve(29), stop washer(56), and spring(57). The ball valve(29) and stem(55) may also be removed.
13.Remove the limiting body nut(52) limiting body(53) and stop washer(56) from the other end of the piston(48).
HOUSING DISASSEMBLY
14.Remove the rubber boot(23) and boot retainer(24) from the main housing(45). (See Figure 22) Take out the snap ring(25) and extract bearing assy.(26) and seal(27). (See Figure 23) NOTE: Do not remove the outer bearing race if in good condition. If it is necessary to remove the outer bearing race, use tool 297647 and drive the race into the housing(45) until it is free.
FIGURE 22
13