Saw Operations (continued)
Bevel Cut
•A “bevel cut” is a
•A bevel cut is made at 0° miter and any bevel angle in the range up to 47°.
•There are factory set bevel stops at 0° and 45° on both the left and right. (See Adjustment section if adjustments are required.)
•The
•There are also positive crown molding bevel stops at 33.9° on both the left and right. Disengage this stop unless using the 33.9° angle (See Cutting Crown Molding for details.)
•A bevel cut can be made as either a chop cut or a slide cut depending on the width of the workpiece.
•The
Bevel Range Selection
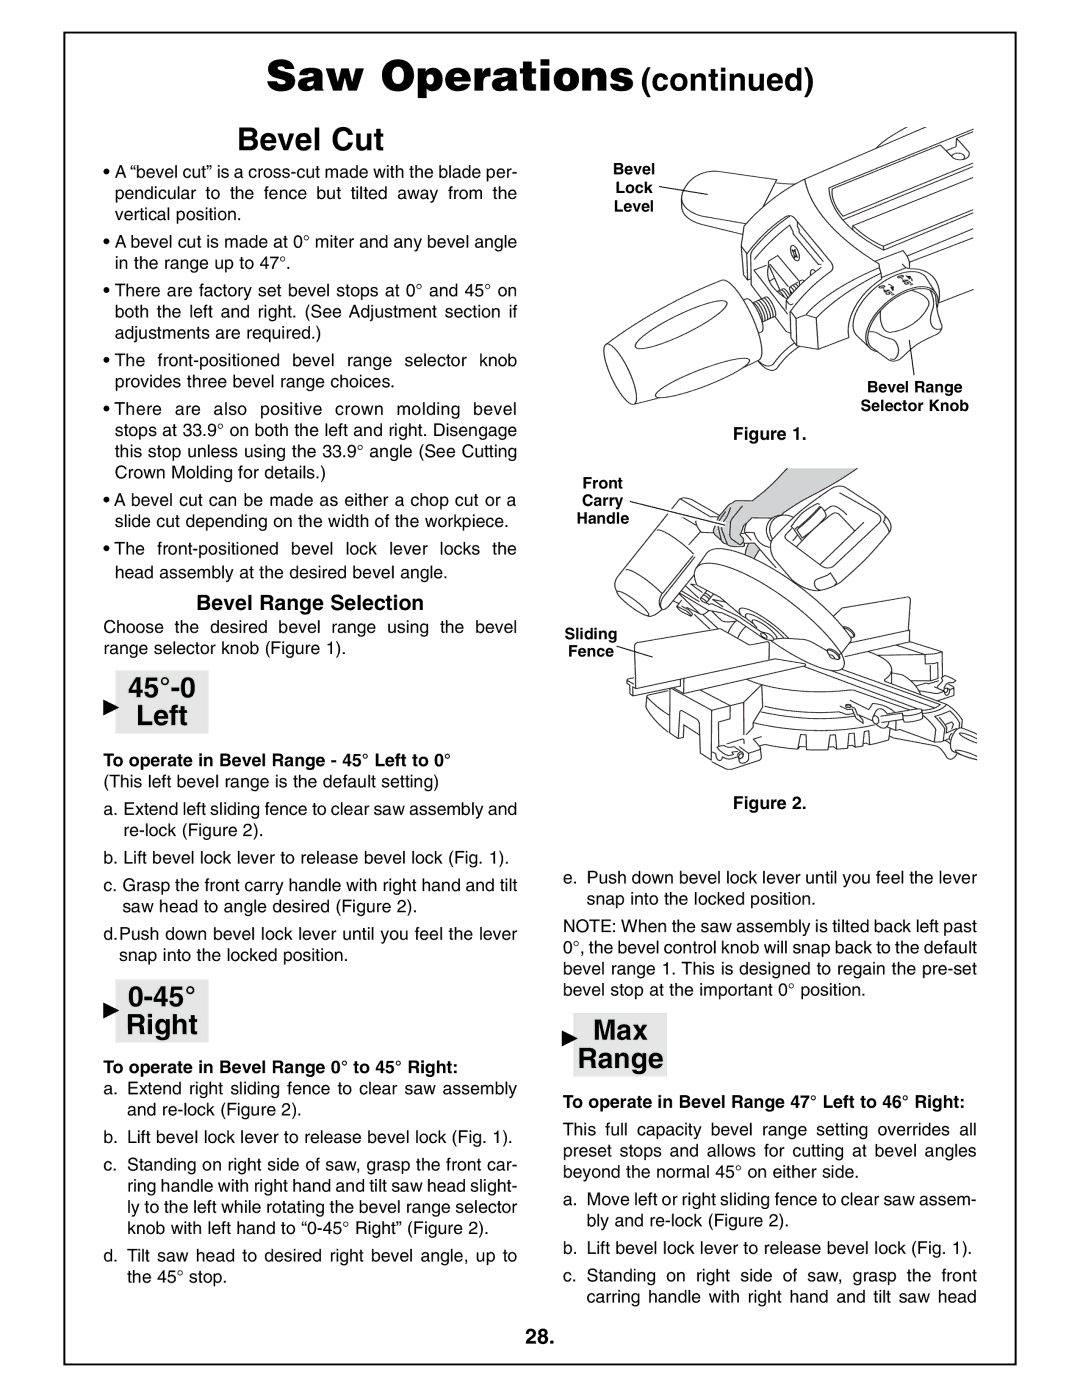
Choose the desired bevel range using the bevel range selector knob (Figure 1).
45°-0  Left
Left
To operate in Bevel Range - 45° Left to 0° (This left bevel range is the default setting)
a.Extend left sliding fence to clear saw assembly and
b.Lift bevel lock lever to release bevel lock (Fig. 1).
c.Grasp the front carry handle with right hand and tilt saw head to angle desired (Figure 2).
d.Push down bevel lock lever until you feel the lever snap into the locked position.
0-45° Right
To operate in Bevel Range 0° to 45° Right:
a.Extend right sliding fence to clear saw assembly and
b.Lift bevel lock lever to release bevel lock (Fig. 1).
c.Standing on right side of saw, grasp the front car- ring handle with right hand and tilt saw head slight- ly to the left while rotating the bevel range selector knob with left hand to
d.Tilt saw head to desired right bevel angle, up to the 45° stop.
Bevel
Lock ![]()
Level
Bevel Range
Selector Knob
Figure 1.
Front
Carry
Handle
Sliding
Fence ![]()
Figure 2.
e.Push down bevel lock lever until you feel the lever snap into the locked position.
NOTE: When the saw assembly is tilted back left past 0°, the bevel control knob will snap back to the default bevel range 1. This is designed to regain the
 Max
Max
Range
To operate in Bevel Range 47° Left to 46° Right:
This full capacity bevel range setting overrides all preset stops and allows for cutting at bevel angles beyond the normal 45° on either side.
a.Move left or right sliding fence to clear saw assem- bly and
b.Lift bevel lock lever to release bevel lock (Fig. 1).
c.Standing on right side of saw, grasp the front carring handle with right hand and tilt saw head
28.
