Kerf Insert
The kerf insert should be adjusted close to the blade, but without touching the blade, in order to avoid tear- out on the bottom of the workpiece.
1.Lower the head assembly and lock into position.
2.Loosen the six (6) kerf screws using the multi pur- pose tool.
3.Adjust the kerf inserts as close to the blade (teeth) as possible without touching the blade.
4.Tighten the kerf screws.
NOTE: At extreme bevel angles the saw blade may slightly cut into kerf insert.
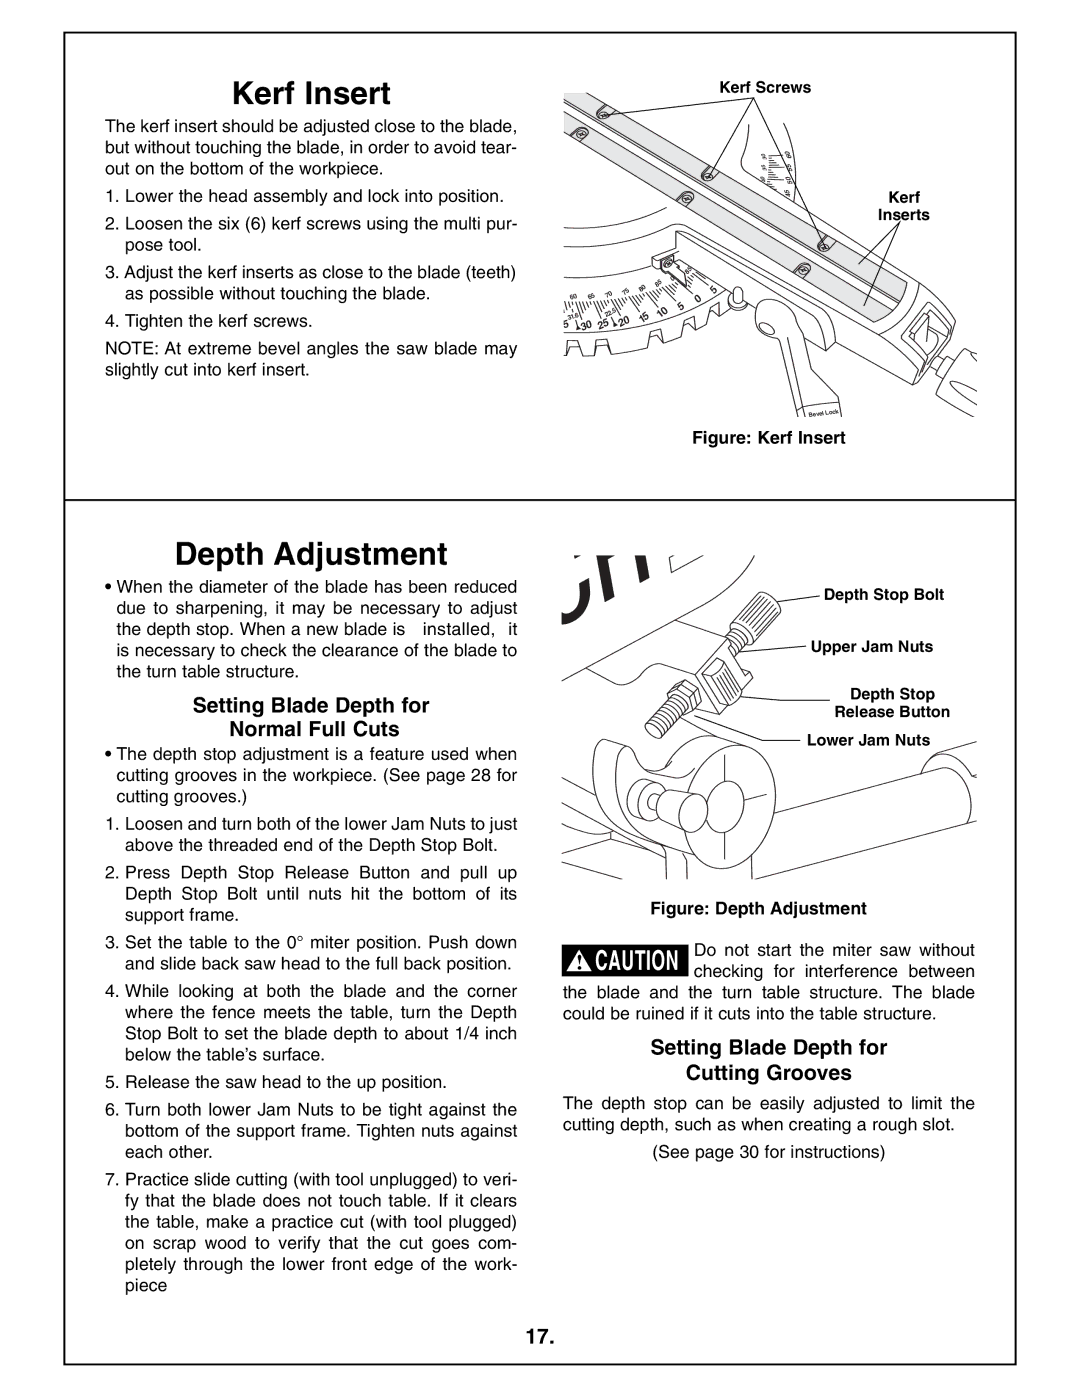
Kerf Screws
30 | 60 |
35 | 55 |
40 | 50 |
| 45 |
|
|
|
|
|
| 0 | 85 |
|
|
|
|
|
| 85 |
|
| |
|
|
|
| 80 |
|
| 5 | |
|
| 70 | 75 |
|
|
| ||
60 | 65 |
|
|
| 0 | |||
|
|
|
|
| ||||
|
|
|
|
|
| 5 |
| |
|
| .5 |
|
| 10 |
|
| |
31 |
| 22 |
|
|
|
|
| |
.6 |
| 20 | 15 |
|
|
|
| |
5 | 30 | 25 |
|
|
|
| ||
|
|
|
|
|
Bevel | Lock |
Figure: Kerf Insert
Kerf
Inserts
Depth Adjustment
•When the diameter of the blade has been reduced
due to sharpening, it may be necessary to adjust the depth stop. When a new blade is installed, it is necessary to check the clearance of the blade to the turn table structure.
Setting Blade Depth for
Normal Full Cuts
•The depth stop adjustment is a feature used when cutting grooves in the workpiece. (See page 28 for cutting grooves.)
1.Loosen and turn both of the lower Jam Nuts to just above the threaded end of the Depth Stop Bolt.
2.Press Depth Stop Release Button and pull up Depth Stop Bolt until nuts hit the bottom of its support frame.
3.Set the table to the 0° miter position. Push down and slide back saw head to the full back position.
4.While looking at both the blade and the corner where the fence meets the table, turn the Depth Stop Bolt to set the blade depth to about 1/4 inch below the table’s surface.
5.Release the saw head to the up position.
6.Turn both lower Jam Nuts to be tight against the bottom of the support frame. Tighten nuts against each other.
7.Practice slide cutting (with tool unplugged) to veri- fy that the blade does not touch table. If it clears the table, make a practice cut (with tool plugged) on scrap wood to verify that the cut goes com- pletely through the lower front edge of the work- piece
![]() Depth Stop Bolt
Depth Stop Bolt
![]() Upper Jam Nuts
Upper Jam Nuts
Depth Stop
Release Button
Lower Jam Nuts![]()
Figure: Depth Adjustment
Do not start the miter saw without ! CAUTION checking for interference between the blade and the turn table structure. The blade
could be ruined if it cuts into the table structure.
Setting Blade Depth for
Cutting Grooves
The depth stop can be easily adjusted to limit the cutting depth, such as when creating a rough slot.
(See page 30 for instructions)
17.