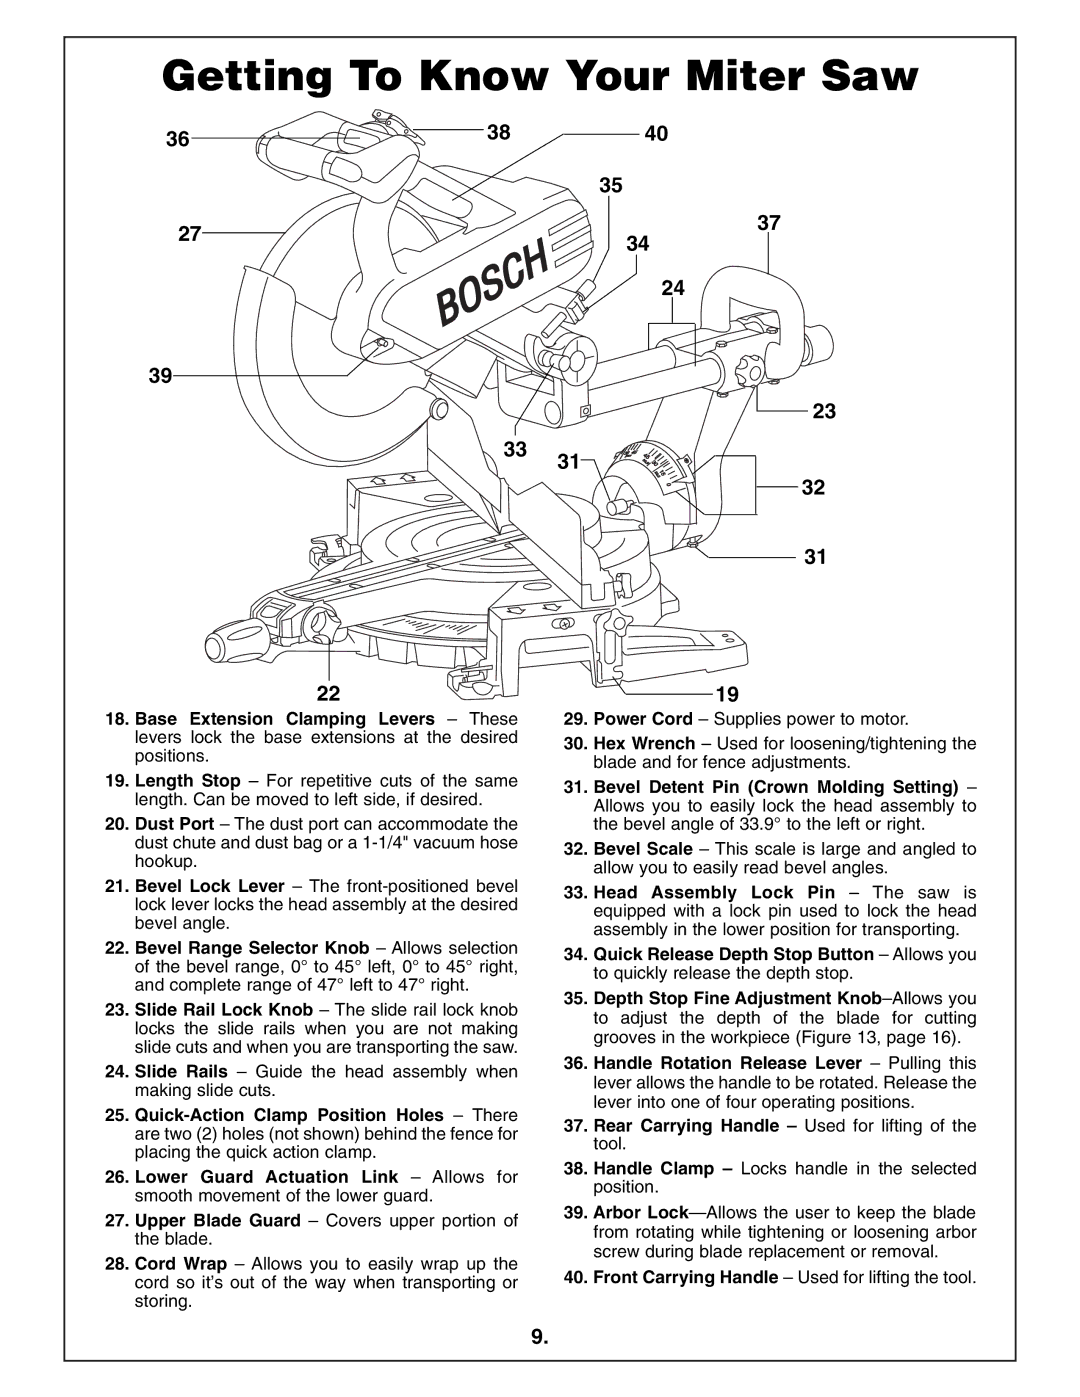
Getting To Know Your Miter Saw
36 | 38 |
|
27
39
33
22
18.Base Extension Clamping Levers – These levers lock the base extensions at the desired positions.
19.Length Stop – For repetitive cuts of the same length. Can be moved to left side, if desired.
20.Dust Port – The dust port can accommodate the dust chute and dust bag or a
21.Bevel Lock Lever – The
22.Bevel Range Selector Knob – Allows selection of the bevel range, 0° to 45° left, 0° to 45° right, and complete range of 47° left to 47° right.
23.Slide Rail Lock Knob – The slide rail lock knob locks the slide rails when you are not making slide cuts and when you are transporting the saw.
24.Slide Rails – Guide the head assembly when making slide cuts.
25.
26.Lower Guard Actuation Link – Allows for smooth movement of the lower guard.
27.Upper Blade Guard – Covers upper portion of the blade.
28.Cord Wrap – Allows you to easily wrap up the cord so it’s out of the way when transporting or storing.
40
35
37
34
24
23
31
32
31
19
29.Power Cord – Supplies power to motor.
30.Hex Wrench – Used for loosening/tightening the blade and for fence adjustments.
31.Bevel Detent Pin (Crown Molding Setting) – Allows you to easily lock the head assembly to the bevel angle of 33.9° to the left or right.
32.Bevel Scale – This scale is large and angled to allow you to easily read bevel angles.
33.Head Assembly Lock Pin – The saw is equipped with a lock pin used to lock the head assembly in the lower position for transporting.
34.Quick Release Depth Stop Button – Allows you to quickly release the depth stop.
35.Depth Stop Fine Adjustment
36.Handle Rotation Release Lever – Pulling this lever allows the handle to be rotated. Release the lever into one of four operating positions.
37.Rear Carrying Handle – Used for lifting of the tool.
38.Handle Clamp – Locks handle in the selected position.
39.Arbor
40.Front Carrying Handle – Used for lifting the tool.
9.