Transporting, Placement and Mounting
! WARNING | To avoid injury always observe the | |
following: | ||
|
—Unplug electric cord. Before transporting the saw, rotate head and lock assembly to 60° right miter, lock into detent, slide head assembly to the mid- dle of it’s rail, tighten the slide rail lock knob and lock the head assembly in the lowered position.
Lifting Saw
—To avoid back injury, hold the tool close to your body when lifting. Bend your knees so you can lift with your legs, not your back.
—Lift by using the
—Alternate lifting method: When picking tool up from ground, use rear carrying handle and front carrying handle (above guard).
—Never carry the tool by the slide rails, this may cause blade damage.
—Never lift tool by holding switch handle. This may cause serious damage.
—Never carry the miter saw by the power cord or the operational handle. Attempting to lift or carry the tool by the power cord will damage the insula- tion and the wire connections resulting in electric shock or fire.
—Observe the position of the saw. People standing behind it could be injured by thrown debris.
—Place the saw on a firm, level surface where there is plenty of room for handling and properly sup- porting the workpiece.
—Bolt, nail or clamp the saw to its support.
Be careful not to
crack foot or damage base.
Mounting Applications
Workbench
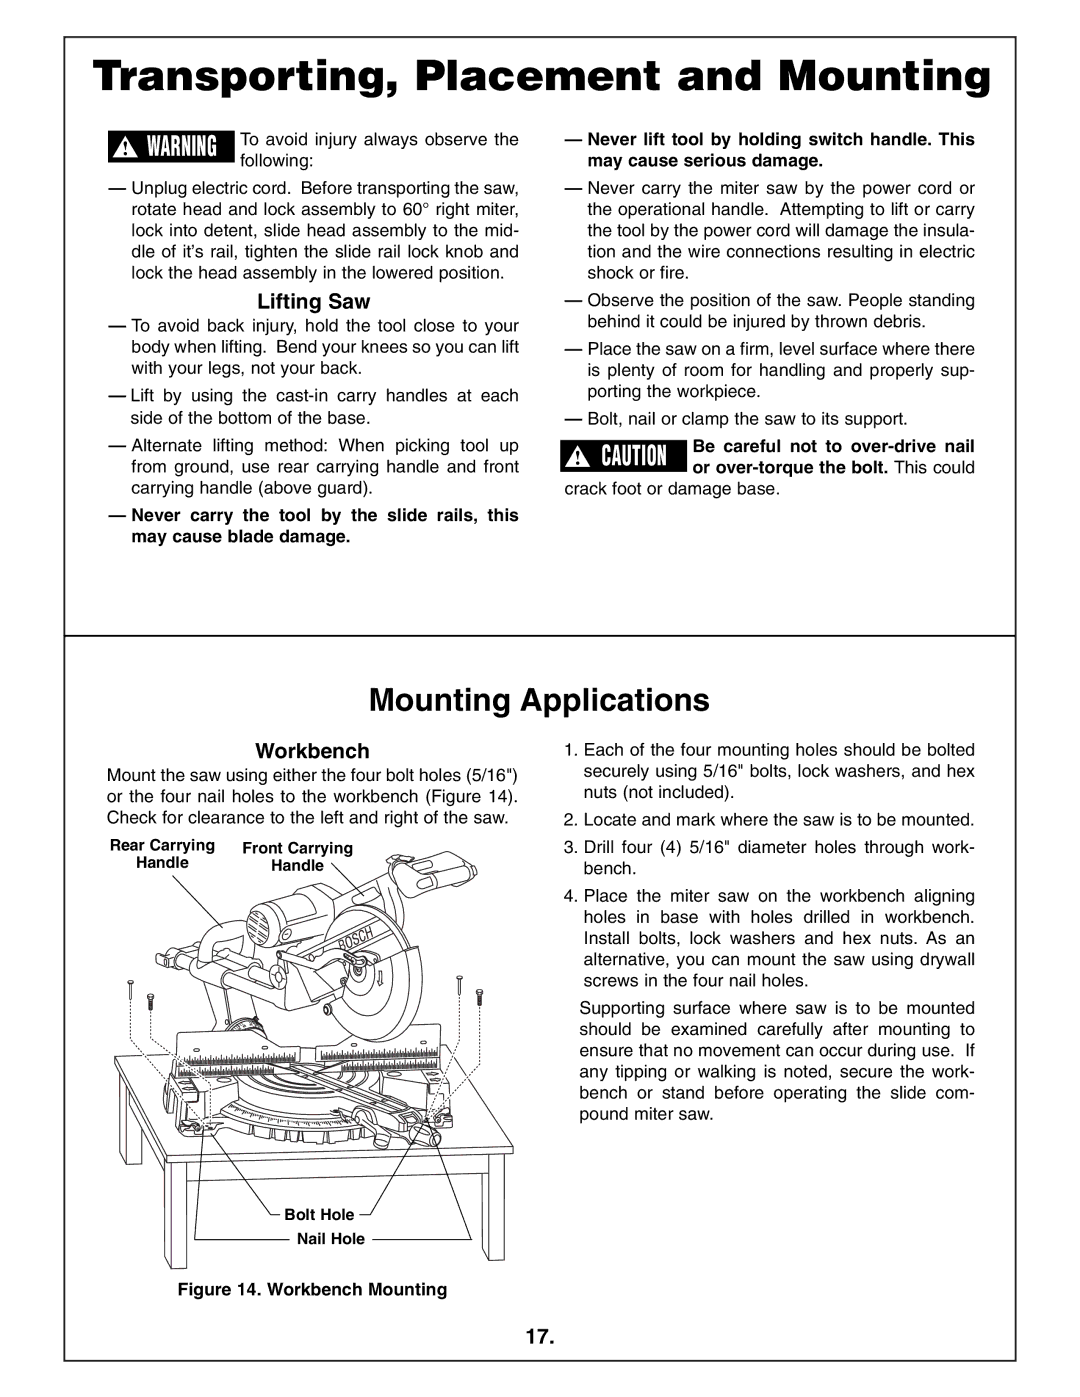
Mount the saw using either the four bolt holes (5/16") or the four nail holes to the workbench (Figure 14). Check for clearance to the left and right of the saw.
Rear Carrying | Front Carrying |
Handle | Handle |
1.Each of the four mounting holes should be bolted securely using 5/16" bolts, lock washers, and hex nuts (not included).
2.Locate and mark where the saw is to be mounted.
3.Drill four (4) 5/16" diameter holes through work- bench.
4.Place the miter saw on the workbench aligning holes in base with holes drilled in workbench. Install bolts, lock washers and hex nuts. As an alternative, you can mount the saw using drywall screws in the four nail holes.
Supporting surface where saw is to be mounted should be examined carefully after mounting to ensure that no movement can occur during use. If any tipping or walking is noted, secure the work- bench or stand before operating the slide com- pound miter saw.
Bolt Hole
Nail Hole
Figure 14. Workbench Mounting
17.