Router Table Assembly
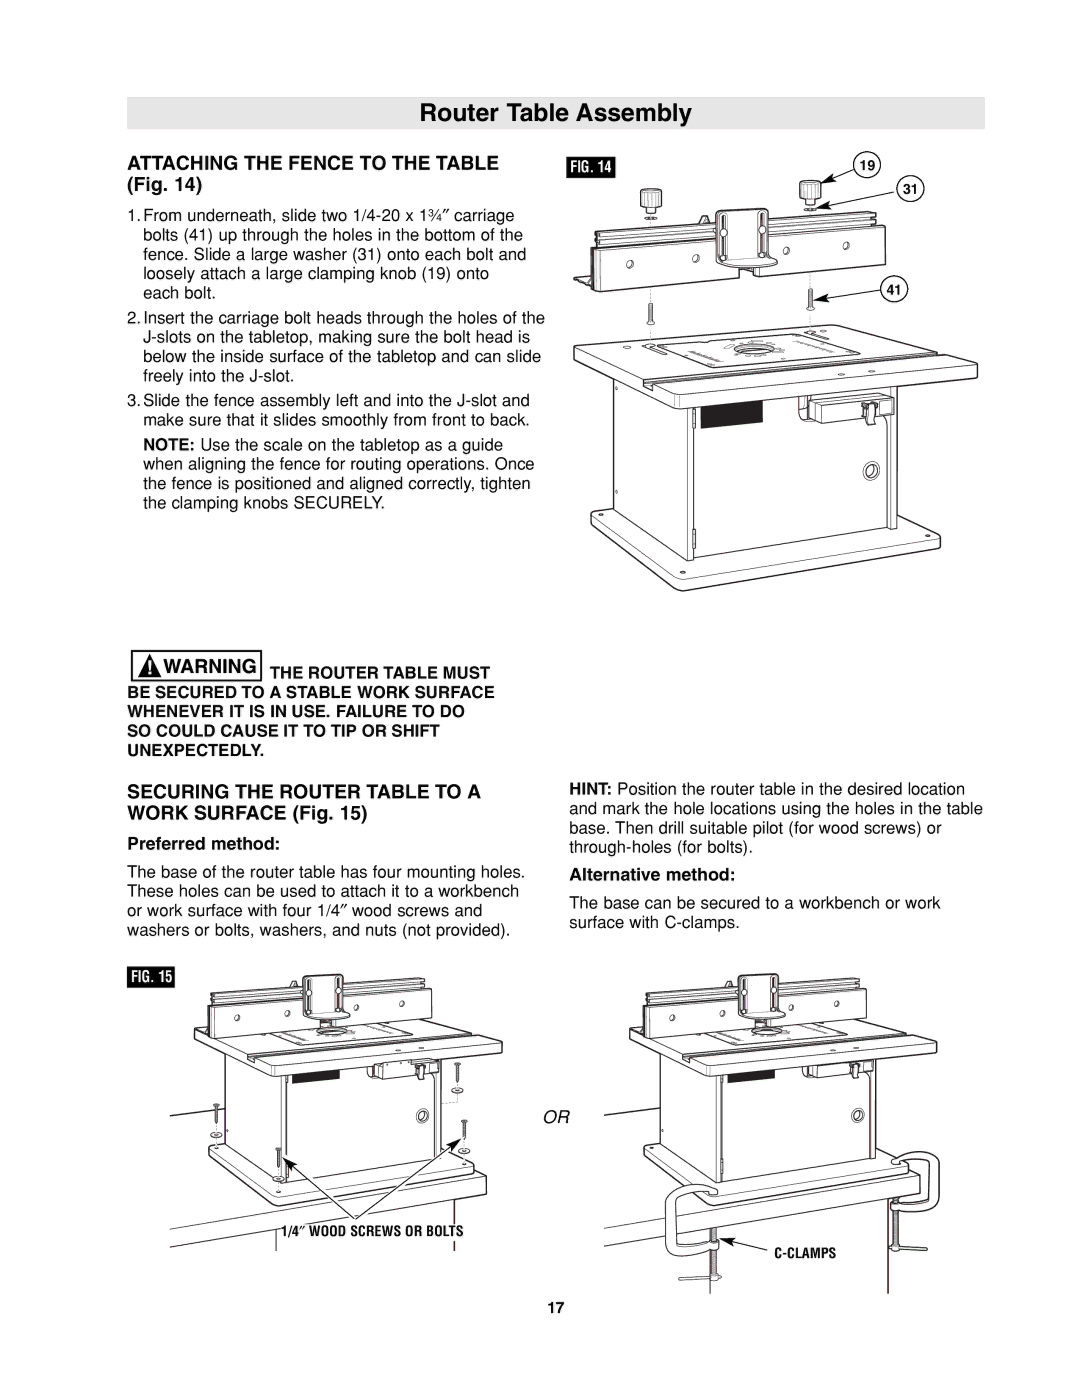
ATTACHING THE FENCE TO THE TABLE (Fig. 14)
1.From underneath, slide two
2.Insert the carriage bolt heads through the holes of the
3.Slide the fence assembly left and into the
NOTE: Use the scale on the tabletop as a guide when aligning the fence for routing operations. Once the fence is positioned and aligned correctly, tighten the clamping knobs SECURELY.
![]()
![]()
![]()
![]()
![]()
![]()
![]()
![]()
![]() THE ROUTER TABLE MUST BE SECURED TO A STABLE WORK SURFACE WHENEVER IT IS IN USE. FAILURE TO DO SO COULD CAUSE IT TO TIP OR SHIFT UNEXPECTEDLY.
THE ROUTER TABLE MUST BE SECURED TO A STABLE WORK SURFACE WHENEVER IT IS IN USE. FAILURE TO DO SO COULD CAUSE IT TO TIP OR SHIFT UNEXPECTEDLY.
SECURING THE ROUTER TABLE TO A WORK SURFACE (Fig. 15)
Preferred method:
The base of the router table has four mounting holes. These holes can be used to attach it to a workbench or work surface with four 1/4″ wood screws and washers or bolts, washers, and nuts (not provided).
FIG. 15
FIG. 14 | 19 |
31
![]() 41
41
HINT: Position the router table in the desired location and mark the hole locations using the holes in the table base. Then drill suitable pilot (for wood screws) or
Alternative method:
The base can be secured to a workbench or work surface with
OR
1/4″ WOOD SCREWS OR BOLTS
17