Router Table Operation
ASSEMBLING THE FEATHERBOARDS (Figs. 18–20)
NOTE: The top/front side of each featherboard is marked to indicate proper feed direction.
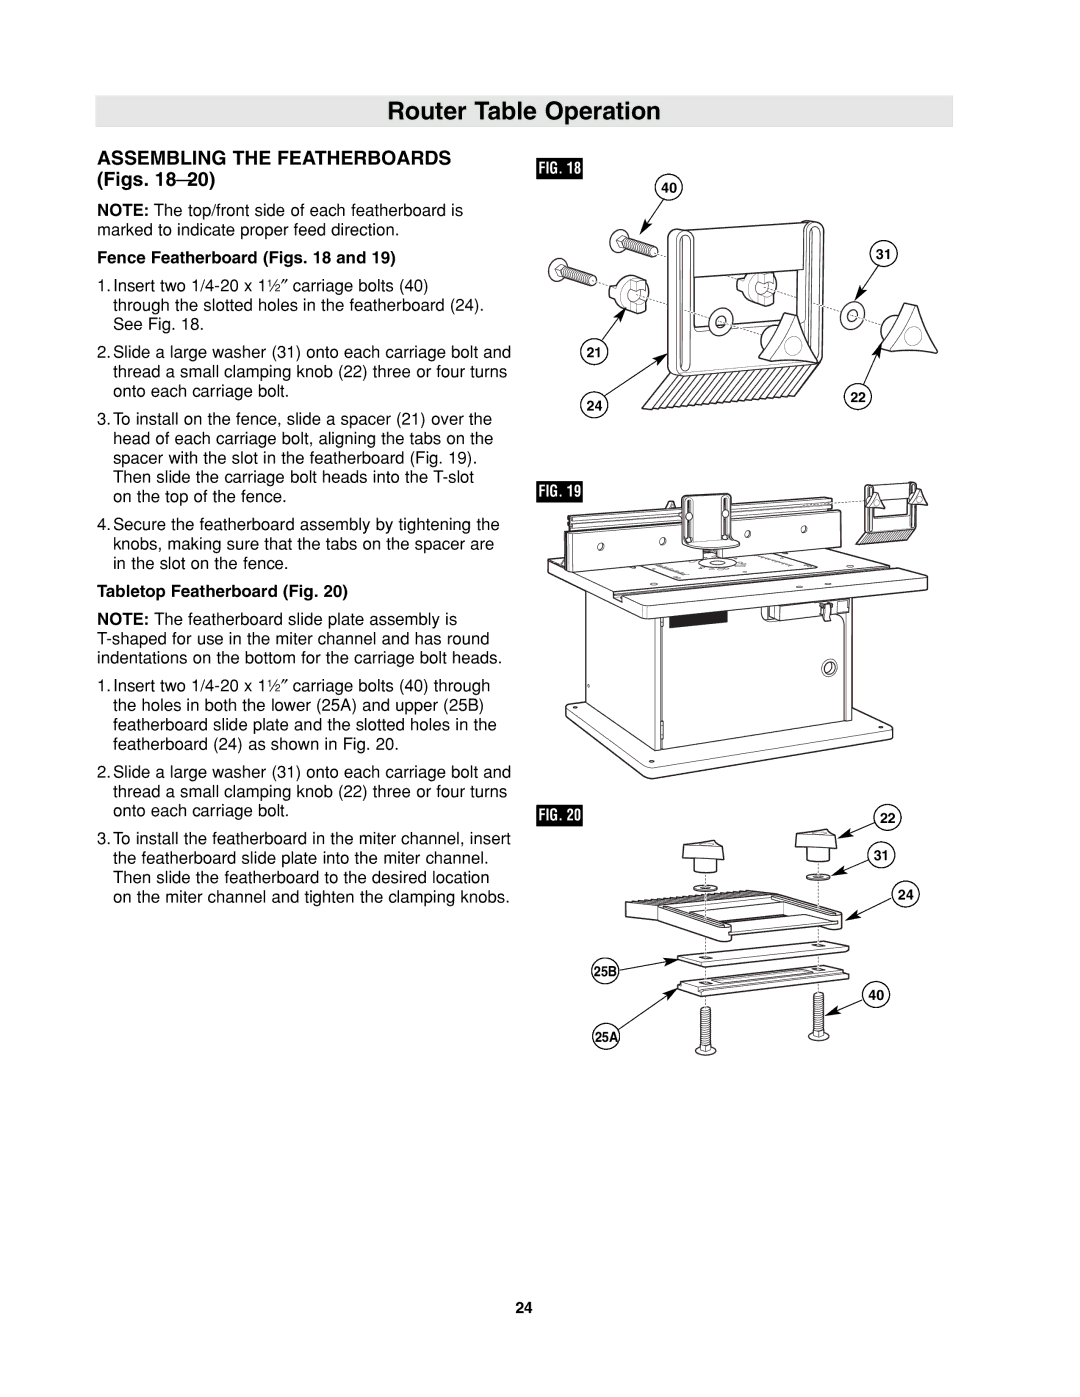
Fence Featherboard (Figs. 18 and 19)
1.Insert two
2.Slide a large washer (31) onto each carriage bolt and thread a small clamping knob (22) three or four turns onto each carriage bolt.
3.To install on the fence, slide a spacer (21) over the head of each carriage bolt, aligning the tabs on the spacer with the slot in the featherboard (Fig. 19).
Then slide the carriage bolt heads into the
4.Secure the featherboard assembly by tightening the knobs, making sure that the tabs on the spacer are in the slot on the fence.
Tabletop Featherboard (Fig. 20)
NOTE: The featherboard slide plate assembly is
1.Insert two
2.Slide a large washer (31) onto each carriage bolt and thread a small clamping knob (22) three or four turns onto each carriage bolt.
3.To install the featherboard in the miter channel, insert the featherboard slide plate into the miter channel. Then slide the featherboard to the desired location on the miter channel and tighten the clamping knobs.
FIG. 18
40
21
24
FIG. 19
FIG. 20
31
22
22
31
24
25B
25A
40
24