Router Table Operation
ADJUSTING DEPTH AND HEIGHT OF CUT (Fig. 23)
1.Select a board that is smooth and straight, with good square edges.
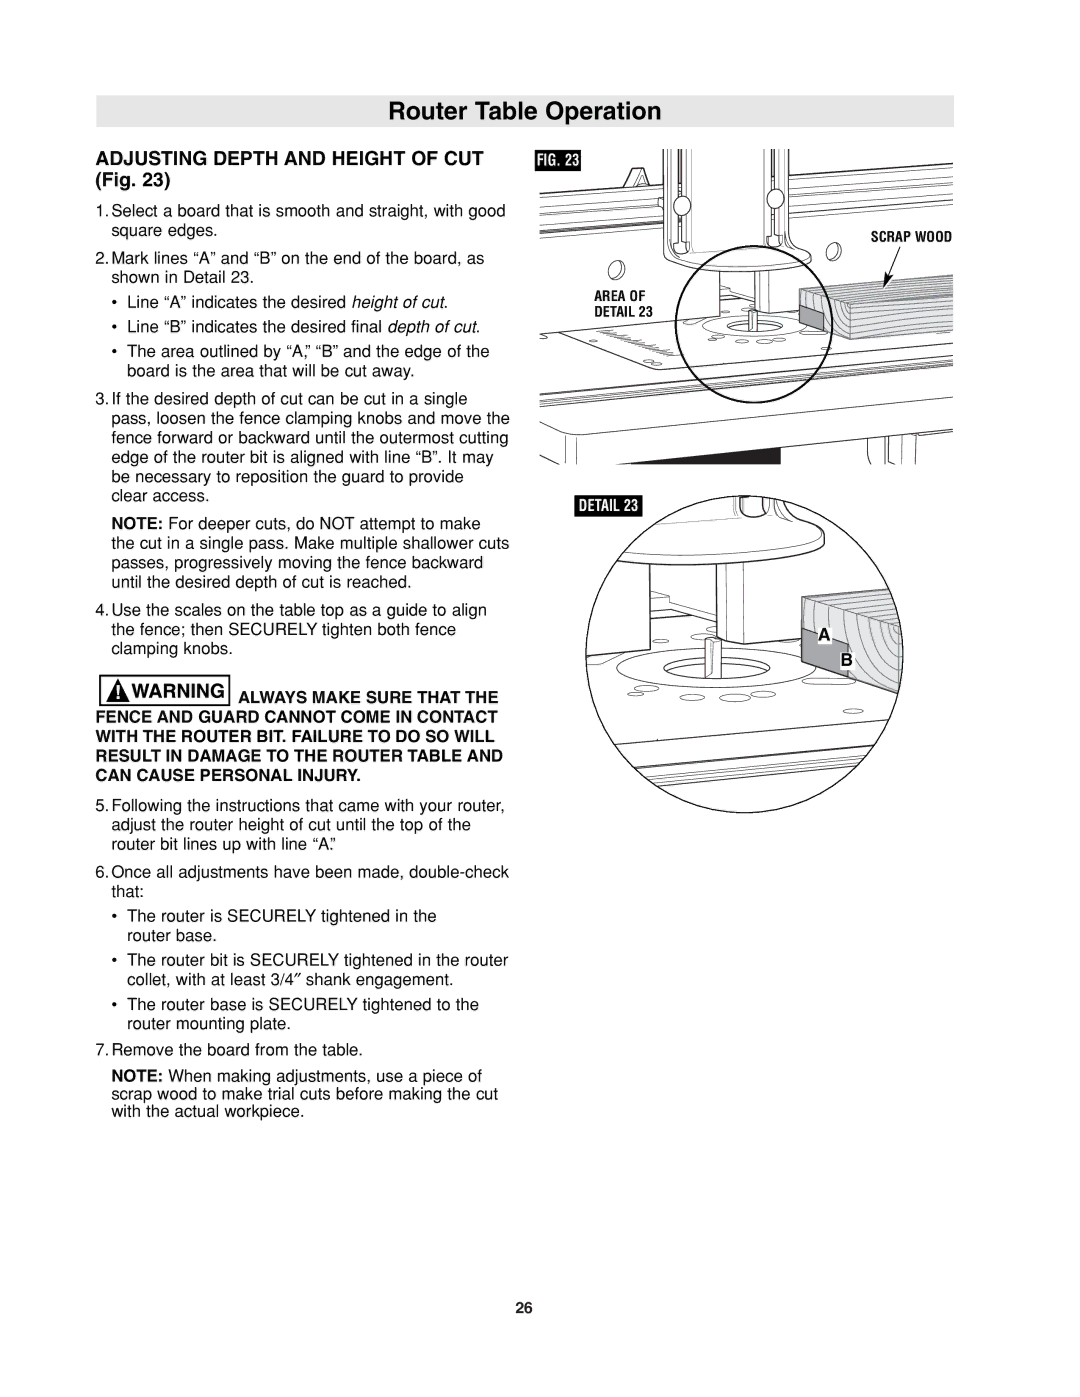
2.Mark lines “A” and “B” on the end of the board, as shown in Detail 23.
•Line “A” indicates the desired height of cut.
•Line “B” indicates the desired final depth of cut.
•The area outlined by “A,” “B” and the edge of the board is the area that will be cut away.
3.If the desired depth of cut can be cut in a single pass, loosen the fence clamping knobs and move the fence forward or backward until the outermost cutting edge of the router bit is aligned with line “B”. It may be necessary to reposition the guard to provide clear access.
NOTE: For deeper cuts, do NOT attempt to make the cut in a single pass. Make multiple shallower cuts passes, progressively moving the fence backward until the desired depth of cut is reached.
4.Use the scales on the table top as a guide to align the fence; then SECURELY tighten both fence clamping knobs.
![]()
![]()
![]()
![]()
![]()
![]()
![]()
![]()
![]() ALWAYS MAKE SURE THAT THE FENCE AND GUARD CANNOT COME IN CONTACT WITH THE ROUTER BIT. FAILURE TO DO SO WILL RESULT IN DAMAGE TO THE ROUTER TABLE AND CAN CAUSE PERSONAL INJURY.
ALWAYS MAKE SURE THAT THE FENCE AND GUARD CANNOT COME IN CONTACT WITH THE ROUTER BIT. FAILURE TO DO SO WILL RESULT IN DAMAGE TO THE ROUTER TABLE AND CAN CAUSE PERSONAL INJURY.
5.Following the instructions that came with your router, adjust the router height of cut until the top of the router bit lines up with line “A.”
6.Once all adjustments have been made,
•The router is SECURELY tightened in the router base.
•The router bit is SECURELY tightened in the router collet, with at least 3/4″ shank engagement.
•The router base is SECURELY tightened to the router mounting plate.
7.Remove the board from the table.
NOTE: When making adjustments, use a piece of scrap wood to make trial cuts before making the cut with the actual workpiece.
FIG. 23
SCRAP WOOD
AREA OF
DETAIL 23
DETAIL 23
A
![]() B
B
26