Router Table Assembly
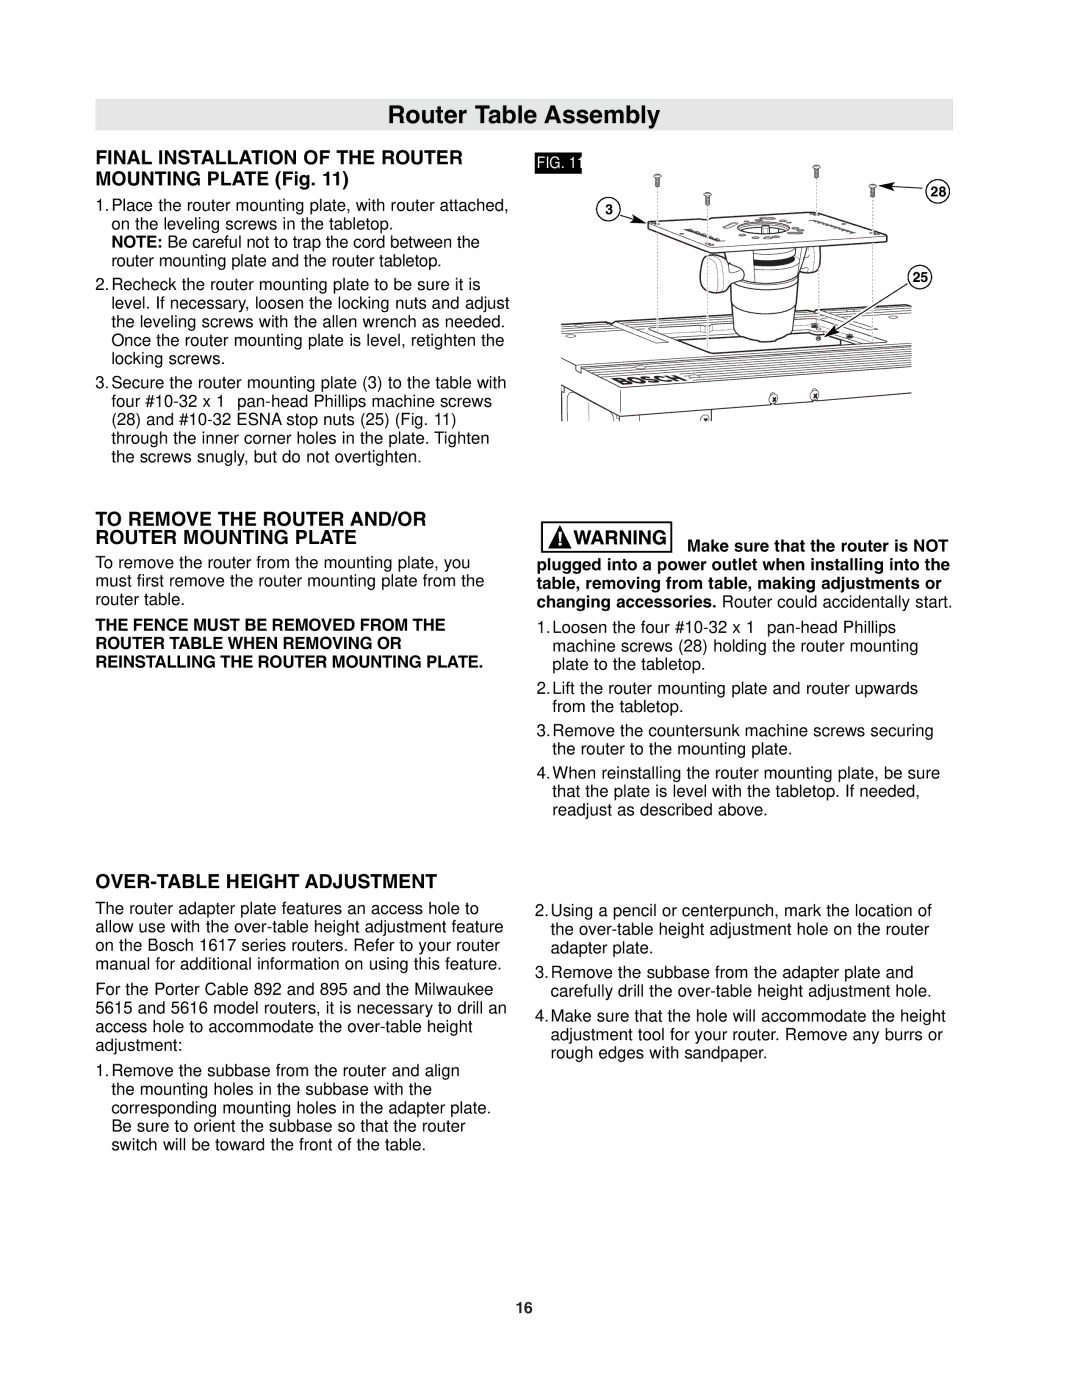
FINAL INSTALLATION OF THE ROUTER MOUNTING PLATE (Fig. 11)
1.Place the router mounting plate, with router attached, on the leveling screws in the tabletop.
NOTE: Be careful not to trap the cord between the router mounting plate and the router tabletop.
2.Recheck the router mounting plate to be sure it is level. If necessary, loosen the locking nuts and adjust the leveling screws with the allen wrench as needed. Once the router mounting plate is level, retighten the locking screws.
3.Secure the router mounting plate (3) to the table with four
TO REMOVE THE ROUTER AND/OR ROUTER MOUNTING PLATE
To remove the router from the mounting plate, you must first remove the router mounting plate from the router table.
THE FENCE MUST BE REMOVED FROM THE ROUTER TABLE WHEN REMOVING OR REINSTALLING THE ROUTER MOUNTING PLATE.
OVER-TABLE HEIGHT ADJUSTMENT
The router adapter plate features an access hole to allow use with the
For the Porter Cable 892 and 895 and the Milwaukee 5615 and 5616 model routers, it is necessary to drill an access hole to accommodate the
1.Remove the subbase from the router and align the mounting holes in the subbase with the corresponding mounting holes in the adapter plate. Be sure to orient the subbase so that the router switch will be toward the front of the table.
FIG. 11
![]()
![]()
![]()
![]() 28 3
28 3![]()
![]()
25
![]()
![]()
![]() Make sure that the router is NOT plugged into a power outlet when installing into the table, removing from table, making adjustments or changing accessories. Router could accidentally start.
Make sure that the router is NOT plugged into a power outlet when installing into the table, removing from table, making adjustments or changing accessories. Router could accidentally start.
1.Loosen the four
2.Lift the router mounting plate and router upwards from the tabletop.
3.Remove the countersunk machine screws securing the router to the mounting plate.
4.When reinstalling the router mounting plate, be sure that the plate is level with the tabletop. If needed, readjust as described above.
2.Using a pencil or centerpunch, mark the location of the
3.Remove the subbase from the adapter plate and carefully drill the
4.Make sure that the hole will accommodate the height adjustment tool for your router. Remove any burrs or rough edges with sandpaper.
16