Router Table Assembly
METHOD 2 (Fig. 14) | FIG. 14 |
1. Set the router table on a workbench or other stable and sturdy surface, with the FRONT (switch side) of the router table facing toward you.
2. Secure the router table legs to the workbench with clamps, making sure to tighten them SECURELY. IMPORTANT: Be sure the placement of the clamps will not interfere with operation of the router table.
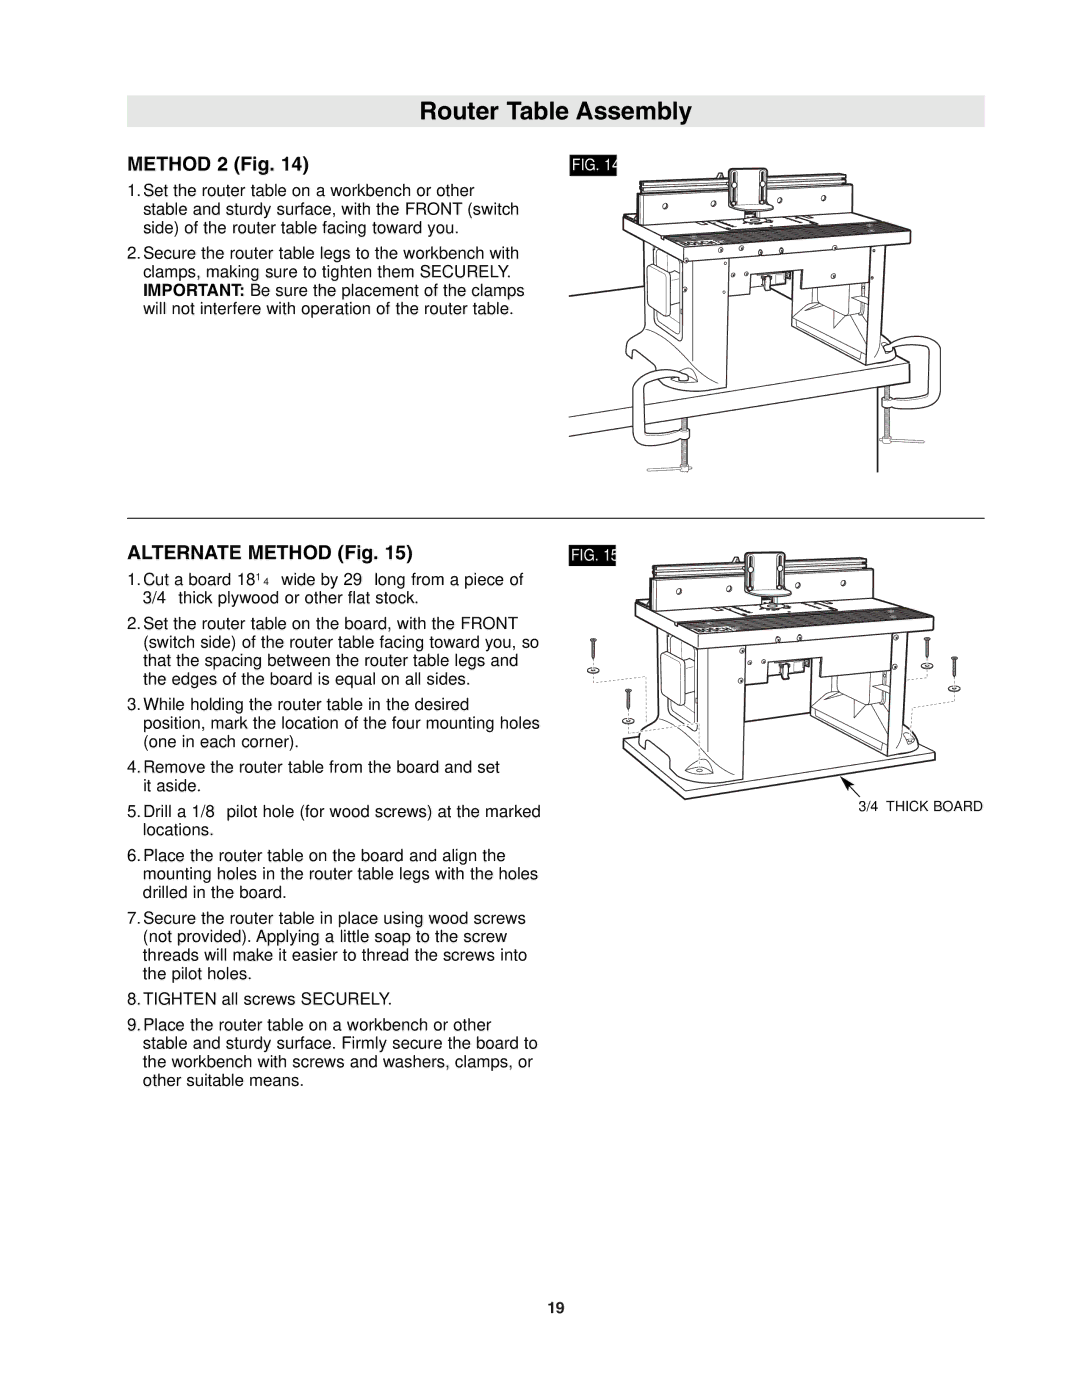
ALTERNATE METHOD (Fig. 15) | FIG. 15 |
1. Cut a board 181⁄4″ wide by 29″ long from a piece of 3/4″ thick plywood or other flat stock.
2. Set the router table on the board, with the FRONT (switch side) of the router table facing toward you, so that the spacing between the router table legs and the edges of the board is equal on all sides.
3. While holding the router table in the desired position, mark the location of the four mounting holes (one in each corner).
4. Remove the router table from the board and set |
|
it aside. |
|
5. Drill a 1/8″ pilot hole (for wood screws) at the marked | 3/4″ THICK BOARD |
locations. |
|
6.Place the router table on the board and align the mounting holes in the router table legs with the holes drilled in the board.
7.Secure the router table in place using wood screws (not provided). Applying a little soap to the screw threads will make it easier to thread the screws into the pilot holes.
8.TIGHTEN all screws SECURELY.
9.Place the router table on a workbench or other stable and sturdy surface. Firmly secure the board to the workbench with screws and washers, clamps, or other suitable means.
19