Router Table Operation
EDGE CUTTING WITH NONPILOTED | FIG. 26 |
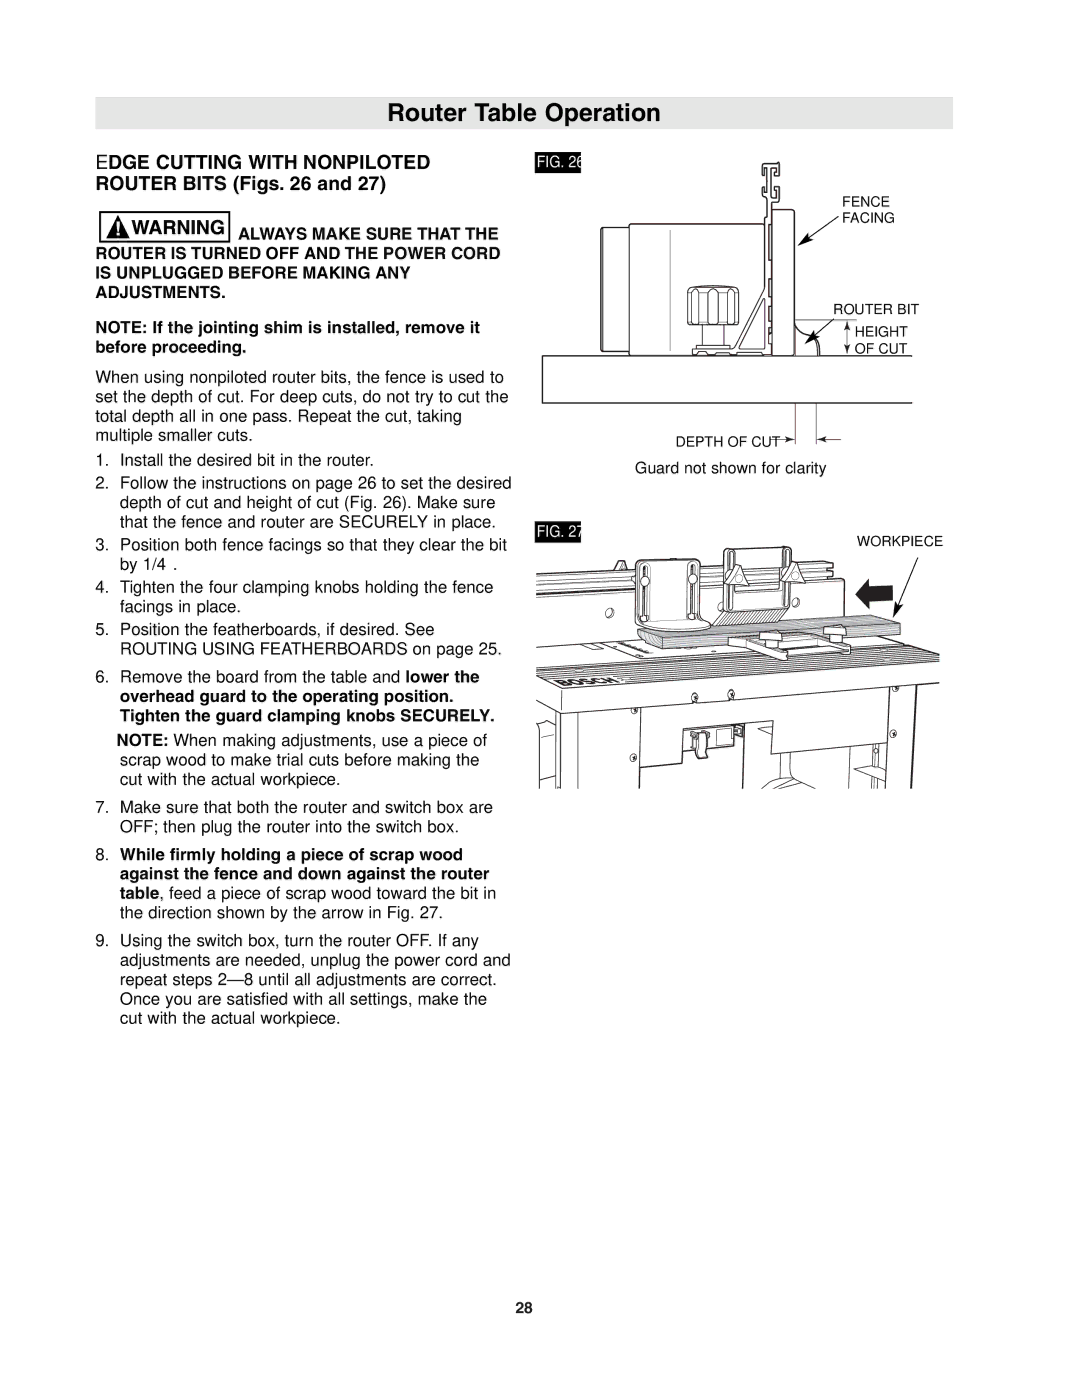
ROUTER BITS (Figs. 26 and 27) |
|
![]()
![]()
![]()
![]()
![]()
![]()
![]()
![]()
![]() ALWAYS MAKE SURE THAT THE ROUTER IS TURNED OFF AND THE POWER CORD IS UNPLUGGED BEFORE MAKING ANY ADJUSTMENTS.
ALWAYS MAKE SURE THAT THE ROUTER IS TURNED OFF AND THE POWER CORD IS UNPLUGGED BEFORE MAKING ANY ADJUSTMENTS.
NOTE: If the jointing shim is installed, remove it before proceeding.
FENCE
![]() FACING
FACING
ROUTER BIT
HEIGHT |
OF CUT |
When using nonpiloted router bits, the fence is used to |
|
| ||
set the depth of cut. For deep cuts, do not try to cut the |
|
| ||
total depth all in one pass. Repeat the cut, taking |
|
| ||
multiple smaller cuts. |
| DEPTH OF CUT | ||
1. | Install the desired bit in the router. |
| ||
| Guard not shown for clarity | |||
2. | Follow the instructions on page 26 to set the desired |
| ||
|
| |||
| depth of cut and height of cut (Fig. 26). Make sure |
|
| |
| that the fence and router are SECURELY in place. | FIG. 27 |
| |
3. | Position both fence facings so that they clear the bit | WORKPIECE | ||
| ||||
| by 1/4″. |
|
| |
4. | Tighten the four clamping knobs holding the fence |
|
| |
| facings in place. |
|
| |
5. Position the featherboards, if desired. See ROUTING USING FEATHERBOARDS on page 25.
6. Remove the board from the table and lower the
overhead guard to the operating position. Tighten the guard clamping knobs SECURELY.
NOTE: When making adjustments, use a piece of scrap wood to make trial cuts before making the cut with the actual workpiece.
7.Make sure that both the router and switch box are OFF; then plug the router into the switch box.
8.While firmly holding a piece of scrap wood against the fence and down against the router table, feed a piece of scrap wood toward the bit in the direction shown by the arrow in Fig. 27.
9.Using the switch box, turn the router OFF. If any adjustments are needed, unplug the power cord and repeat steps
28