Assembly Guide | ||
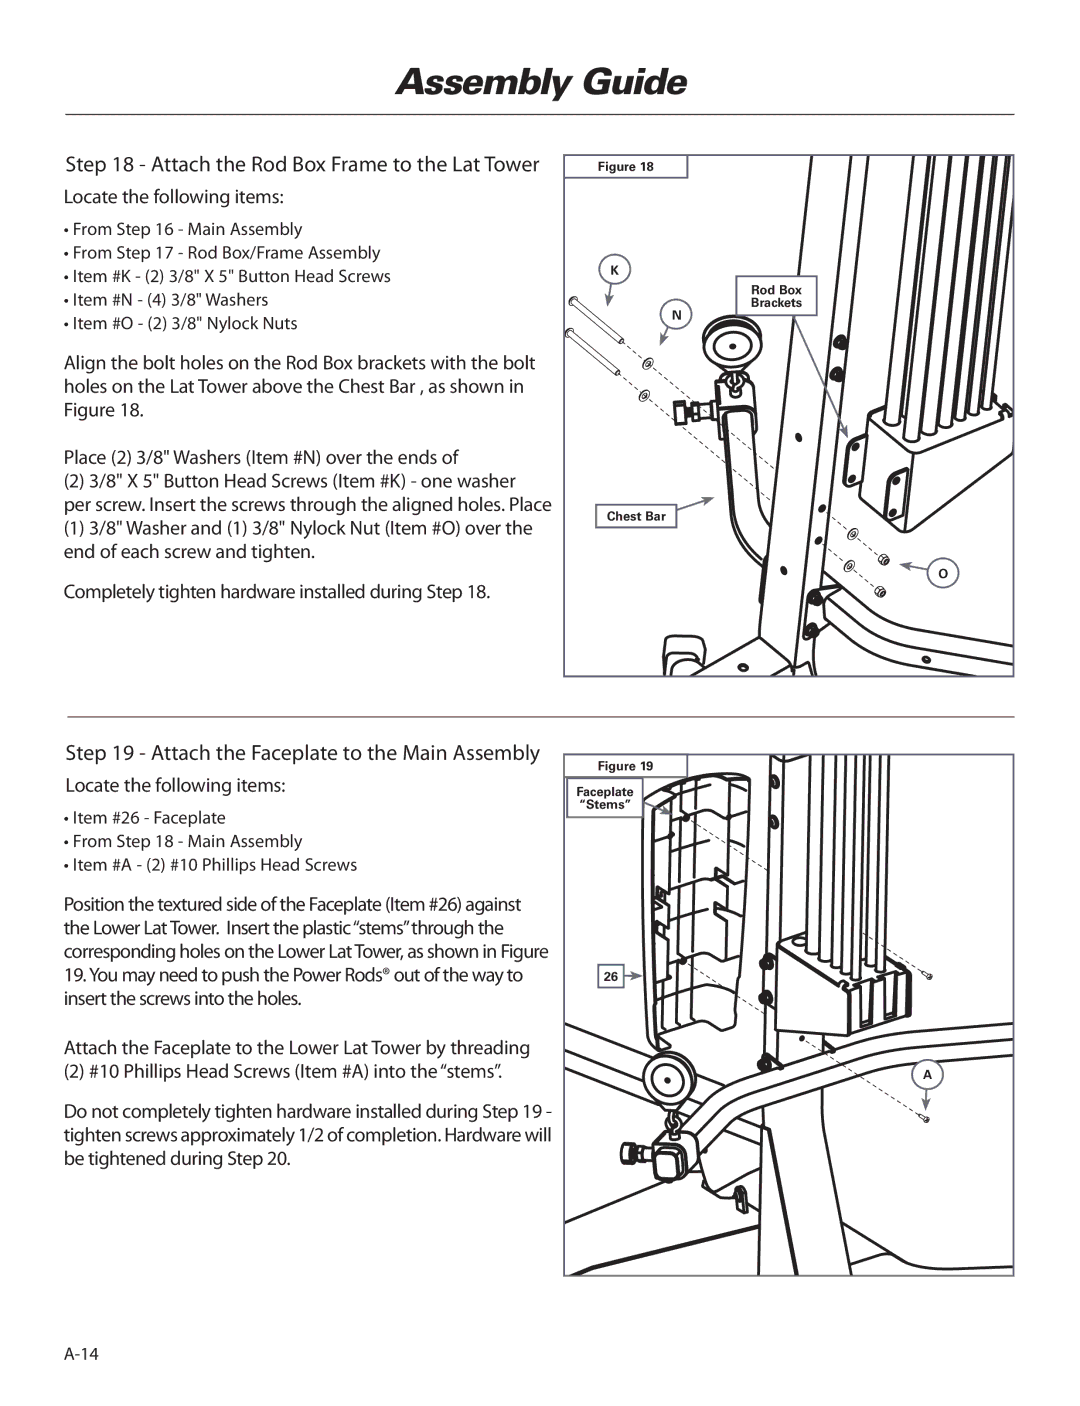
Step 18 - Attach the Rod Box Frame to the Lat Tower | Figure 18 | |
Locate the following items: |
| |
• From Step 16 - Main Assembly |
| |
• From Step 17 - Rod Box/Frame Assembly | K | |
• Item #K - (2) 3/8" X 5" Button Head Screws | ||
Rod Box | ||
• Item #N - (4) 3/8" Washers | ||
Brackets | ||
• Item #O - (2) 3/8" Nylock Nuts | N | |
| ||
Align the bolt holes on the Rod Box brackets with the bolt |
| |
holes on the Lat Tower above the Chest Bar , as shown in |
| |
Figure 18. |
| |
Place (2) 3/8" Washers (Item #N) over the ends of |
| |
(2) 3/8" X 5" Button Head Screws (Item #K) - one washer |
| |
per screw. Insert the screws through the aligned holes. Place | Chest Bar | |
(1) 3/8" Washer and (1) 3/8" Nylock Nut (Item #O) over the | ||
| ||
end of each screw and tighten. |
| |
Completely tighten hardware installed during Step 18. | O | |
| ||
Step 19 - Attach the Faceplate to the Main Assembly | Figure 19 | |
| ||
Locate the following items:
•Item #26 - Faceplate
•From Step 18 - Main Assembly
•Item #A - (2) #10 Phillips Head Screws
Position the textured side of the Faceplate (Item #26) against the Lower Lat Tower. Insert the plastic“stems” through the corresponding holes on the Lower Lat Tower, as shown in Figure 19. You may need to push the Power Rods® out of the way to insert the screws into the holes.
Attach the Faceplate to the Lower Lat Tower by threading
(2) #10 Phillips Head Screws (Item #A) into the “stems”.
Do not completely tighten hardware installed during Step 19 - tighten screws approximately 1/2 of completion. Hardware will be tightened during Step 20.
Faceplate “Stems”
26![]()
A
