SERVICE PROCEDURE D24-IV
Main Burner & Pilot
Removal and Inspection
Pilot Burner Removal |
| Pilot Shield | |
| |||
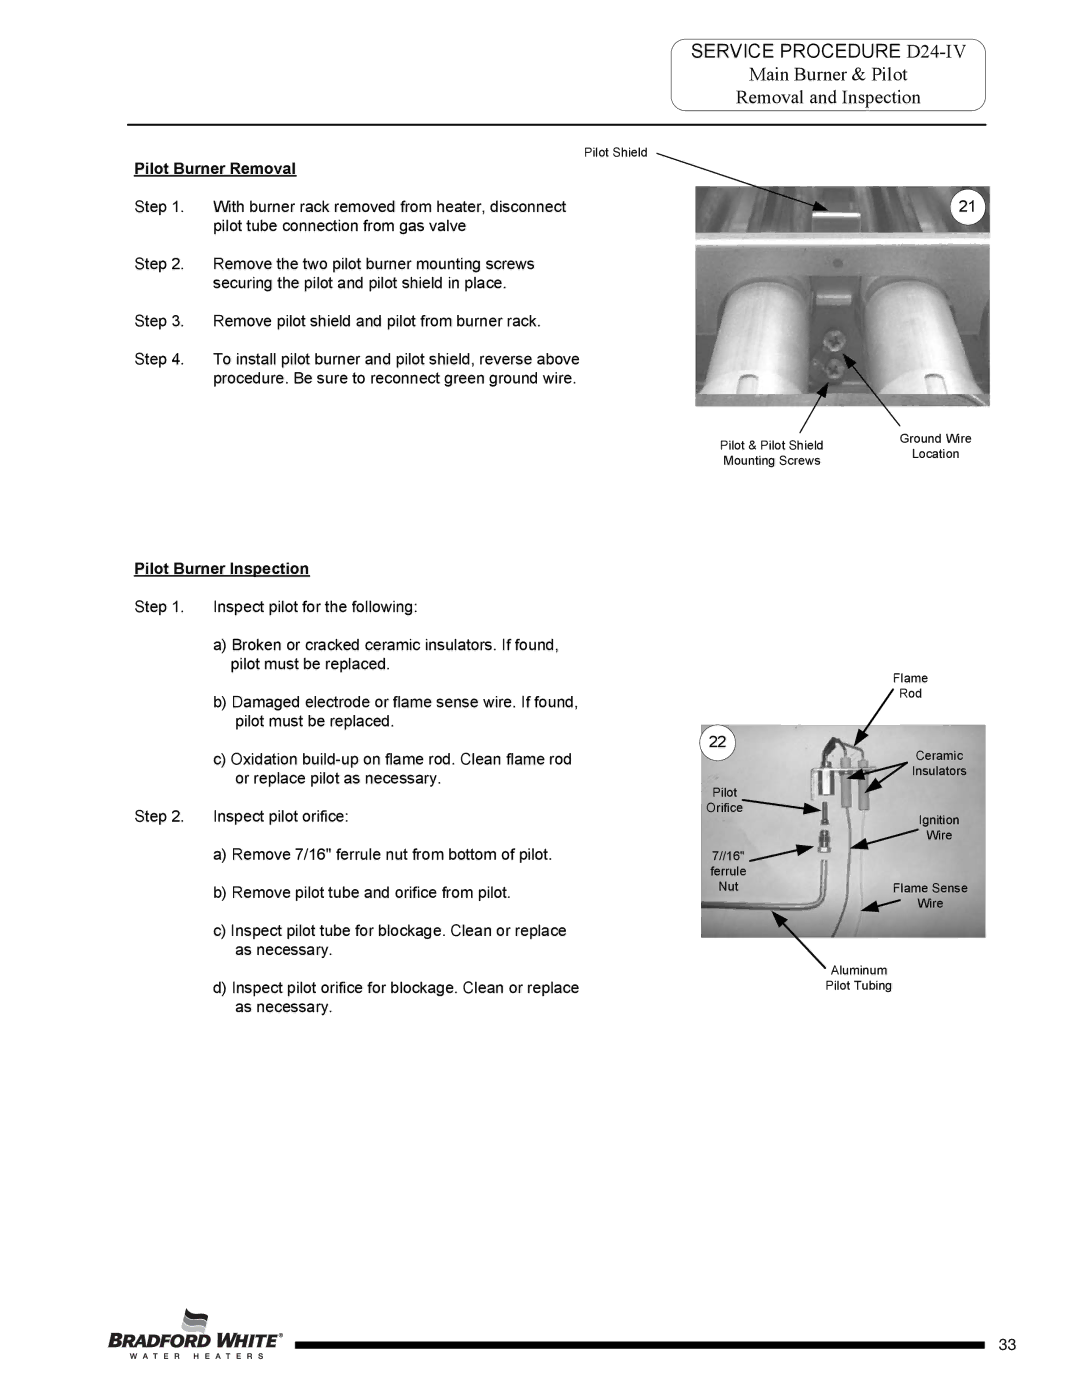
Step 1. | With burner rack removed from heater, disconnect | 21 | |
| pilot tube connection from gas valve |
| |
Step 2. Remove the two pilot burner mounting screws securing the pilot and pilot shield in place.
Step 3. Remove pilot shield and pilot from burner rack.
Step 4. To install pilot burner and pilot shield, reverse above procedure. Be sure to reconnect green ground wire.
Pilot & Pilot Shield | Ground Wire | |
Location | ||
Mounting Screws | ||
|
Pilot Burner Inspection
Step 1. Inspect pilot for the following:
a)Broken or cracked ceramic insulators. If found, pilot must be replaced.
b)Damaged electrode or flame sense wire. If found, pilot must be replaced.
c)Oxidation
Step 2. Inspect pilot orifice:
a)Remove 7/16" ferrule nut from bottom of pilot.
b)Remove pilot tube and orifice from pilot.
c)Inspect pilot tube for blockage. Clean or replace as necessary.
d)Inspect pilot orifice for blockage. Clean or replace as necessary.
Flame
Rod
22 | Ceramic |
| |
| Insulators |
Pilot |
|
Orifice | Ignition |
| |
| Wire |
7//16" |
|
ferrule |
|
Nut | Flame Sense |
| Wire |
| Aluminum |
| Pilot Tubing |
Page 33
33
