TM

SLE100 Installation Manual

It is critically important during installation to ensure the radios on each side of the link are in the same polarization (horizontal-horizontal or vertical-vertical). A link that has a radio on one side of the link set in the horizontal polarization and the other side of the link set in the vertical polarization will not operate properly.

It is also critically important that a high-band radio is paired with a low-band radio to ensure the system will operate properly. Prior to installation check each radio to verify one is a high-band and the other is a low-band version. The label on the radio will indicate the band (blue for high or red for low).

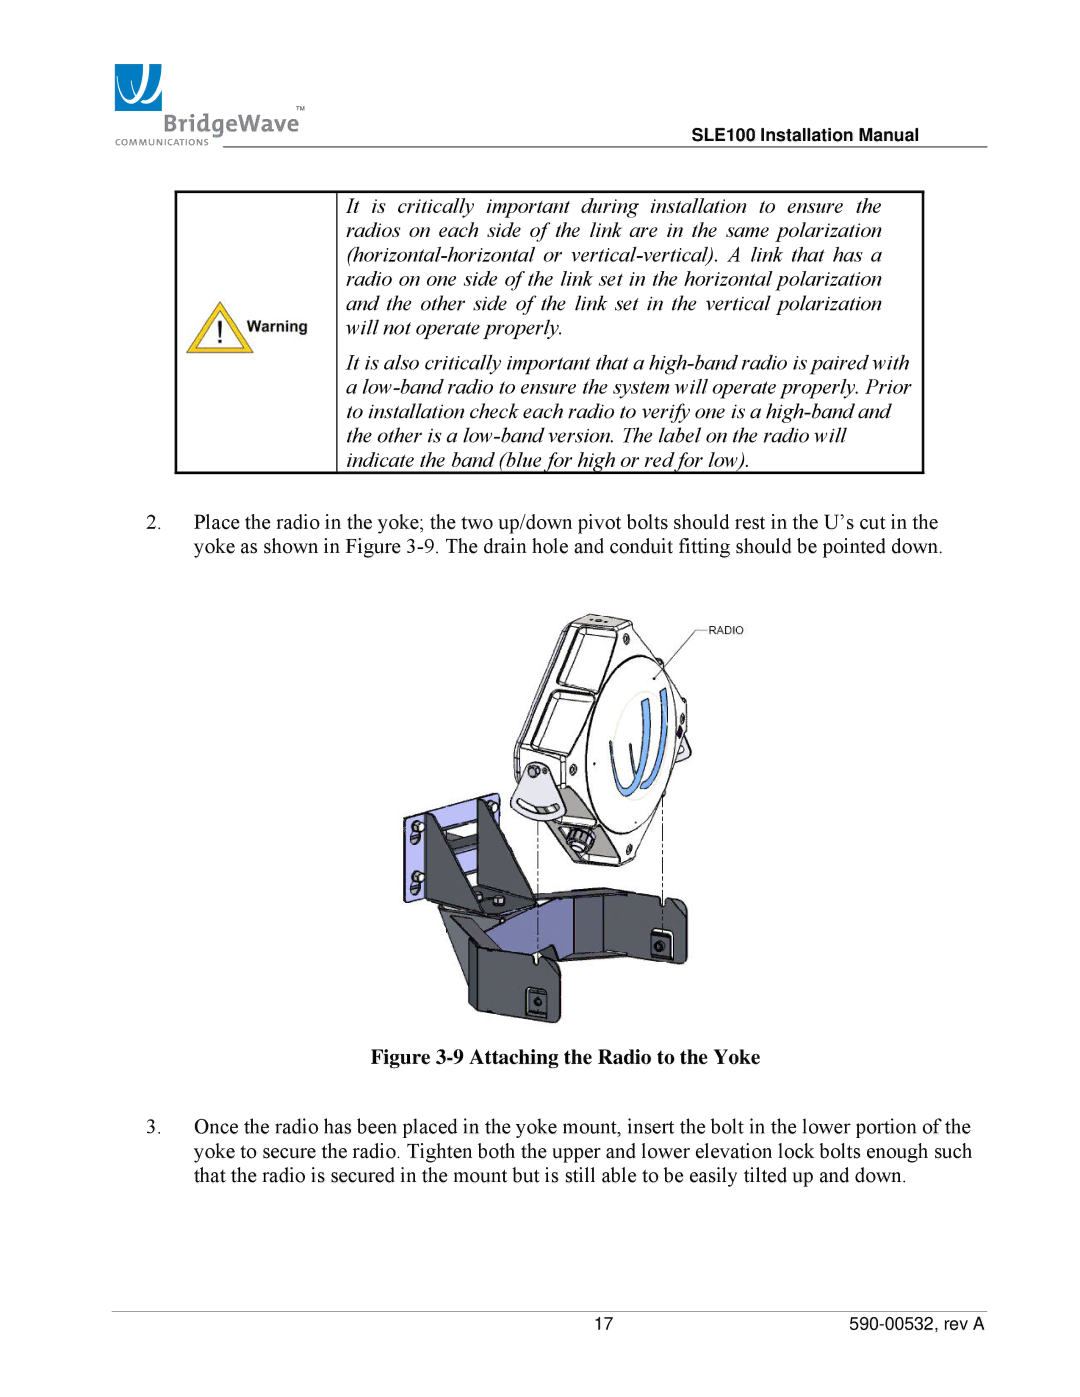
2.Place the radio in the yoke; the two up/down pivot bolts should rest in the U’s cut in the yoke as shown in Figure 3-9. The drain hole and conduit fitting should be pointed down.

Figure 3-9 Attaching the Radio to the Yoke

3.Once the radio has been placed in the yoke mount, insert the bolt in the lower portion of the yoke to secure the radio. Tighten both the upper and lower elevation lock bolts enough such that the radio is secured in the mount but is still able to be easily tilted up and down.

17

590-00532, rev A

Page 22
Image 22
BridgeWave SLE100 installation manual Attaching the Radio to the Yoke