17 | |
|
|
3
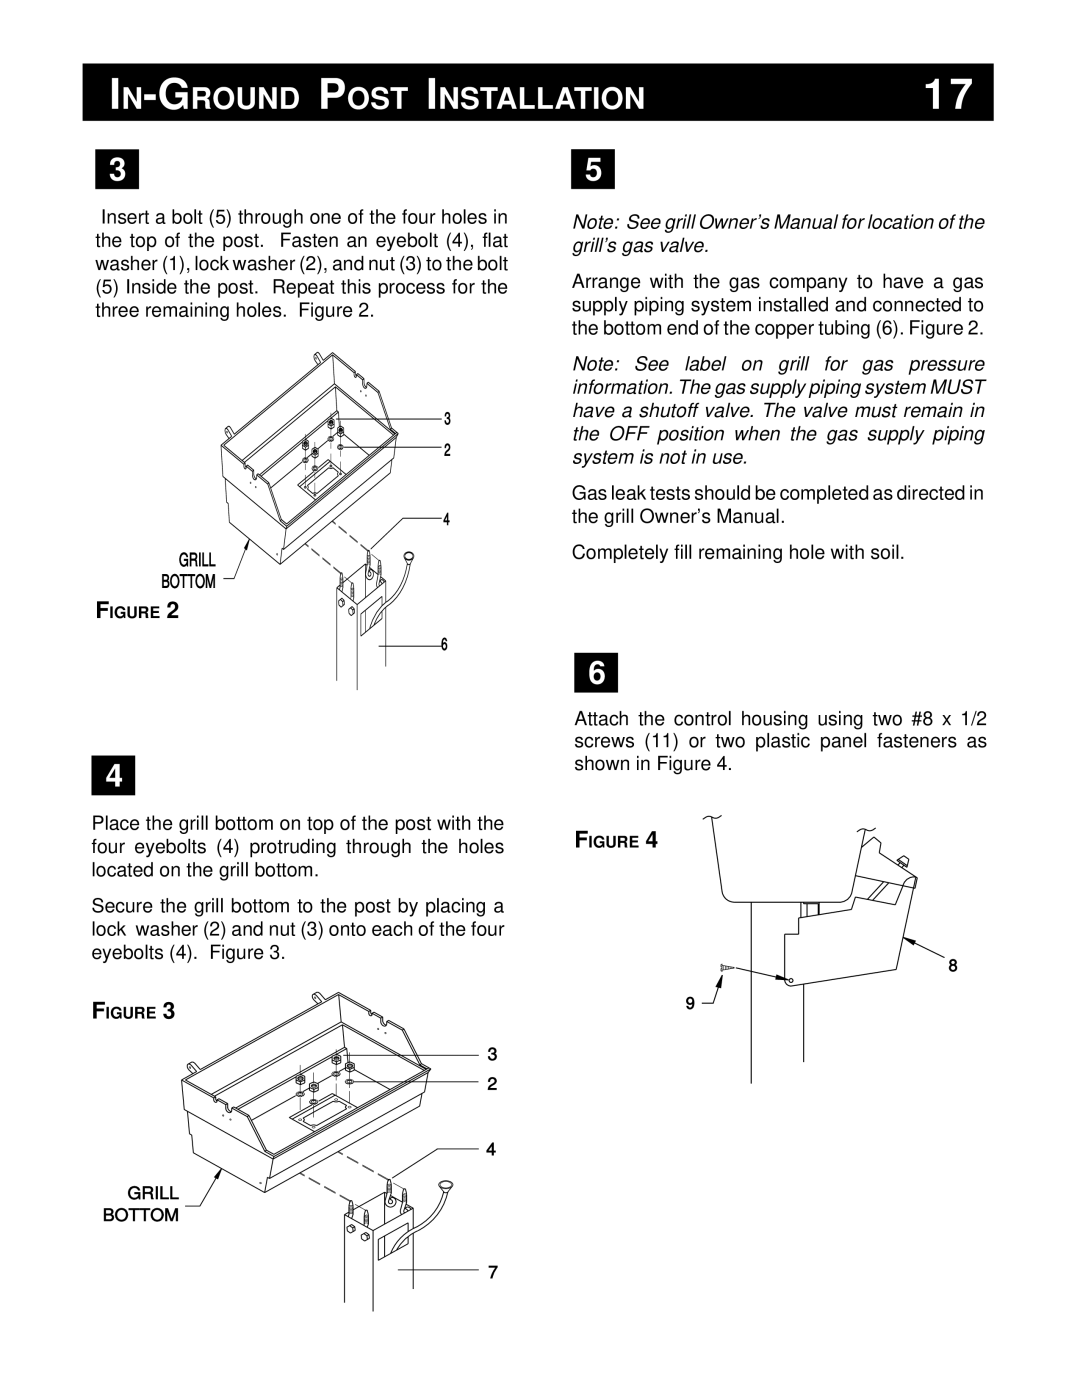
Insert a bolt (5) through one of the four holes in the top of the post. Fasten an eyebolt (4), flat washer (1), lock washer (2), and nut (3) to the bolt
(5)Inside the post. Repeat this process for the three remaining holes. Figure 2.
3
2
4
GRILL
BOTTOM
FIGURE 2
6
4
Place the grill bottom on top of the post with the four eyebolts (4) protruding through the holes located on the grill bottom.
Secure the grill bottom to the post by placing a lock washer (2) and nut (3) onto each of the four eyebolts (4). Figure 3.
FIGURE 3
3
2
4
GRILL
BOTTOM
5
Note: See grill Owner’s Manual for location of the grill’s gas valve.
Arrange with the gas company to have a gas supply piping system installed and connected to the bottom end of the copper tubing (6). Figure 2.
Note: See label on grill for gas pressure information. The gas supply piping system MUST have a shutoff valve. The valve must remain in the OFF position when the gas supply piping system is not in use.
Gas leak tests should be completed as directed in the grill Owner’s Manual.
Completely fill remaining hole with soil.
6
Attach the control housing using two #8 x 1/2 screws (11) or two plastic panel fasteners as shown in Figure 4.
FIGURE 4
8
9
7