1Set the Trimming Mode.
(1)Display the setting screens for Printing an Image, Specify images and Select layout.
See “Printing an Image Displayed on the LCD” on page 10.
See “Specifying how many copies to print for each image” on page 15. See “Specifying the layout” on page 20.
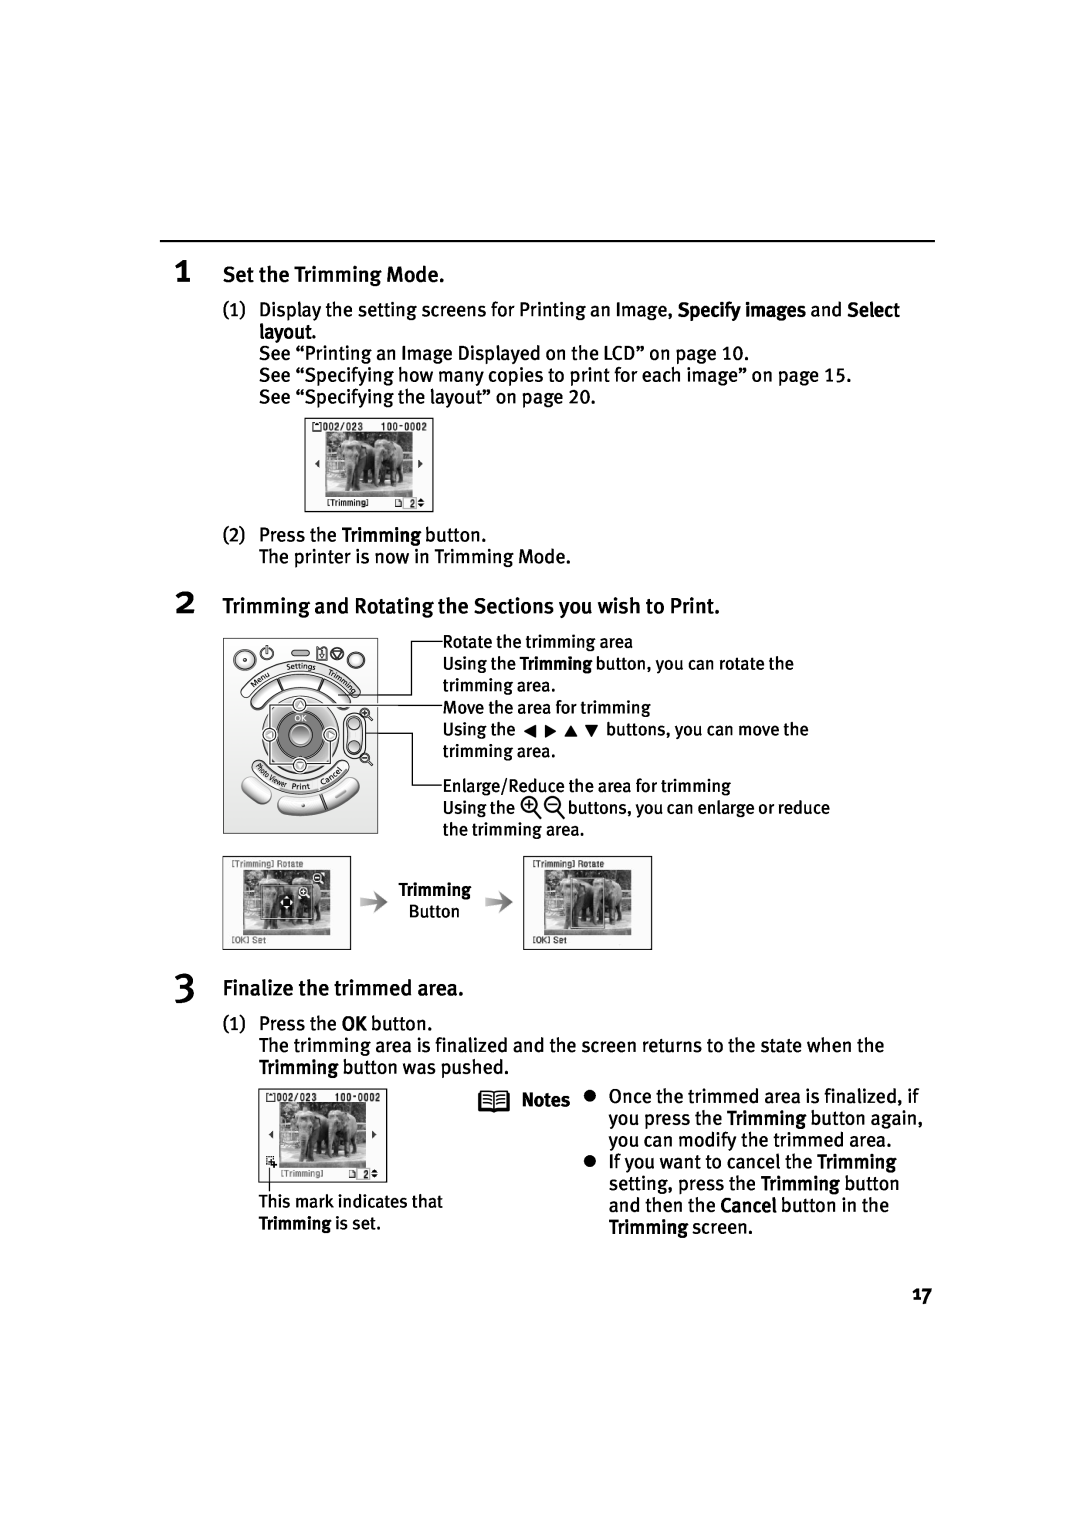
(2)Press the Trimming button.
The printer is now in Trimming Mode.
2Trimming and Rotating the Sections you wish to Print.
Rotate the trimming area
Using the Trimming button, you can rotate the trimming area.
![]()
![]()
![]() Move the area for trimming
Move the area for trimming
Using the | buttons, you can move the | |
trimming area. |
| |
Enlarge/Reduce the area for trimming | ||
Using the |
| buttons, you can enlarge or reduce |
| ||
the trimming area.
Trimming
Button
3Finalize the trimmed area.
(1)Press the OK button.
The trimming area is finalized and the screen returns to the state when the Trimming button was pushed.
This mark indicates that Trimming is set.
Notes z Once the trimmed area is finalized, if you press the Trimming button again,
you can modify the trimmed area.
zIf you want to cancel the Trimming setting, press the Trimming button and then the Cancel button in the Trimming screen.
17
