S T E P 3
Tone Adjustment
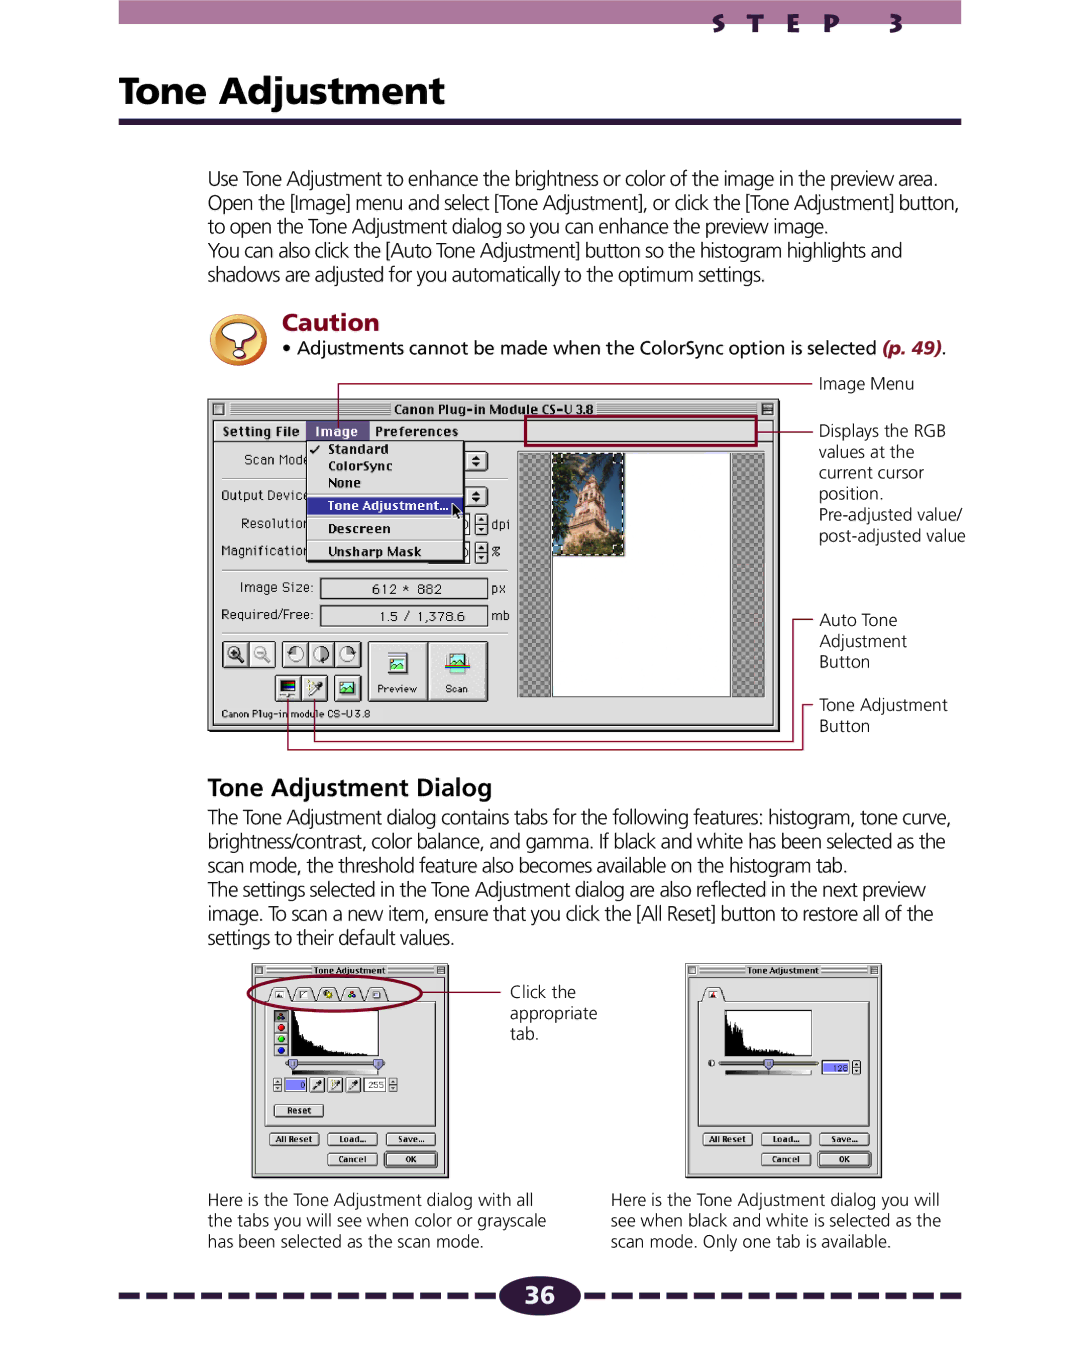
Use Tone Adjustment to enhance the brightness or color of the image in the preview area. Open the [Image] menu and select [Tone Adjustment], or click the [Tone Adjustment] button, to open the Tone Adjustment dialog so you can enhance the preview image.
You can also click the [Auto Tone Adjustment] button so the histogram highlights and shadows are adjusted for you automatically to the optimum settings.
Caution
![]() • Adjustments cannot be made when the ColorSync option is selected (p. 49).
• Adjustments cannot be made when the ColorSync option is selected (p. 49).
Image Menu
Displays the RGB values at the current cursor position.
Auto Tone
Adjustment
Button
Tone Adjustment
Button
Tone Adjustment Dialog
The Tone Adjustment dialog contains tabs for the following features: histogram, tone curve, brightness/contrast, color balance, and gamma. If black and white has been selected as the scan mode, the threshold feature also becomes available on the histogram tab.
The settings selected in the Tone Adjustment dialog are also reflected in the next preview image. To scan a new item, ensure that you click the [All Reset] button to restore all of the settings to their default values.
Click the appropriate tab.
Here is the Tone Adjustment dialog with all the tabs you will see when color or grayscale has been selected as the scan mode.
Here is the Tone Adjustment dialog you will see when black and white is selected as the scan mode. Only one tab is available.
![]()
![]()
![]()
![]()
![]()
![]()
![]()
![]()
![]()
![]()
![]()
![]()
![]()
![]()
![]() 36
36![]()
![]()
![]()
![]()
![]()
![]()
![]()
![]()
![]()
![]()
![]()
![]()
![]()
![]()
![]()