S T E P 1
Setting the Resolution and Magnification
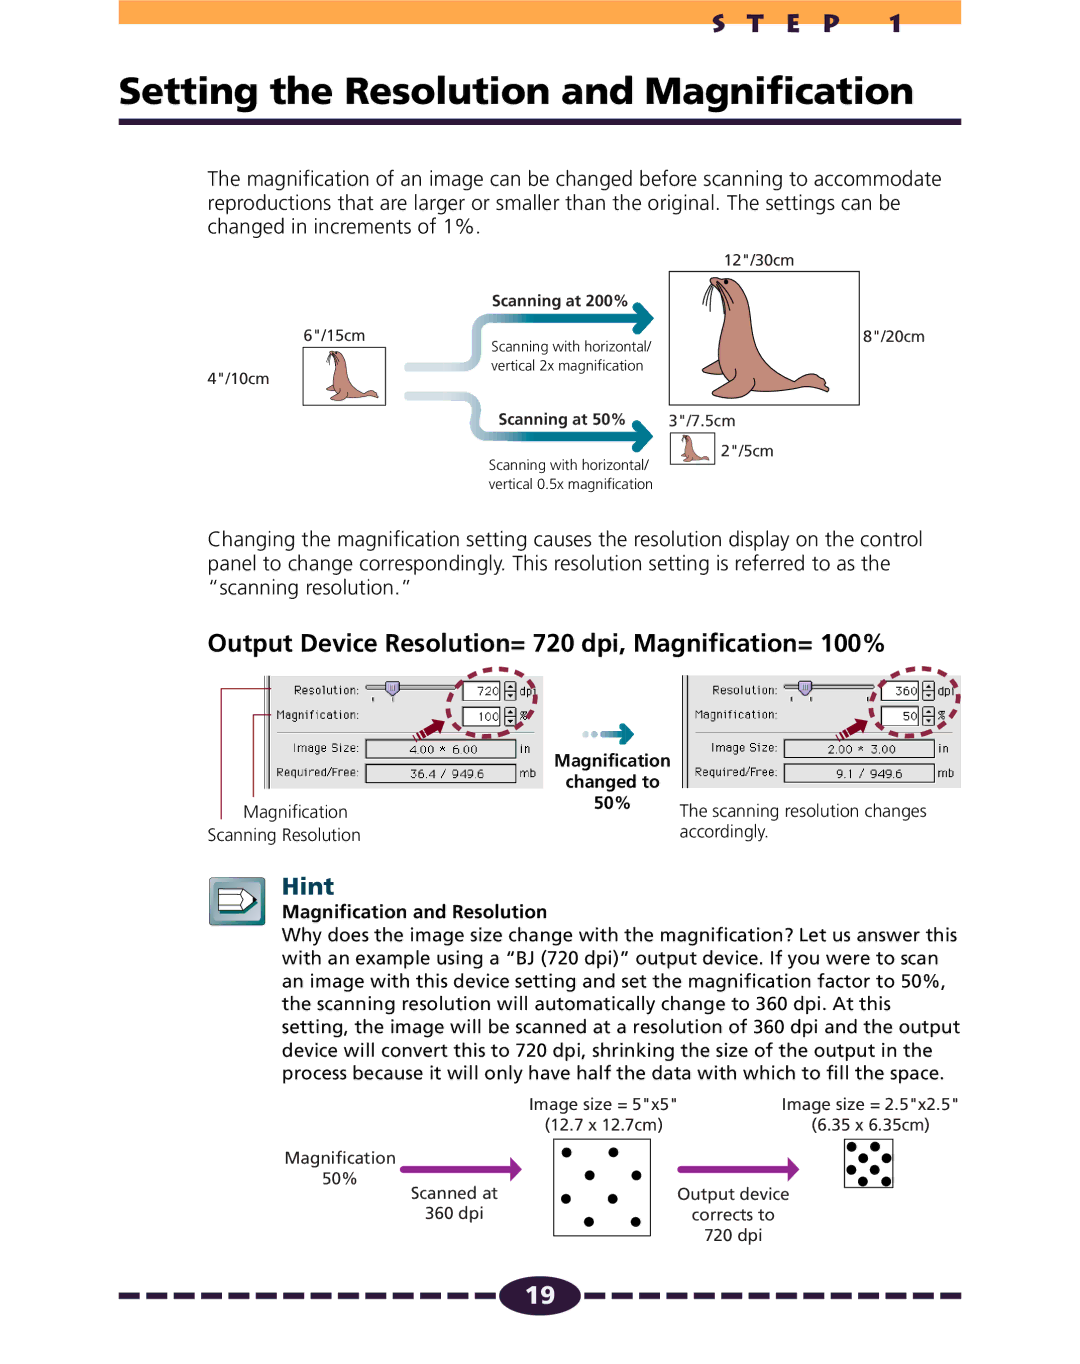
The magnification of an image can be changed before scanning to accommodate reproductions that are larger or smaller than the original. The settings can be changed in increments of 1%.
6"/15cm
4"/10cm
| 12"/30cm |
Scanning at 200% |
|
Scanning with horizontal/ |
|
vertical 2x magnification |
|
Scanning at 50% | 3"/7.5cm |
Scanning with horizontal/ | 2"/5cm |
| |
vertical 0.5x magnification |
|
8"/20cm
Changing the magnification setting causes the resolution display on the control panel to change correspondingly. This resolution setting is referred to as the “scanning resolution.”
Output Device Resolution= 720 dpi, Magnification= 100%
➟
➟
Magnification
changed to
Magnification Scanning Resolution
50%
The scanning resolution changes accordingly.
Hint
Magnification and Resolution
Why does the image size change with the magnification? Let us answer this with an example using a “BJ (720 dpi)” output device. If you were to scan an image with this device setting and set the magnification factor to 50%, the scanning resolution will automatically change to 360 dpi. At this setting, the image will be scanned at a resolution of 360 dpi and the output device will convert this to 720 dpi, shrinking the size of the output in the process because it will only have half the data with which to fill the space.
|
| Image size = 5"x5" | Image size = 2.5"x2.5" | ||||||
|
| (12.7 x 12.7cm) |
|
| (6.35 x 6.35cm) | ||||
Magnification |
|
|
|
|
|
|
| ||
|
|
|
|
|
|
| |||
50% |
|
|
|
|
|
|
|
|
|
Scanned at |
|
| Output device |
|
| ||||
|
|
|
|
| |||||
| 360 dpi |
|
|
| corrects to | ||||
|
|
|
|
|
| 720 dpi | |||
|
|
|
|
|
| ||||
![]()
![]()
![]()
![]()
![]()
![]()
![]()
![]()
![]()
![]()
![]()
![]()
![]()
![]()
![]() 19
19![]()
![]()
![]()
![]()
![]()
![]()
![]()
![]()
![]()
![]()
![]()
![]()
![]()
![]()
![]()