1
2
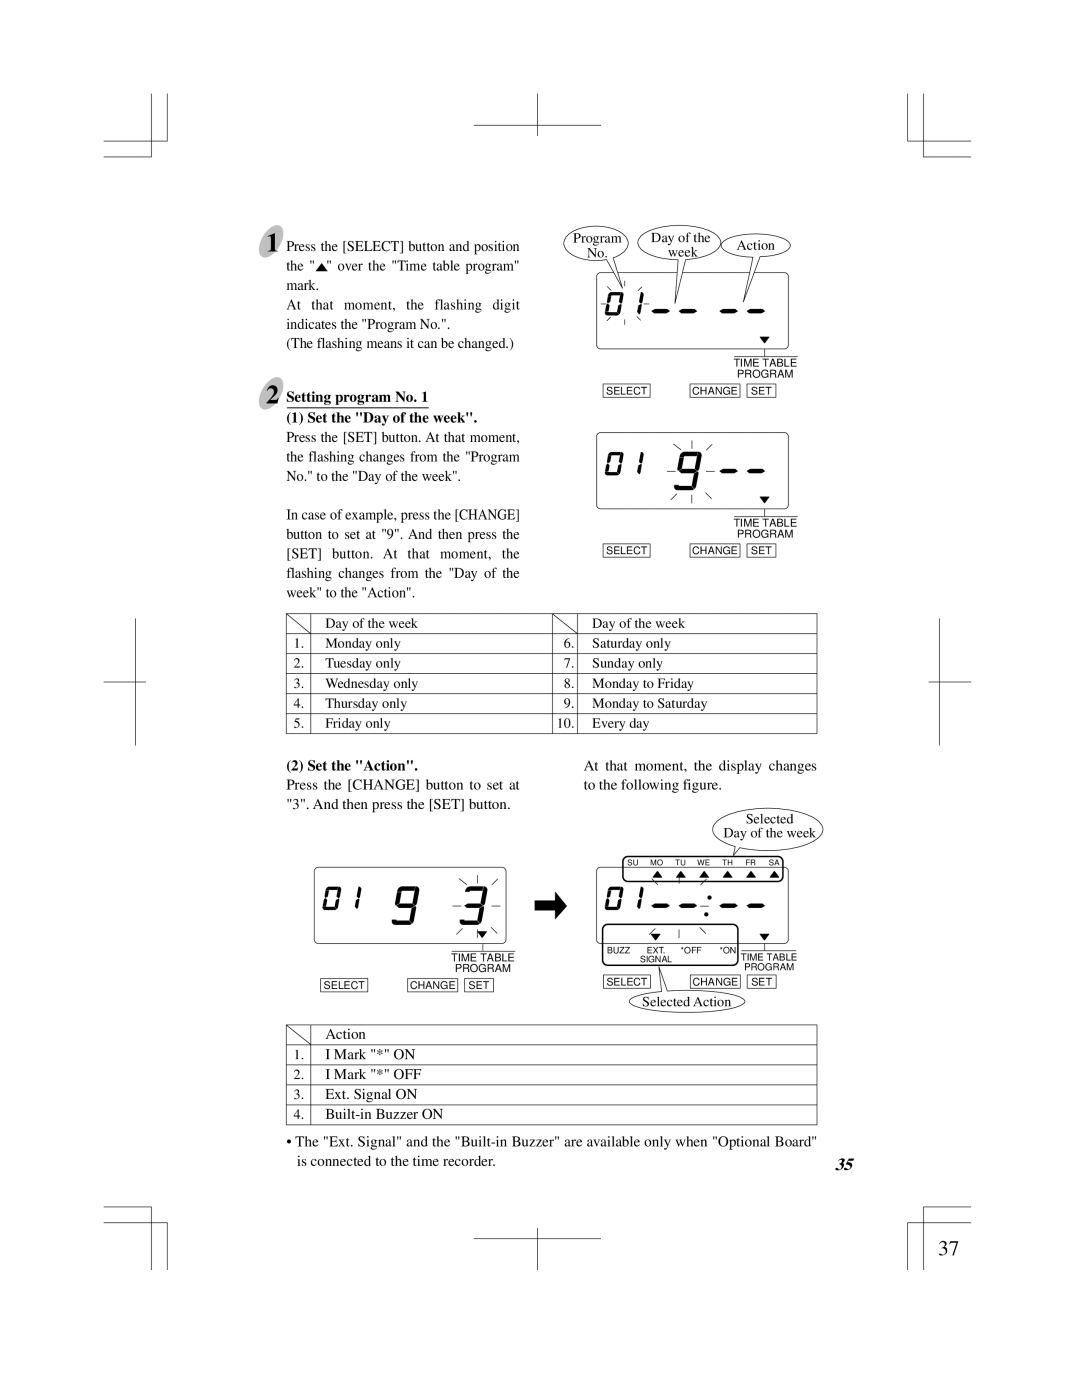
Press the [SELECT] button and position the "![]() " over the "Time table program" mark.
" over the "Time table program" mark.
At that moment, the flashing digit indicates the "Program No.".
(The flashing means it can be changed.)
Setting program No. 1
(1) Set the "Day of the week".
Press the [SET] button. At that moment, the flashing changes from the "Program No." to the "Day of the week".
In case of example, press the [CHANGE] button to set at "9". And then press the [SET] button. At that moment, the flashing changes from the "Day of the week" to the "Action".
Program | Day of the | Action | |
No. | week | ||
|
| TIME TABLE | |||
| PROGRAM | |||
|
|
|
|
|
SELECT | CHANGE |
| SET |
|
| TIME TABLE | |||
| PROGRAM | |||
|
|
|
|
|
SELECT | CHANGE |
| SET |
|
| Day of the week |
| Day of the week |
|
|
|
|
1. | Monday only | 6. | Saturday only |
|
|
|
|
2. | Tuesday only | 7. | Sunday only |
|
|
|
|
3. | Wednesday only | 8. | Monday to Friday |
|
|
|
|
4. | Thursday only | 9. | Monday to Saturday |
|
|
|
|
5. | Friday only | 10. | Every day |
|
|
|
|
(2) Set the "Action".
Press the [CHANGE] button to set at "3". And then press the [SET] button.
| TIME TABLE | |||
| PROGRAM | |||
|
|
|
|
|
SELECT | CHANGE |
| SET |
|
At that moment, the display changes to the following figure.
Selected
Day of the week
SU MO TU WE TH FR SA
BUZZ EXT. | *OFF *ON |
|
| ||||
SIGNAL |
|
| TIME TABLE | ||||
|
|
|
| PROGRAM | |||
SELECT |
|
| CHANGE |
| SET |
| |
Selected Action
Action
1.I Mark "*" ON
2.I Mark "*" OFF
3.Ext. Signal ON
4.
•The "Ext. Signal" and the
33 | is connected to the time recorder. | 35 |
37