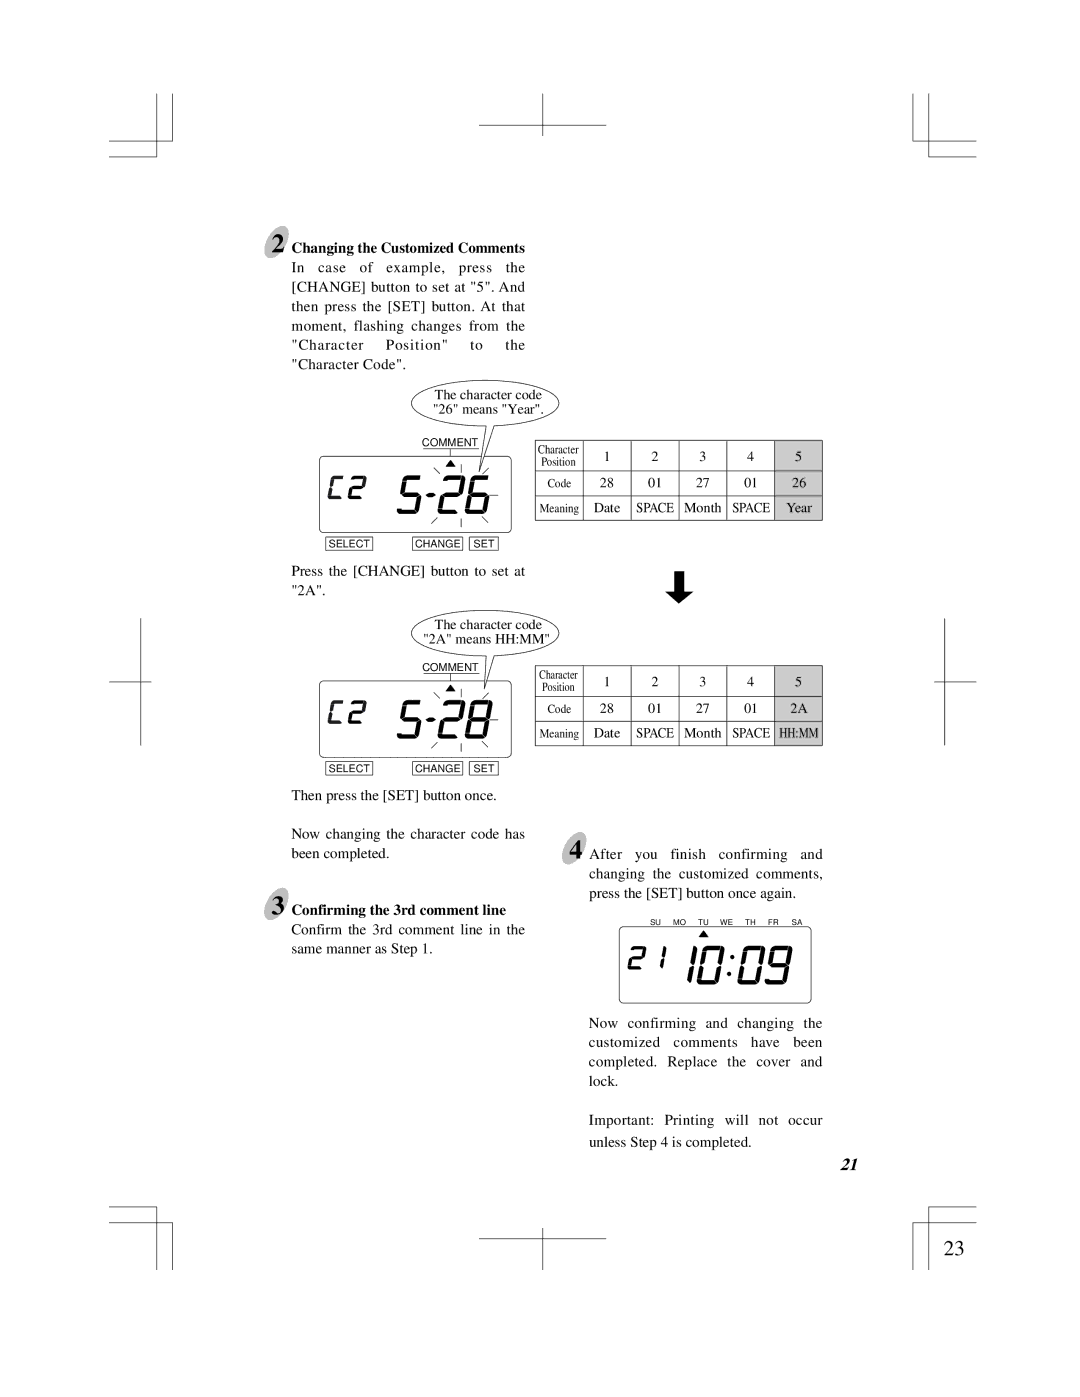
2 Changing the Customized Comments
In case of example, press the [CHANGE] button to set at "5". And then press the [SET] button. At that moment, flashing changes from the "Character Position" to the "Character Code".
The character code "26" means "Year".
COMMENT
SELECT | CHANGE |
| SET |
Press the [CHANGE] button to set at "2A".
Character | 1 | 2 | 3 | 4 | 5 | |
Position | ||||||
|
|
|
|
| ||
Code | 28 | 01 | 27 | 01 | 26 | |
Meaning | Date | SPACE | Month | SPACE | Year | |
|
|
|
|
|
|
The character code "2A" means HH:MM"
COMMENT
SELECT | CHANGE |
| SET |
Then press the [SET] button once.
Character | 1 | 2 | 3 | 4 | 5 | |
Position | ||||||
|
|
|
|
| ||
Code | 28 | 01 | 27 | 01 | 2A | |
Meaning | Date | SPACE | Month | SPACE | HH:MM | |
|
|
|
|
|
|
Now changing the character code has
been completed.4 After you finish confirming and changing the customized comments, press the [SET] button once again.
3 Confirming the 3rd comment line
Confirm the 3rd comment line in the same manner as Step 1.
SU MO TU WE TH FR SA
Now confirming and changing the customized comments have been completed. Replace the cover and lock.
Important: Printing will not occur unless Step 4 is completed.
19 | 21 |
23