17. SETTING THE INITIAL NUMBER
Example: Setting the initial number to "123". Refer to "16. SETTING THE NUMBER".
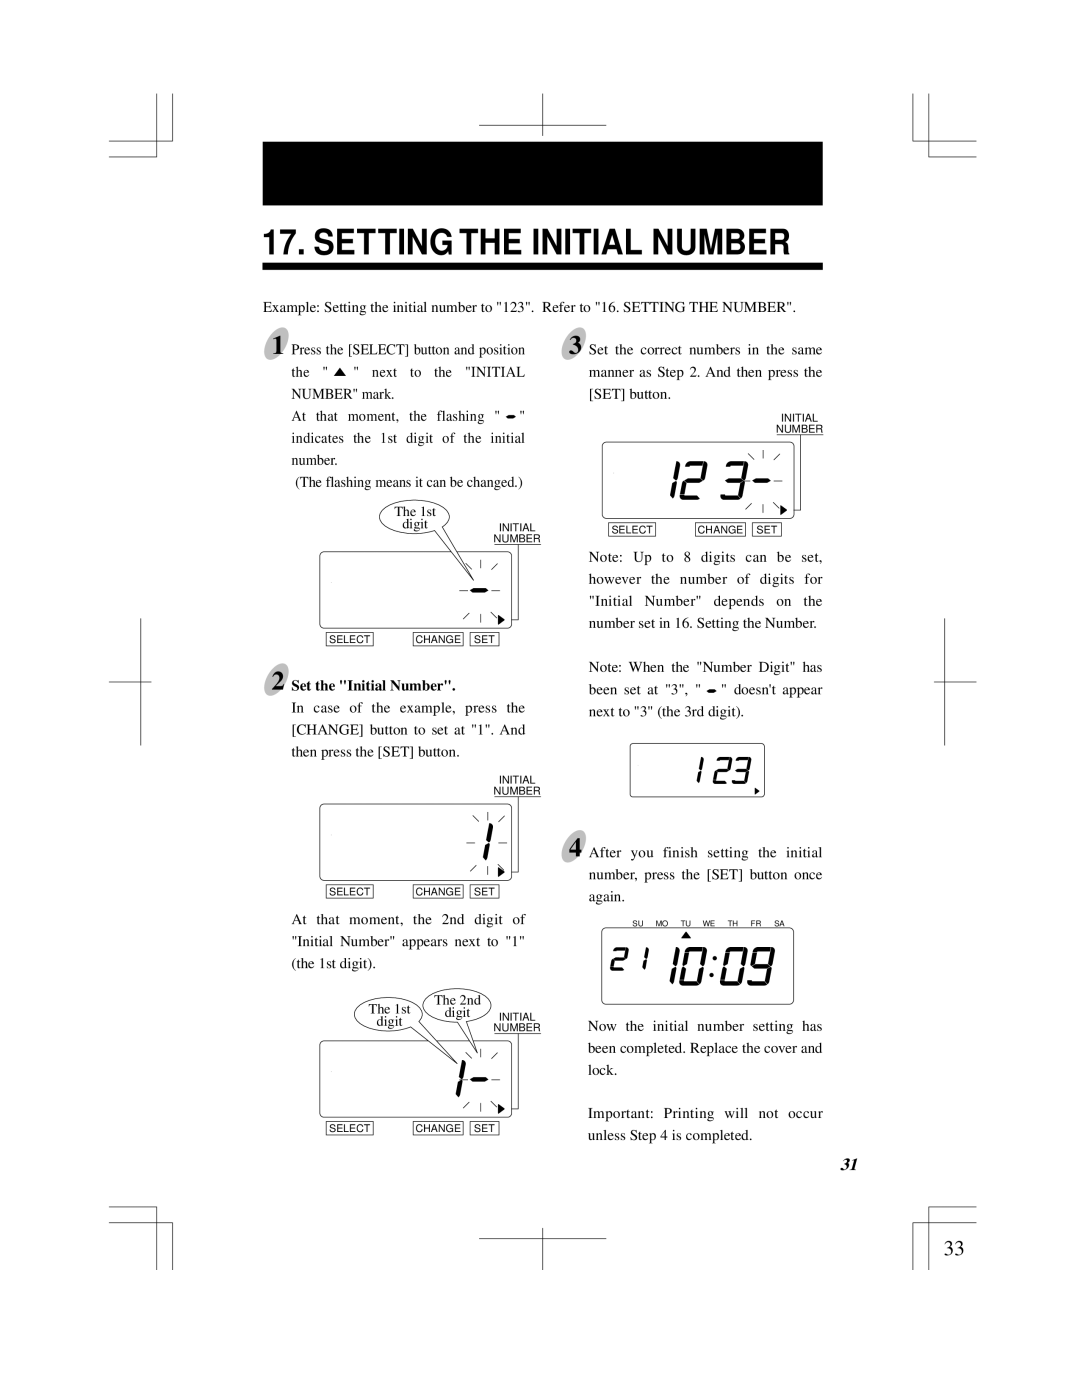
1 Press the [SELECT] button and position the " ![]() " next to the "INITIAL NUMBER" mark.
" next to the "INITIAL NUMBER" mark.
At that moment, the flashing " ![]() " indicates the 1st digit of the initial number.
" indicates the 1st digit of the initial number.
(The flashing means it can be changed.)
The 1st
digit INITIAL NUMBER
SELECT | CHANGE |
| SET |
3 Set the correct numbers in the same manner as Step 2. And then press the [SET] button.
INITIAL
NUMBER
SELECT | CHANGE |
| SET |
Note: Up to 8 digits can be set, however the number of digits for "Initial Number" depends on the number set in 16. Setting the Number.
2 Set the "Initial Number".
In case of the example, press the [CHANGE] button to set at "1". And then press the [SET] button.
INITIAL
NUMBER
Note: When the "Number Digit" has been set at "3", " ![]() " doesn't appear next to "3" (the 3rd digit).
" doesn't appear next to "3" (the 3rd digit).
SELECT | CHANGE |
| SET |
At that moment, the 2nd digit of "Initial Number" appears next to "1" (the 1st digit).
The 2nd
The 1st digit INITIAL
digitNUMBER
SELECT | CHANGE |
| SET |
4 After you finish setting the initial number, press the [SET] button once again.
SU MO TU WE TH FR SA
Now the initial number setting has been completed. Replace the cover and lock.
Important: Printing will not occur unless Step 4 is completed.
29 | 31 |
|
|
33