20. SETTING THE SLAVE CLOCK
In this setup, you can select the Slave Clock.
Note: For this feature to be functional, the optional board must be installed in the Time
Recorder.
Clock Options
0.Disabled
1.Slave Clock
2.N/A
Signal Options (for Slave Clock)
30.
60.
59.
Setting the Slave Clock
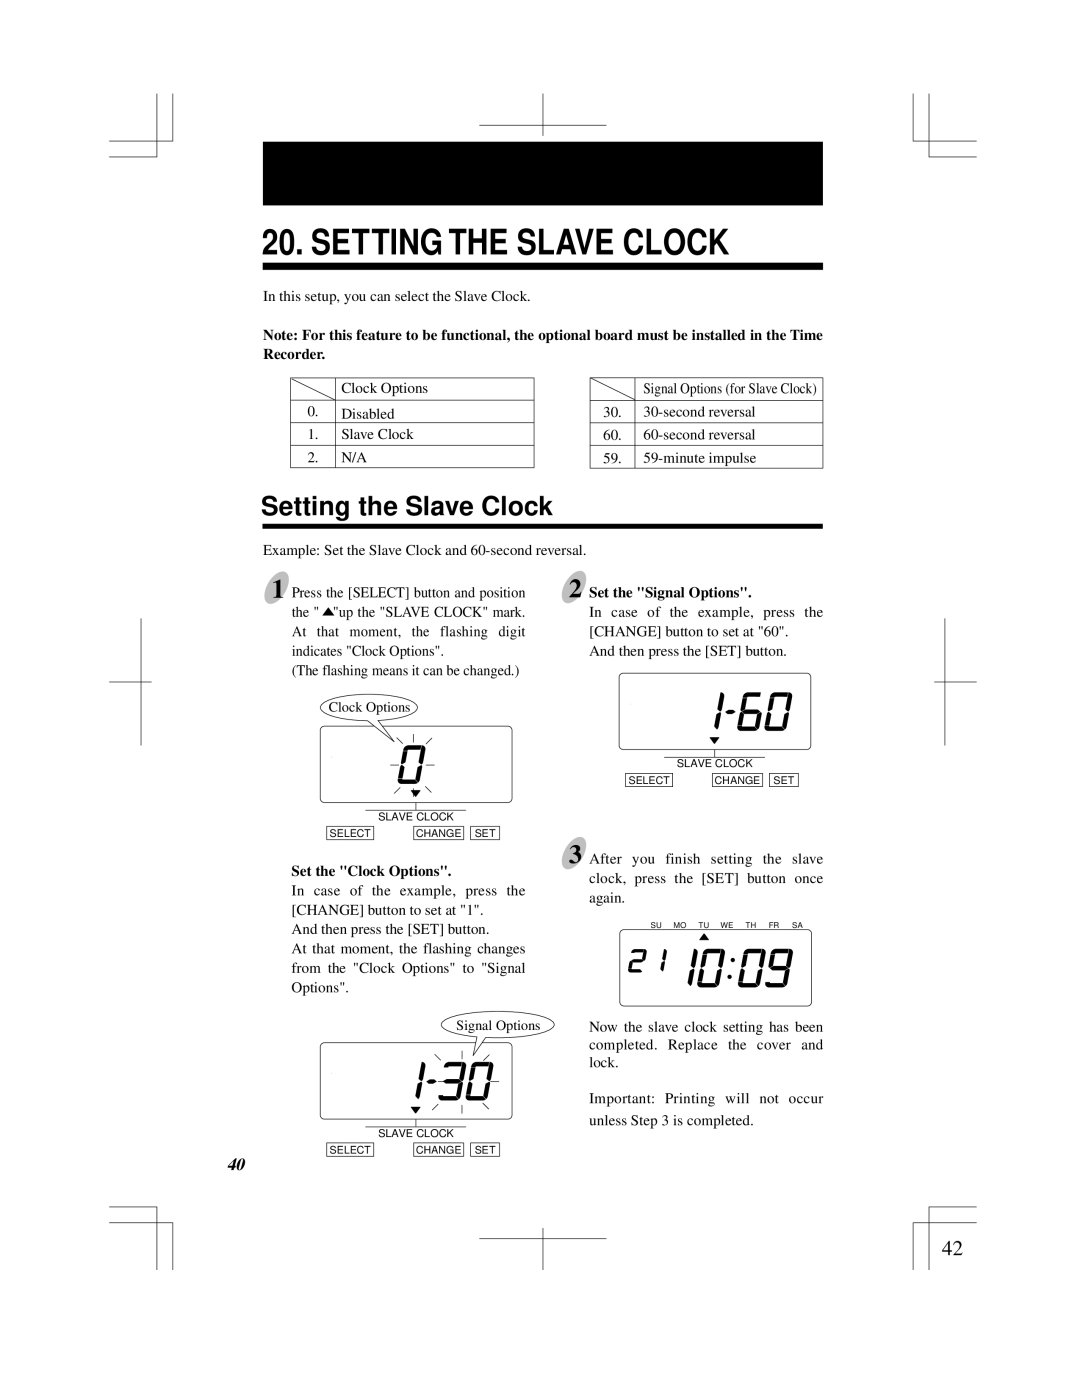
Example: Set the Slave Clock and 60-second reversal.
1 Press the [SELECT] button and position the " ![]() "up the "SLAVE CLOCK" mark. At that moment, the flashing digit indicates "Clock Options".
"up the "SLAVE CLOCK" mark. At that moment, the flashing digit indicates "Clock Options".
(The flashing means it can be changed.)
Clock Options
| SLAVE CLOCK | |||
SELECT |
| CHANGE |
| SET |
Set the "Clock Options".
In case of the example, press the [CHANGE] button to set at "1".
And then press the [SET] button.
At that moment, the flashing changes from the "Clock Options" to "Signal Options".
Signal Options
| SLAVE CLOCK | |||
SELECT |
| CHANGE |
| SET |
40
2 Set the "Signal Options".
In case of the example, press the [CHANGE] button to set at "60".
And then press the [SET] button.
| SLAVE CLOCK | |||
SELECT |
| CHANGE |
| SET |
3 After you finish setting the slave clock, press the [SET] button once again.
SU MO TU WE TH FR SA
Now the slave clock setting has been completed. Replace the cover and lock.
Important: Printing will not occur unless Step 3 is completed.
40
42