Using the
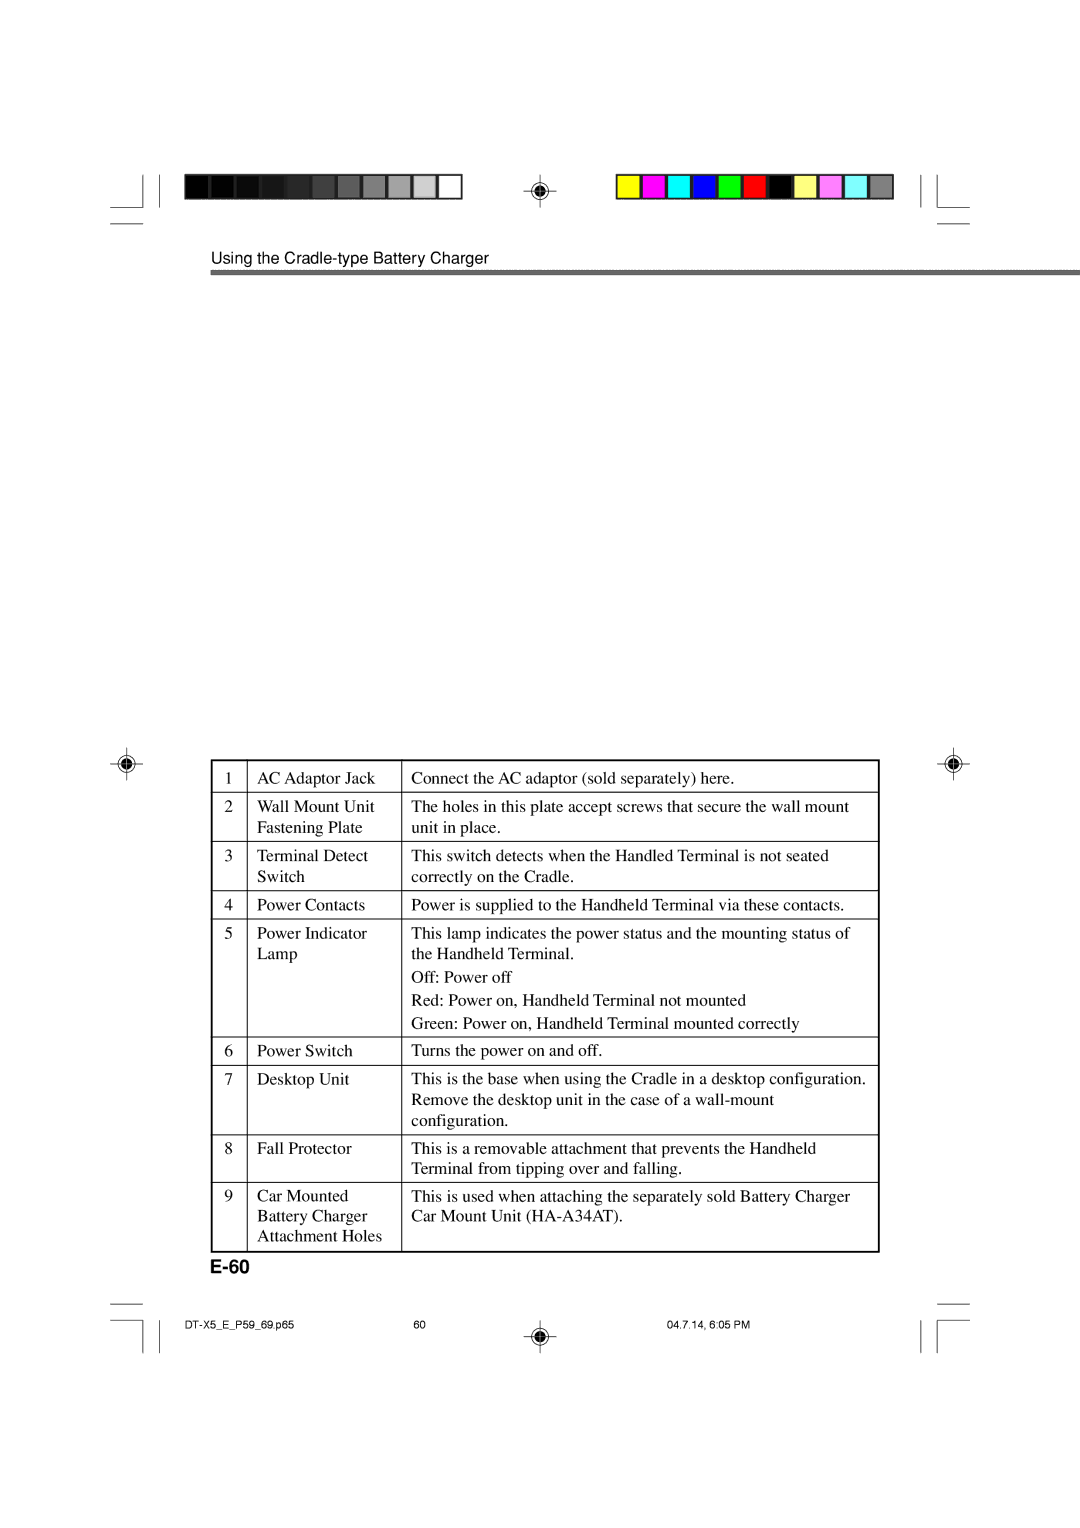
1 | AC Adaptor Jack | Connect the AC adaptor (sold separately) here. |
|
|
|
2 | Wall Mount Unit | The holes in this plate accept screws that secure the wall mount |
| Fastening Plate | unit in place. |
|
|
|
3 | Terminal Detect | This switch detects when the Handled Terminal is not seated |
| Switch | correctly on the Cradle. |
|
|
|
4 | Power Contacts | Power is supplied to the Handheld Terminal via these contacts. |
|
|
|
5 | Power Indicator | This lamp indicates the power status and the mounting status of |
| Lamp | the Handheld Terminal. |
|
| Off: Power off |
|
| Red: Power on, Handheld Terminal not mounted |
|
| Green: Power on, Handheld Terminal mounted correctly |
|
|
|
6 | Power Switch | Turns the power on and off. |
|
|
|
7 | Desktop Unit | This is the base when using the Cradle in a desktop configuration. |
|
| Remove the desktop unit in the case of a |
|
| configuration. |
|
|
|
8 | Fall Protector | This is a removable attachment that prevents the Handheld |
|
| Terminal from tipping over and falling. |
|
|
|
9 | Car Mounted | This is used when attaching the separately sold Battery Charger |
| Battery Charger | Car Mount Unit |
| Attachment Holes |
|
|
|
|
60 | 04.7.14, 6:05 PM |