Message Language
You can use the following procedure to select any one of five different languages (English, German, French, Italian, Spanish) for display of message text.
•All of the display examples in this manual use English as the display language.
To change the message language
1.On the SET UP menu, use u and i to highlight “LAN- GUAGE” and then press SET.
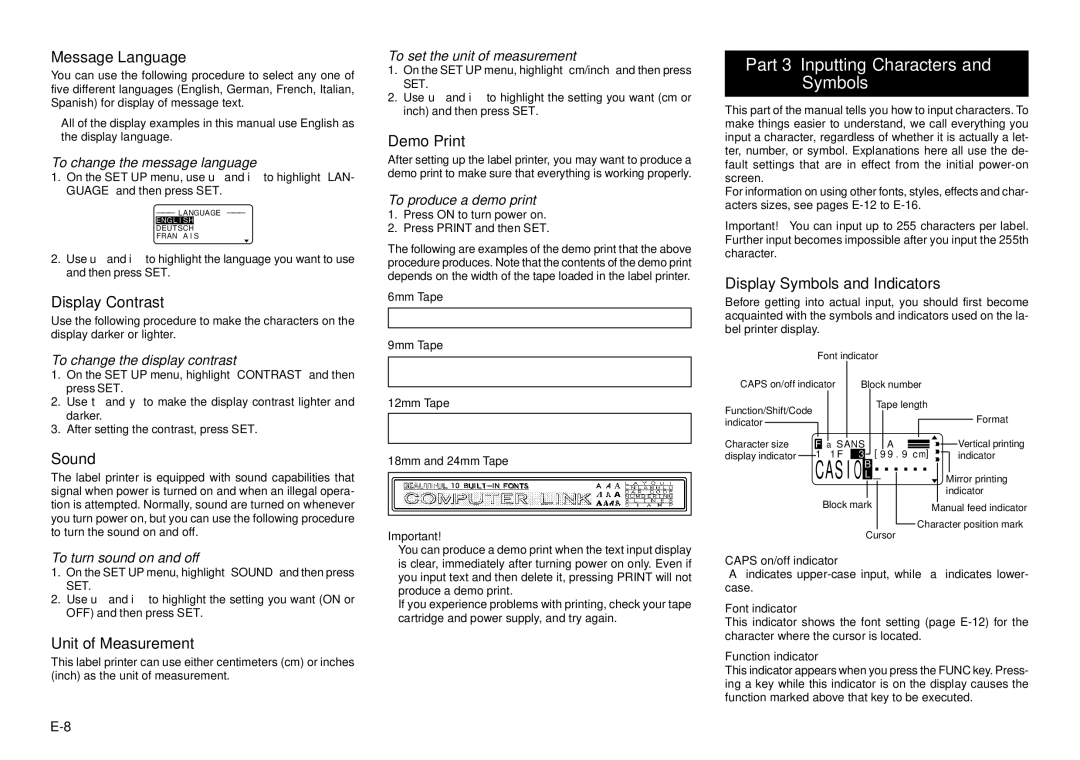
– – – L ANGUAGE – – –
DEUTSCH
FRANÇA I S
2.Use u and i to highlight the language you want to use and then press SET.
Display Contrast
Use the following procedure to make the characters on the display darker or lighter.
To change the display contrast
1.On the SET UP menu, highlight “CONTRAST” and then press SET.
2.Use t and y to make the display contrast lighter and darker.
3.After setting the contrast, press SET.
Sound
The label printer is equipped with sound capabilities that signal when power is turned on and when an illegal opera- tion is attempted. Normally, sound are turned on whenever you turn power on, but you can use the following procedure to turn the sound on and off.
To turn sound on and off
1.On the SET UP menu, highlight “SOUND” and then press SET.
2.Use u and i to highlight the setting you want (ON or OFF) and then press SET.
Unit of Measurement
This label printer can use either centimeters (cm) or inches (inch) as the unit of measurement.
To set the unit of measurement
1.On the SET UP menu, highlight “cm/inch” and then press SET.
2.Use u and i to highlight the setting you want (cm or inch) and then press SET.
Demo Print
After setting up the label printer, you may want to produce a demo print to make sure that everything is working properly.
To produce a demo print
1.Press ON to turn power on.
2.Press PRINT and then SET.
The following are examples of the demo print that the above procedure produces. Note that the contents of the demo print depends on the width of the tape loaded in the label printer.
6mm Tape
9mm Tape
12mm Tape
18mm and 24mm Tape
Important!
•You can produce a demo print when the text input display is clear, immediately after turning power on only. Even if you input text and then delete it, pressing PRINT will not produce a demo print.
•If you experience problems with printing, check your tape cartridge and power supply, and try again.
Part 3 Inputting Characters and Symbols
This part of the manual tells you how to input characters. To make things easier to understand, we call everything you input a character, regardless of whether it is actually a let- ter, number, or symbol. Explanations here all use the de- fault settings that are in effect from the initial
For information on using other fonts, styles, effects and char- acters sizes, see pages
Important! You can input up to 255 characters per label. Further input becomes impossible after you input the 255th character.
Display Symbols and Indicators
Before getting into actual input, you should first become acquainted with the symbols and indicators used on the la- bel printer display.
|
|
|
| Font indicator |
|
|
|
|
|
| ||||||||||||||
CAPS on/off indicator |
| Block number |
|
|
|
|
|
| ||||||||||||||||
Function/Shift/Code |
|
|
|
|
|
|
|
| Tape length |
|
|
|
|
|
| |||||||||
|
|
|
|
|
|
|
|
|
|
|
|
|
|
|
|
|
|
|
|
| Format | |||
indicator |
|
|
|
|
|
|
|
|
|
|
|
|
|
|
|
|
|
|
|
|
|
|
| |
Character size |
|
|
|
|
|
|
|
|
| A |
|
|
|
|
|
|
| Vertical printing | ||||||
|
|
| a SANS |
|
|
|
|
|
|
|
|
|
|
| ||||||||||
|
|
|
| 1 | ⋅ 1 F |
|
|
|
|
|
|
|
|
|
|
|
|
|
|
|
| |||
display indicator |
|
|
|
|
| [ 9 9 . 9 | c m] |
|
|
|
| indicator | ||||||||||||
|
|
| CA S I O |
|
|
|
|
|
|
|
|
|
|
|
|
|
|
| ||||||
|
|
|
|
|
|
|
|
|
|
|
|
|
| Mirror printing | ||||||||||
|
|
|
|
|
|
|
|
|
|
|
|
|
|
|
|
|
|
|
|
| indicator | |||
|
|
|
|
| Block mark |
|
|
|
|
|
|
| Manual feed indicator | |||||||||||
|
|
|
|
|
|
|
|
|
|
|
|
|
|
|
|
|
|
| ||||||
|
|
|
|
|
|
|
|
|
|
|
|
|
|
|
|
| Character position mark | |||||||
|
|
|
|
|
|
|
|
|
|
|
|
|
|
|
|
| ||||||||
|
|
|
|
|
|
|
|
|
| Cursor |
|
|
|
|
|
| ||||||||
CAPS on/off indicator
“A” indicates
Font indicator
This indicator shows the font setting (page
Function indicator
This indicator appears when you press the FUNC key. Press- ing a key while this indicator is on the display causes the function marked above that key to be executed.