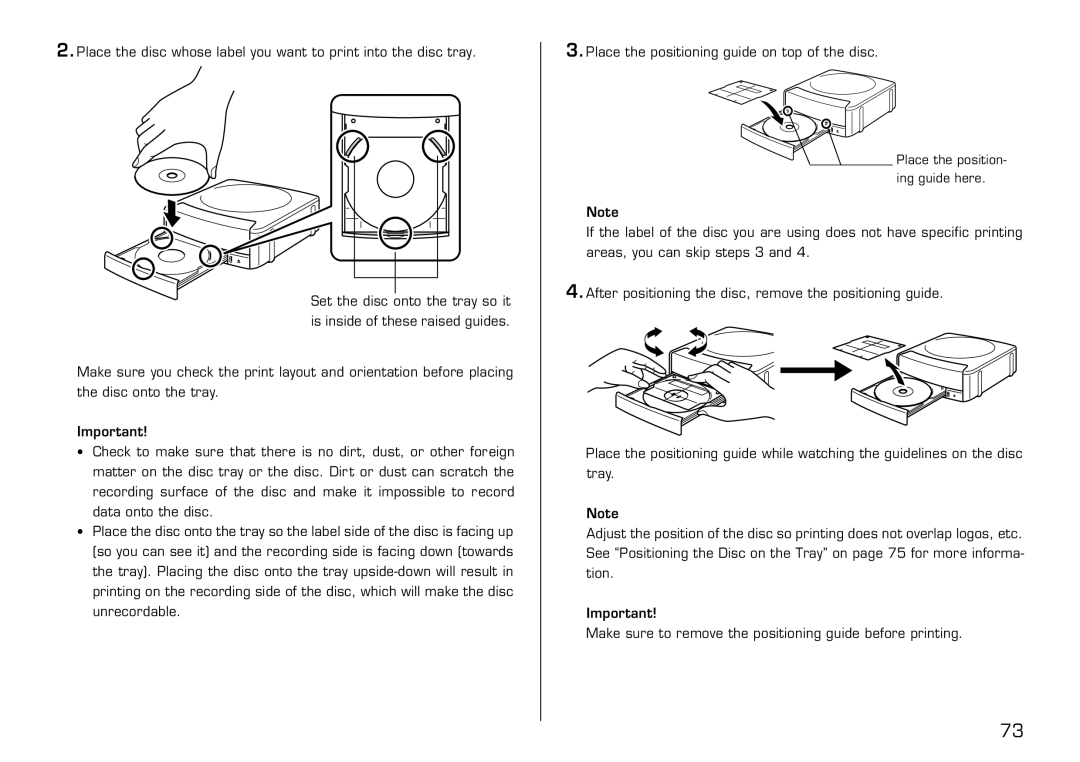
2.Place the disc whose label you want to print into the disc tray.
Set the disc onto the tray so it is inside of these raised guides.
Make sure you check the print layout and orientation before placing the disc onto the tray.
Important!
•Check to make sure that there is no dirt, dust, or other foreign matter on the disc tray or the disc. Dirt or dust can scratch the recording surface of the disc and make it impossible to record data onto the disc.
•Place the disc onto the tray so the label side of the disc is facing up (so you can see it) and the recording side is facing down (towards the tray). Placing the disc onto the tray
3.Place the positioning guide on top of the disc.
Place the position- ing guide here.
Note
If the label of the disc you are using does not have specific printing areas, you can skip steps 3 and 4.
4.After positioning the disc, remove the positioning guide.
![]()

![]() J
J ![]()
![]()
Place the positioning guide while watching the guidelines on the disc tray.
Note
Adjust the position of the disc so printing does not overlap logos, etc. See “Positioning the Disc on the Tray” on page 75 for more informa- tion.
Important!
Make sure to remove the positioning guide before printing.
73